

What is Paper Mache: Beautiful Masks, Boxes, and Much More
Paper mache, or papier-mâché as you’ll sometimes see it spelled, is a technique used to sculpt and decorate that uses layers of paper and adhesive. You might remember it from your elementary school art class, but paper mache has a rich history and many beautiful, practical uses. So, what is paper mache, anyway?
Paper mache is one of the most accessible paper crafts you’ll come across in terms of supplies, and yet its uses seem endless. Throughout history, papier-mache was used to make everything from Egyptian funerary masks to Chinese parade floats – even furniture in England!
We’re going to take a brief look at the history of paper mache then discuss its variations and how you might go about using these crafts. The beauty of paper mache is in its simplicity, which allows it to be applied to an endless amount of project ideas . You’re going to be amazed at all the projects you can make using only paper and glue!
Paper mache history
Though the term “papier-mâché” comes to us from France, the paper mache technique gets its first recorded start in Chinese , Tibetan, and Egyptian cultures, where it was used to create beautiful works of art.
You’re probably familiar with the classic Chinese festival decorations – think of the iconic paper tiger – but in Egypt, paper mache created beautiful funerary masks using soaked strips of linen. Vases, bowls, and other decorative objects were made by molding the paper to a base, which controlled its shape.
Perhaps most interestingly – and unexpectedly – papier-mâché was used in Europe beginning in the late 1700s to make furniture. The invention of steam-powered machines allowed the paper to be pressed into solid, sturdy forms.
Using these machines, a technique called “Japanning” became popular. The gorgeous Japanese furniture of the time was made with lacquered wood that did not stand up to the climates of Europe, so furniture makers would copy the design by mixing tar or pitch into their paper mache to achieve that glossy, dark, iconic finish.
Art, both decorative and practical, was created by many civilizations using the paper mache technique. Gorgeous furniture, elaborate vases, and props for celebrations were all possible – and cheap – by using paper mache.
Paper mache and protest
But paper mache is known for more than its inoffensive beauty, and art is useful for more than decoration.
Because its ingredients can be found in any grocery store, anyone can do it. And because paper is light, papier-mâché is perfect for objects that need to be held high in demonstration. Paper mache can be seen on display in coverage of many war protests, whether they take place in Central America, Afghanistan, or here in the United States.
Very popular in the protests of the 1960s, American demonstrators found meaning in the way paper mache takes “garbage” and turns it into art. They sculpted caricature-like busts and heads of prominent politicians, carrying or even wearing them at protests and marches. The result was a clever, stunning, and impactful visual that remains iconic to this day.
Types of paper mache
There are two ways to divide paper mache projects: by ingredients and by technique. If you want to create your own paper mache project, it’s important to know the differences.
Paper mache ingredients
Paper mache can be made from the iconic strips of paper soaked in adhesive, but you can actually use other kinds of paper to make paper mache crafts. Paper pulp is great for sculpting, while the torn strips are best for molding using a form like a balloon or chicken wire.
Paper mache technique
There are two main paper mache techniques. You can either sculpt your paper mache project, or you can use a mold. The difference is sculpted paper mache will not be hollow, while a formed paper mache project will be hollow. Think about this when you decide which technique is right for you.
What materials do I need for paper mache
Essentially, you only need paper and adhesive to create paper mache. There are, of course, some considerations to make if you would like to take your craft to the next level. This information will help you make the best choices for how you want to use paper mache.
Best paper for paper mache
The best paper for paper mache is going to be what you have lying around the house already! Truly, there are so many great things about paper mache: it’s easy, it’s cheap, and it’s eco-friendly. By recycling your old newspapers, you give new life to something that would otherwise have been thrown away.
Please note that, if you choose to recycle your magazines, the glossy pages will not absorb your adhesive as well because of their coating. Magazine paper is not nearly as porous as newspaper, so you will have to soak the pages a bit longer to get them to stick.
Try to find a non-coated, un-glossed paper for your papier-mache. Newspaper really works the best, so look around, ask friends and family for their old stacks of newspapers. Many people tend to unintentionally stockpile these things and will be more than happy to give them away to you!
Patterned paper can also be great for paper mache projects, and you’ll save yourself a step since it’s already beautifully decorative!
Best glue for paper mache
There are two main ways to make your own glue for paper mache.
The first method to make paper mache glue is to mix flour and water. This is how it was done for many years, but there’s a small downside. This mixture can get moldy if you live in a humid climate.
Choose a mixture of white glue and water if you’re concerned about mold. This is a newer technique, but it works very well.
A third method is to buy a pre-mixed adhesive. Some projects need to be made of tougher stuff, which is where this option could come in handy. If you want to make something that needs to hold some weight, consider buying a strong, pre-mixed adhesive.
However, for most simple projects, homemade glue for paper mache will work just fine.
Best molds for paper mache
The best molds for paper mache are balloons, cardboard, and chicken wire frames.
Balloons will allow you to form a beautifully round shape, and then you can simply pop or remove the balloon when your piece has set. This technique is great for making bowls or little catchall dishes.
Cardboard is a wonderful mold for paper mache if you’re crafting any kind of box, like a trinket box or a recipe box. Historically, paper mache was used by Victorians to create snuff boxes.
Chicken wire is the best mold for paper mache if your desired shape is not perfectly uniform. Political protestors, and even costume creators, often form giant heads to wear from paper mache and chicken wire. Chicken wire is great stuff. You can use it for a seemingly infinite amount of projects.
How to start paper mache for beginners
To get your start making paper mache, we suggest a simple yet satisfying project. Doing too much too soon can be the killer of your enthusiasm, and if you take on a massive paper mache project, you’ll get discouraged in no time.
The best way to start paper mache for a beginner is to use a glue-based adhesive and newsprint. A great beginner papier-mâché craft is to blow up a few balloons of different sizes and create a series of little bowls to display on your table or bookcase.
YouTube tutorials and Pinterest are great ways to learn and get ideas for how you might use paper mache. There are so many creative people sharing their ideas online.
Once you get the technique down, you can move on to more ambitious projects. You can sculpt a piñata using chicken wire for a party or use paper pulp as if it were modeling clay to create something amazing!
Let’s run down a couple of quick frequently asked questions about papier-mâché.
Why is it called paper mache
The technical spelling is papier-mâché, and it comes to us from French. It translates to “chewed up paper”. Makes sense, doesn’t it?
Is paper mache better with glue or flour
Though flour is the traditional, cheaper method, in terms of ease and durability, glue is the better choice. It won’t get moldy, it’ll be stickier, and you’ll have an easier time forming your project.
How long does it take paper mache to dry
This is going to depend a little bit on your home climate, but generally, it will take a finished paper mache project over a day to dry completely. We wouldn’t recommend speeding the process up with a heat source. Remember, you’re working with paper !
What is paper mache: Final Thoughts
Paper mache has stood the test of time for a reason. It’s a simple yet effective craft that has countless uses – both practical and decorative. Once you start experimenting with different papier-mâché projects, you’ll realize that its simplicity is its greatest strength.
There are so many great projects you can make with papier-mâché. Just have a look around you! Almost anything can benefit from a little paper mache magic. Comment your favorite way to use paper mache, and let us know if you learned anything new from this guide!
Leave a Comment Cancel reply
We sent you SMS, for complete subscription please reply.
You are using an outdated browser. Please upgrade your browser or activate Google Chrome Frame to improve your experience.

Wonder of the Day #176
What Is Papier-Mâché?
ARTS & CULTURE — Fine Art
Have You Ever Wondered...
- What is papier-mâché?
- How do you make papier-mâché paste?
- What types of things can you make out of papier-mâché?
- papier-mâché ,
- sculpture ,
- Papier-Mâché ,
Today’s Wonder of the Day was inspired by Emory. Emory Wonders , “ What Is Papier Mache? ” Thanks for WONDERing with us, Emory!
At one time or another, most of us have experienced the joy of creating our own artistic papier-mâché masterpiece . Papier-mâché — sometimes spelled paper-mâché — is a French phrase that literally means “chewed paper."
A finished papier-mâché project is made up of pieces of paper or pulp that are often reinforced with cloth or other materials and bound together with an adhesive paste . Papier-mâché paste can be made of watered-down glue, starch or wallpaper paste .
For example, regular white glue can be diluted with water until it forms a paste the consistency of heavy cream. You can also use a mixture of water and flour (or another starch ) if you prefer.
Once you have your papier-mâché paste , you just need some paper and an idea to get started. Cut your paper into thin strips (newspaper is often used because it is cheap and works well) and soak it in your paste .
When your strips of paper are saturated (that means soaked through), place them onto whatever surface you decide to use to create the structure of your masterpiece . Common items used to create the structure for a papier-mâché project include balloons, light bulbs and wire mesh in different shapes.
Allow your strips of paper to dry slowly. Once they're dry, you can cut, sand and paint your work-in-progress until it resembles the masterpiece you had in mind from the beginning.
For example, a papier-mâché head can be made by wrapping saturated strips of newspaper around a balloon. When the strips dry, they will keep the round shape of the balloon. You can then cut, sand and paint the form to make it look like a head!
Papier-mâché has been around for centuries. The ancient Egyptians were known to have made coffins and death masks out of a primitive form of papier-mâché: layers of papyrus or linen covered with plaster.
Today, papier-mâché remains popular for arts and crafts, as well as in the production of certain items, such as the piñata and carnival floats you see in parades.
You might be surprised to learn, though, that papier-mâché has also been used to make some very interesting and practical things. During the 19 th century in America, papier-mâché was used to make paper canoes!
In addition to large paper layers, cloth and wooden strips were added at key points to provide reinforcement. The final product was waterproofed and proved to be a lightweight alternative to heavier wooden canoes.
Even more interesting is the fact that papier-mâché auxiliary fuel tanks were developed during World War II using paper infused with plastic. These lightweight fuel tanks allowed short-range aircraft to extend their range, so that they could accompany long-range aircraft on longer missions.
Wonder What's Next?
Got the munchies? Return to Wonderopolis in the morning to learn all about the best way to satisfy your hunger pains!
Enough reading about papier-mâché already! It's time to get a little messy with some hands-on learning. After all, March is National Craft Month!
Whip up a batch of papier-mâché paste , and then check out the ideas below to make a variety of fun projects:
- Apple pencil holder
- Mexican bird rattle
- Lion book holder
Did you get it?
Wonder contributors.
We’d like to thank:
Melia , Reece , kaci and James for contributing questions about today’s Wonder topic!
Keep WONDERing with us!
Wonder Words
- papier-mâché
- masterpiece
- consistency
We are undergoing some spring clearing site maintenance and need to temporarily disable the commenting feature. Thanks for your patience.
Related Wonders for You to Explore

Who Was Jacob Lawrence?

What Is Pride Month?

What Are the Types of Jewish Dance?
Who Was Sonia Delaunay?

Who Was Irving Berlin?
Drag a word to its definition
Select a Wonder Word:
Match its definition:
Congratulations!
You’ve matched all of the definitions correctly.
Share results
Spread the joy of wonder, get your wonder daily.
Subscribe to Wonderopolis and receive the Wonder of the Day® via email or SMS
Join the Buzz
Don’t miss our special deals, gifts and promotions. Be the first to know!
Share with the World
Tell everybody about Wonderopolis and its wonders.
Share Wonderopolis
Wonderopolis widget.
Interested in sharing Wonderopolis® every day? Want to add a little wonder to your website? Help spread the wonder of families learning together.
You Got It!

http://www.wonderopolis.org/wonder/what-is-papier-mache
© National Center for Families Learning (NCFL)
The Graphics Fairy
Vintage Images, DIY Tutorials & Craft Projects
Paper Mache Beginner’s Guide (Easy!)
Written by Rebecca E. Parsons
This post may contain affiliate links which won’t change your price but will share some commission, you can find our privacy policy here.
Paper Mache Beginner’s Guide
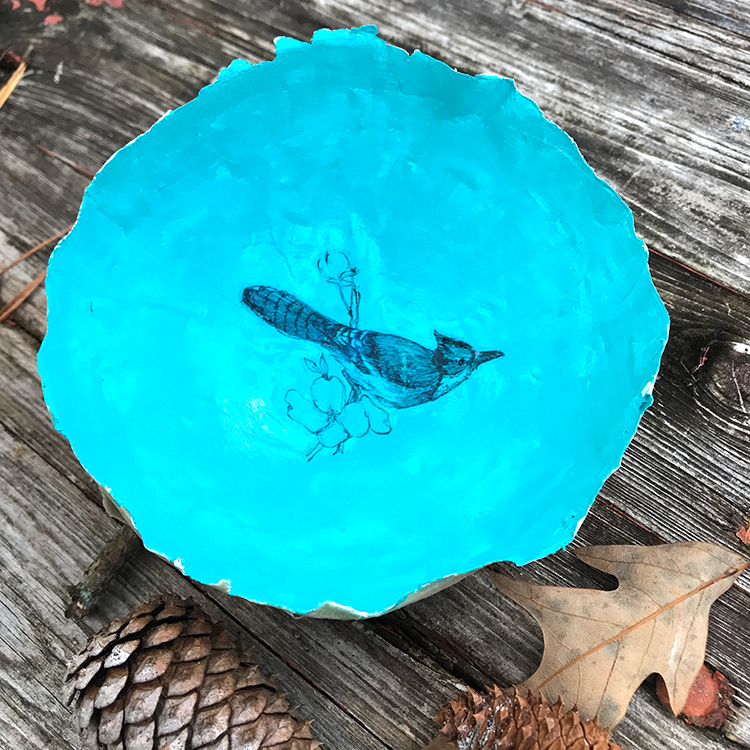
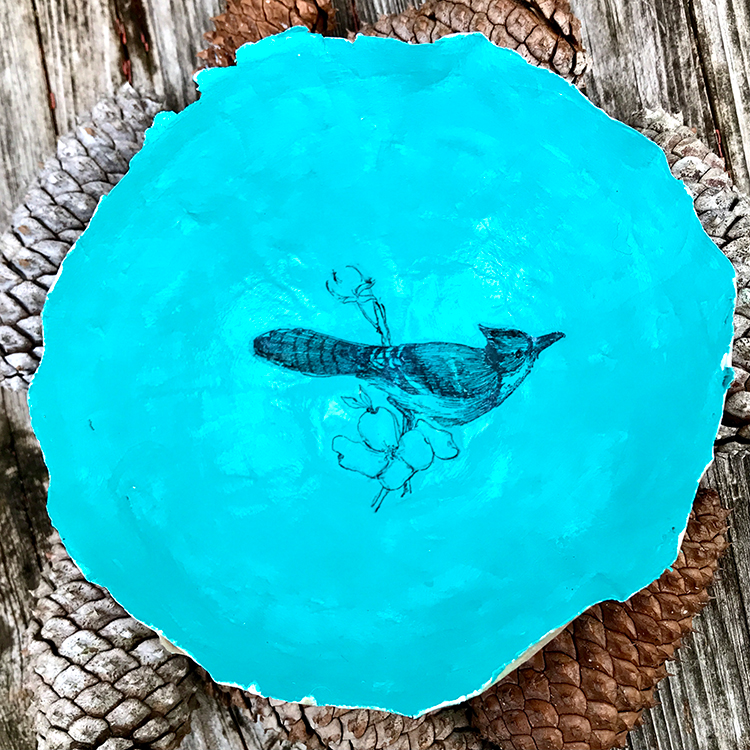
Hello my sweet Graphics Fairy friends! It’s Rebecca E. Parsons here, back today with a fun tutorial for a Paper Mache Beginner’s Guide! Paper Mache is a marvelous art form for beginners because people of all age groups can enjoy the simple applications of this technique without any prior experience. In this tutorial, we will make a nifty little Paper Mache Bowl using an inflated balloon as a mold. I’ll even included 2 recipes for the mixture you will need, one is a flour paste recipe and one for water and glue paper mache. Easy peasy! Plus we will decorate the inside of our bowl with a beautiful Graphics Fairy bird!
What is Paper Mache?
In simple terms, paper mache refers to the layering of paste moistened paper onto a blank surface. The paper then dries into the shape of that blank surface. Cool! The term paper mache is derived from the French words Papier-mâché, meaning of all things “chewed paper.” Paper mache is a method of crafting in which paper is combined with a ‘paste’ to create a wide variety of objects.
Don’t forget to Pin and save this post for later!
You can create something as simple a little bowl to something as grand as a Mardi Gras float and even a useable canoe! This age old craft dates back thousands of years to Egypt and China.
Materials Needed
The basic materials needed for paper mache crafting include:
- Newsprint Paper (I prefer blank newsprint, but you can use old printed newspapers as well)
- An Adhesive (see options below)
- Vaseline (for highly detailed molds)
How to Make Paper Mache
There are two options for preparing your paper for paper mache. One method uses paper pulp created by placing paper scraps into boiling water or soaking the paper in water overnight, then mixing in an adhesive. This is best for sculpting and intricate designs. The most commonly used method requires tearing strips of paper, soaking them in paste or adhesive, then laying them on a shape. The adhesive used to moisten the paper acts as the binding agent. The outer shell hardens as the paper dries. After drying, your paper mache creation can be painted and decorated. We will be using the ‘strips of paper’ method in our crafting.
A soft paper that is easy to mold is the best option for paper mache. Although different types of paper can be applied, torn strips of newspaper is the definitive choice for most crafters. It is inexpensive; free if you use old newspapers! It is very absorbent and thin. I actually buy unprinted newsprint that is used as packing paper when moving. TIP : Make sure that it is uncoated. I prefer this because newspaper ink stains the piece. That is fine however if you plan to paint it.
As always, I encourage you to experiment. You can use lightweight papers like 20-24 lb. printer paper. Just make sure that you soak them a little longer so they absorb the glue. I have heard of people using cotton or rag papers with success as well. Those would be pricey though. NOTE : Coated and glossy papers like magazine pages will not work!
The Adhesive
Crafters have two choices for the adhesive:
- Homemade Flour Paste : A part water, part flour mix. There isn’t really an exact flour to water ratio, but 1 cup flour to 1 cup water is a good reference point. It is best to use a whisk and bowl to create the flour based paste.
- Ready-made Glue Mix : Plain white school glue (PVA glue like Elmer’s) mixed with water is very popular. Wood glue can also be used. White PVA school glue should be mixed 2 parts glue to 1 part water. A 4 ounce bottle is mixed with 1/4 cup of water.
The use of glue is similar to using flour, but glue produces a stronger structure and is less likely to deteriorate over time.
Salt : I recommend use of salt for preventing future mold on your paper mache project. It also speeds up the drying process by removing excess moisture from the paper more quickly. It is optional, of course.
Advanced Paper Mache
Three-dimensional paper mache sculptures can be created by starting with foam core board that you can cut to form whatever your imagination leads you to. Whether it be a face, birds, flowers, etc., the options here are virtually limitless. Wire can also be utilized as a reinforcement tool or by itself to actually build the ‘skeleton’ for a sculpture. The paper mache that covers the skeleton can be viewed as the ‘flesh’ of the sculpture.
Another optional material is vaseline. This is utilized if you decide to create a paper mache piece by covering your paper over a mold of some sort by rubbing vaseline over the mold first to prevent the paper from sticking to the mold.
How to Seal Paper Mache
You generally do not have to seal paper mache items. YAY! However, sealing can be beneficial if you want the paper mache surface to be very smooth. Prior to sealing, you can use sandpaper to smooth out rough areas. If any gaps or wrinkling remains after sanding, a sealant can fill in the uneven parts. TIP : Sealers should be applied after your paper mache item has dried completely. Overnight is best for smaller pieces. Thicker pieces can take several days.
Gesso is highly recommended for use as the sealant since it dries very hard and provides an excellent finish that is ideal for applying acrylic paints. The best way to apply gesso is with a sponge or brush in multiple thin layers. Gesso is available in clear, white, and black. It dries in just a few minutes. People have had success with Mod Podge as a sealer as well.
How to Paint Paper Mache
Make certain that the surface is dust free and completely dry before you paint. Also be sure that the paper mache layers are not loose or uneven before painting. If there are loose pieces, just put a dab of white glue to hold it down. Painting with acrylic paint and a paintbrush is the preferred method of painting on paper mache. Acrylic paint is ideal because it is waterproof and has many color options. NOTE : The paint needs to be thoroughly dry between applications.
Acrylic markers sometimes are used instead of acrylic paint, and are a viable option. Watercolors are not ideal because they aren’t waterproof and tend to dry somewhat soft and dull. Additionally, watercolors and other paints can actually damage the unsealed paper itself. If you wish to apply your own personal touches to your project after painting, colored pencils or waterproof marker pens are a splendid choice. There are of course many other ways to embellish your work of art with your own, unique ideas!
Sealing After Painting
Your new paper mache creation can be sealed. This is an option that will protect the paint from sunlight and help to maintain vibrancy. The two practical materials for this final stage are gloss varnish or Gloss Mod Podge. Applied with a brush or sprayed, both will dry transparent and leave a hard shiny finish. Acrylic sealing spray is an alternative option and is considerably easier to apply evenly. PLEASE NOTE : The items you create are not food safe!!! They are for decorative use only!!!
How to Make a Paper Mache Bowl
Now that you know everything about creating with paper mache, let’s make a bowl! This is a fun and messy project, so protect your surface well. Kids absolutely love to do this. I find it very satisfying and almost meditative to make these small bowls. I used a small, round balloon for this project.
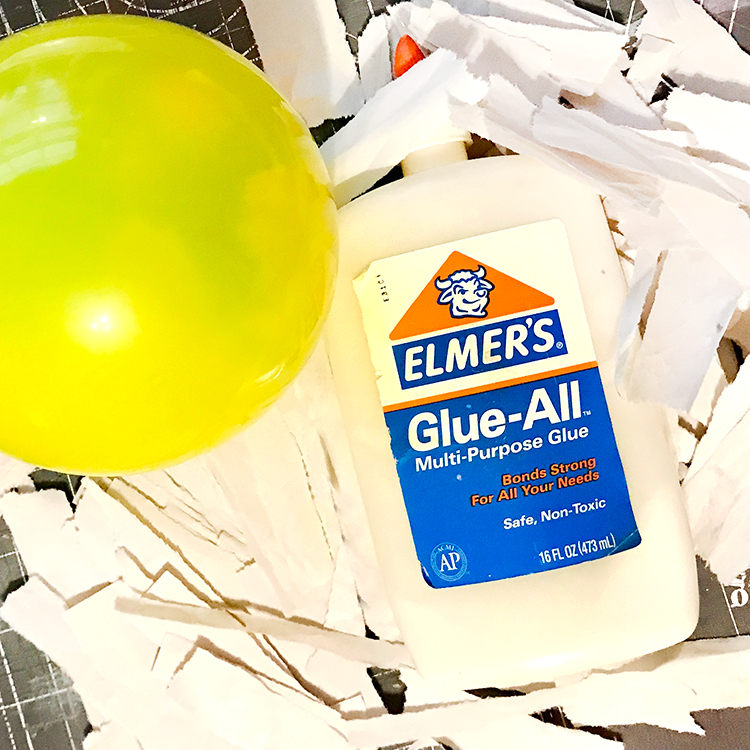
Small Balloon blown up and tied shut Permanent Marker Paper torn into 1/2″ wide strips about 3-6″ long White School Glue 4 oz. mixed 2 parts glue to 1 part water Salt (maybe 1/2 teaspoon) Foam Plate Whisk Gesso Acrylic Paint in color of choice (I used aqua) Blue Jay Print Here from The Graphics Fairy
Step-by-Step Directions
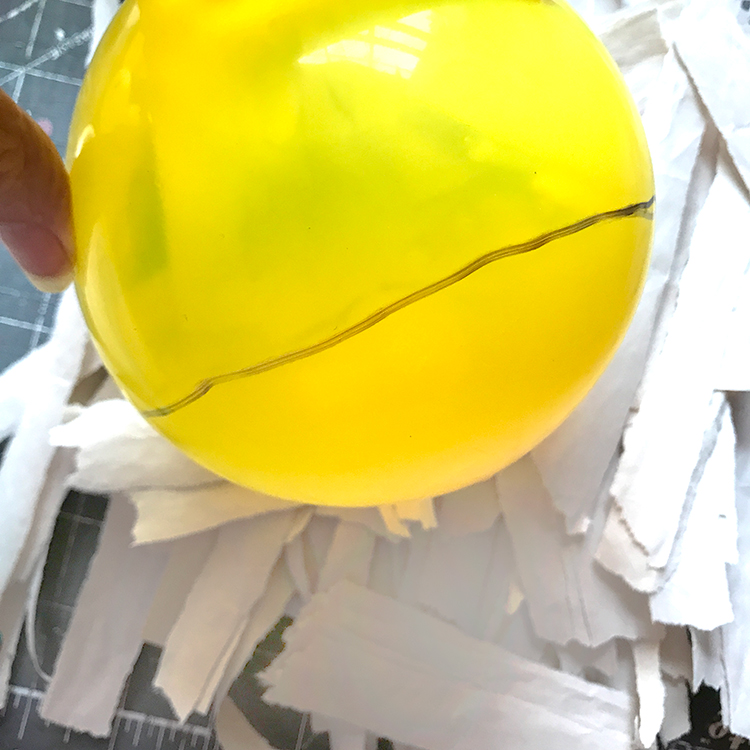
Step 1 – Prepare the Balloon: Blow up the balloon. Lightly draw a line around the balloon with a permanent marker. This will give you a guide to the edge area. However, the uneven edges of a Paper Mache bowl are what gives it the carefree look you want.
A Word About Balloons : I prefer to work with a colorful balloon. You can see any thin or gap areas more easily. I learned a lot about balloons while making this tutorial. I first bought a bag of small balloons (2-3″ round) at the grocery store. They were very small and so thin that some of them broke while being blown. I did like the small size bowl I made with them (see below). Then I went to my neighborhood dollar store that only had 6″ balloons. They were sturdy when blown, but larger than I had hoped. I would say that a 4″ balloon would be perfect for what I wanted. Just be aware that inexpensive balloons might frustrate you!
Step 2 – Tear the Newspaper: Tear the newsprint paper into strips about 1/2″ wide strips about 3-6″ long.The edges of the ripped paper will have fibers that grasp and grab hold of other pieces easily. (see the strips in the above photo) HINT : Do not cut the strips (tear them) as the crisp edges will be harder to work with . Trust me on this !! NOTE : The bigger the balloon, the longer the strips can be. I used 3″ strips for my 6″ balloon. The edges of wider strips will pucker when laid on the balloon.
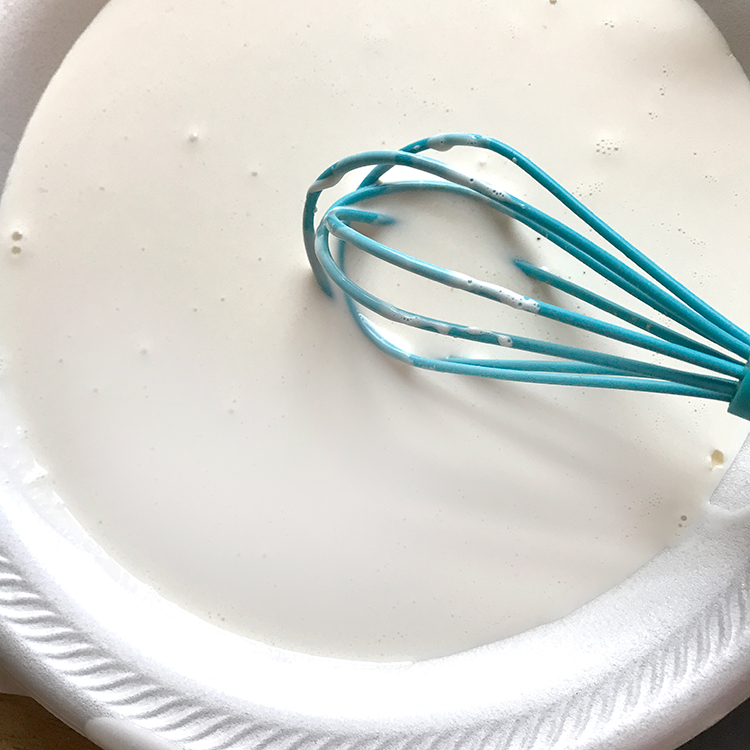
Step 3 – Prepare the Paste: Thoroughly mix 2 parts white glue to 1 part water in a foam plate Sprinkle in a little salt; maybe 1/4 teaspoon. I use a wire whisk for this. The mix should be thin but not runny!!! (see photo below)
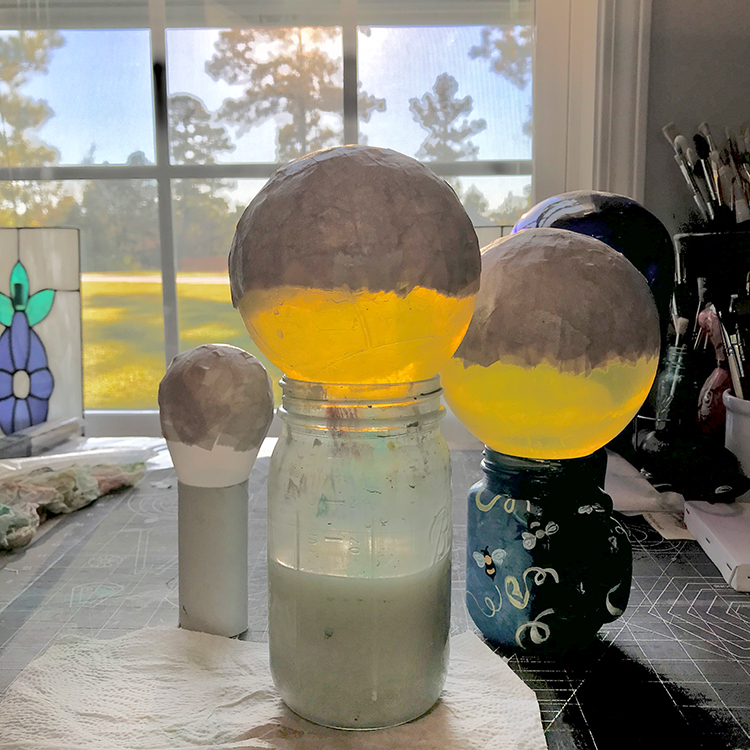
Step 4 – Dip and Place Newspaper: Place your balloon on top of a glass or jar with the tie inside. This will help to stabilize it while you work and dry the bowl. (see photo below) TIP : I added water to my jars to make them less apt to fall over while working!! WINK
Lay it over the balloon and smooth it down with your fingers. (see photo below)
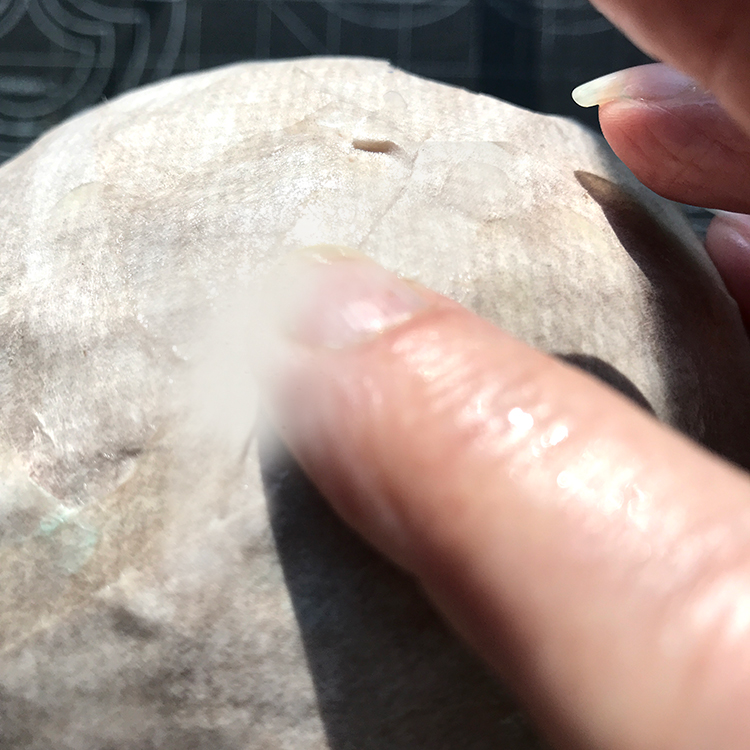
Lay the strips randomly in all directions (see photo below). Repeat this process until you have three or 4 layers over the entire balloon.
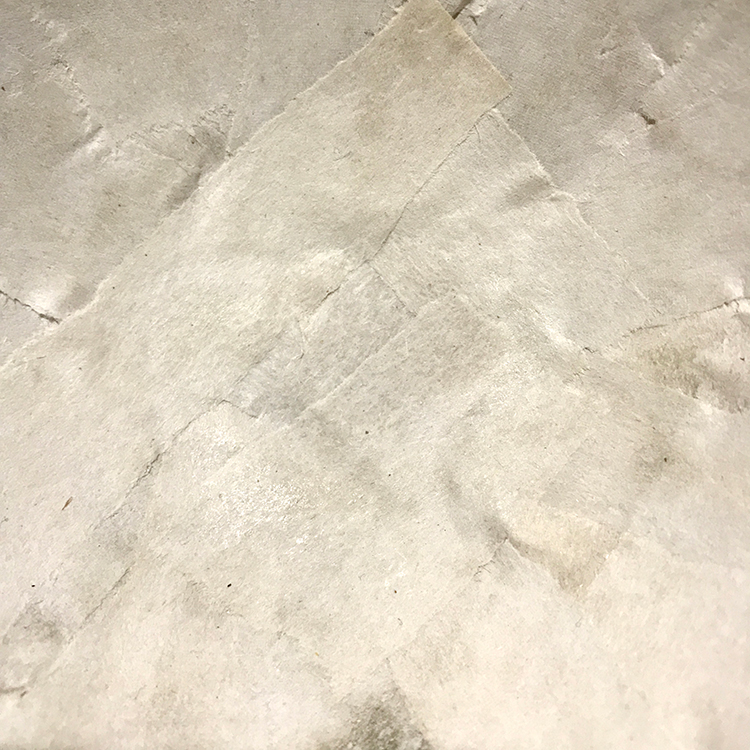
You can hold the balloon up to a light source to see any thin areas. Leave it to dry overnight. The more layers of paper, the longer it will take to dry. If the bowl feels cold to the touch, it is still wet. Allow it to dry completely before removing balloon and decorating !
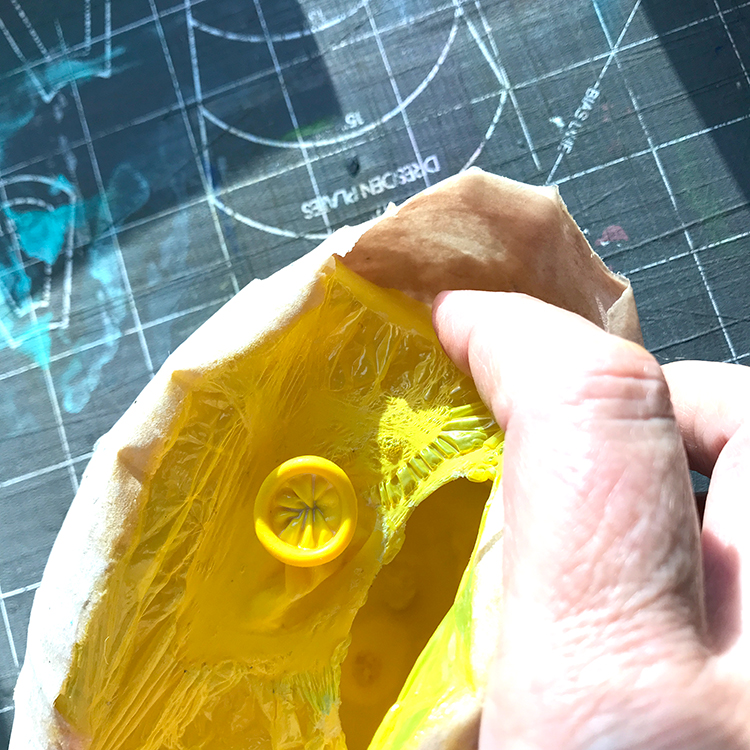
Step 5 – Remove the Balloon : There are a few ways to remove the bowl from the balloon. I will share my favorite. PLEASE NOTE : If the paper is not completely dry, it will be a struggle to remove the balloon . I found this out the hard way!!! Methis 1 worked like a charm on my second bowl. Method 1– Begin at the edges of the bowl where it touches the balloon. There will probably be a few gaps where the paper has started to pull away from the balloon. Start on one of these. Gently press the balloon in, away from the bowl. The paper should pop off fairly easily. Slowly and carefully work your way around the bowl, pressing and releasing the paper. If it is really stuck, allow the bowl to dry more. Method 2– Pop the balloon. Then gently pull the balloon out of the bowl. (ph0to below shows balloon sticking to the bowl) TIP : If it sticks to the bowl … STOP, it is still too wet. Allow to dry longer. Then gently remove the balloon.
Finished Bowl and Bowl Edges
Here is a look at the yummy, uneven edges of a paper mache bowl. The top photo is my test bowl. I did not have enough layers of paper at the edge. The front edge is torn a bit and you can see how translucent it is. But it still works, I think!
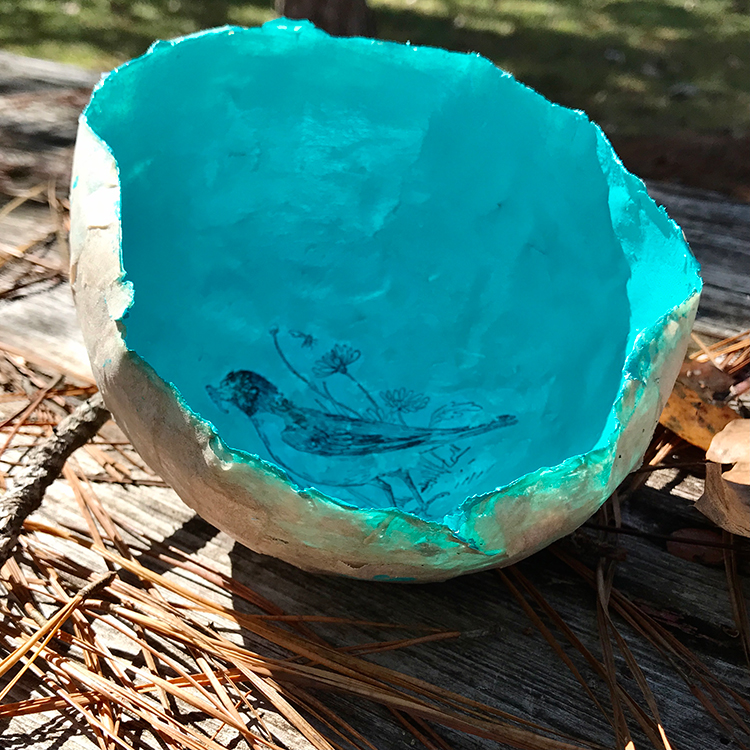
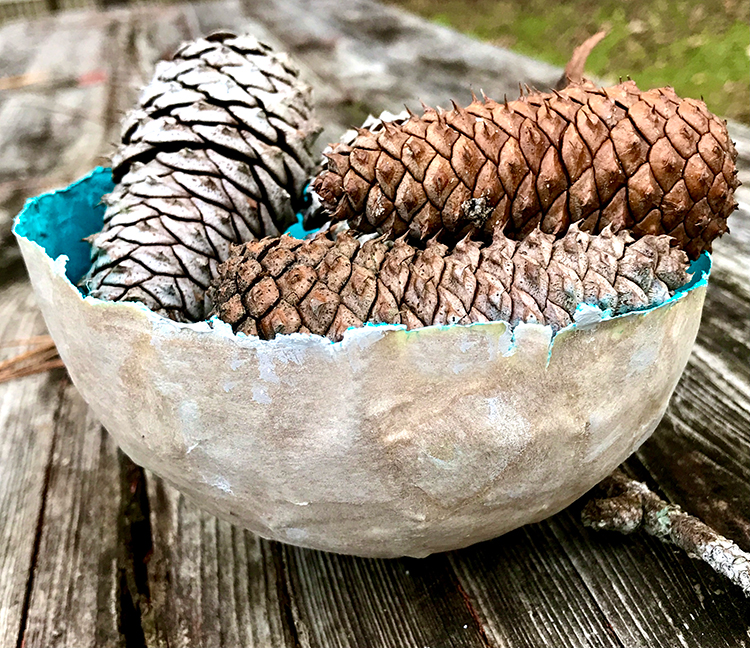
In this image, you can see the wavy and wispy edges of my finished bowl. Most of the edges have three or four layers of paper in my second try. You can also see the beautiful outside of the bowl, which is unsealed. Using plain newsprint dries to this rustic, almost rough plaster like look and feel. Printed newspaper with have dark areas where the ink was.
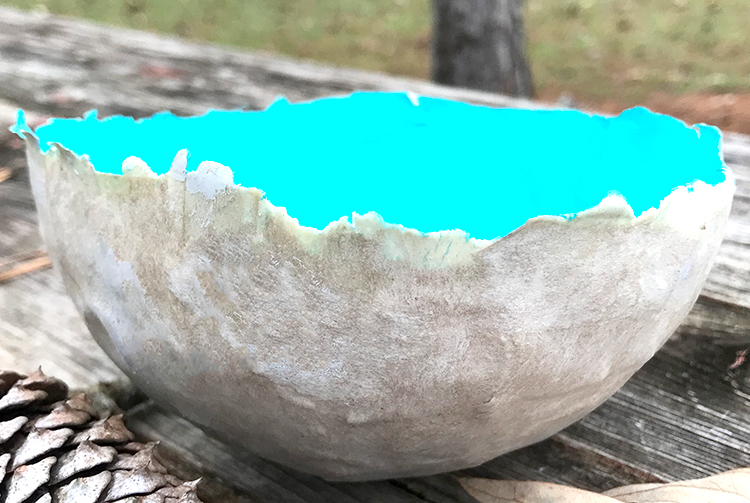
Step 6 – Decorate : There are several options for decorating your bowl. We will be painting ours and doing a transfer to the inside. But you can stain it, glitter it, gild it, etc.
- Sand the bowl if necessary according to the directions in the “How to Seal Paper Mache” section above.
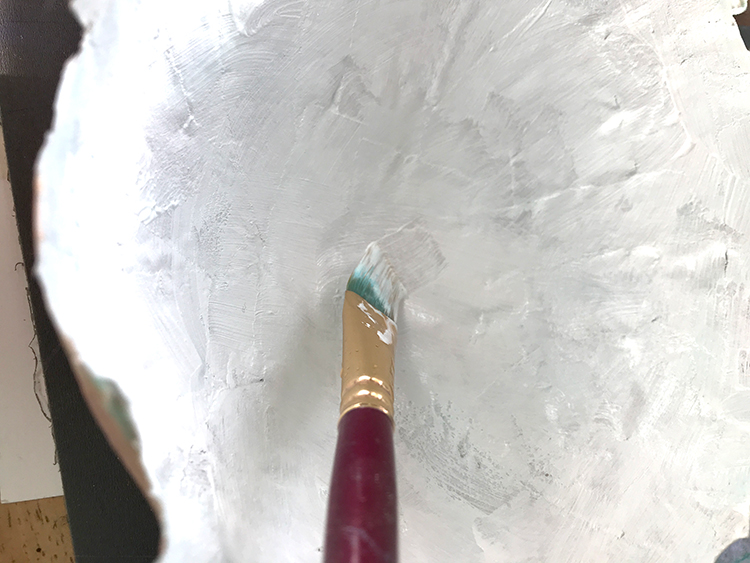
- Paint the inside of the bowl with your color of choice. I used Golden’s Acrylic in Cobalt Teal. Allow to dry at least 1 hour. HINT : You want the paint to form a strong bond to the Paper Mache bowl for the transfer to work well. So don’t rush it!
- Transfer the Bird Image . Photocopy or Laser Image to transfer – I used this Blue Jay . I am using my Acrylic Paint Transfer Technique to transfer the little bird onto my bowl bottom. Again, I used Golden’s Acrylic in Cobalt Teal spread liberally in th area where the transfer will be. You can find the instructions for this technique HERE ! NOTE : It is a little trickier to transfer an image to a soft and bumpy surface.
- Take your time; don’t rush.
- Fussy cut the image leaving just a tiny white edge around it.
- Apply plenty of paint; more than you may think is necessary. If it dries before you get the image burnished down, those areas will not transfer.
- Burnish, then burnish more. I used my fingers first and them my bone folder. I worked on this for several minutes to make sure every single part of the image was embedded in the paint.
- Allow the image to dry at least 3-4 hours before wetting and removing the backing paper. It would be better overnight!
- Use very little water to remove backing paper. The water necessary to remove the backing paper can soften sealed and unsealed Paper Mache.
- Rub the paper backing very gently and stop if any of the image begins to come off!!
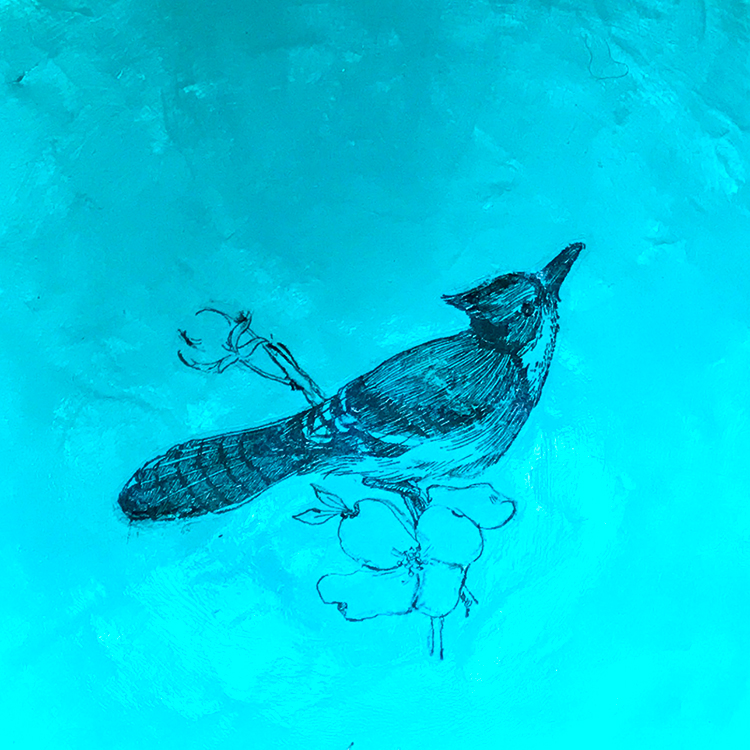
- Seal the transfer inside of the bowl with a glossy medium or spray. This will help make the image pop and look clear. I used Mod Podge Gloss Spray! Use the steps in the “Sealing After Painting” section above.
- Enjoy your bowl!!
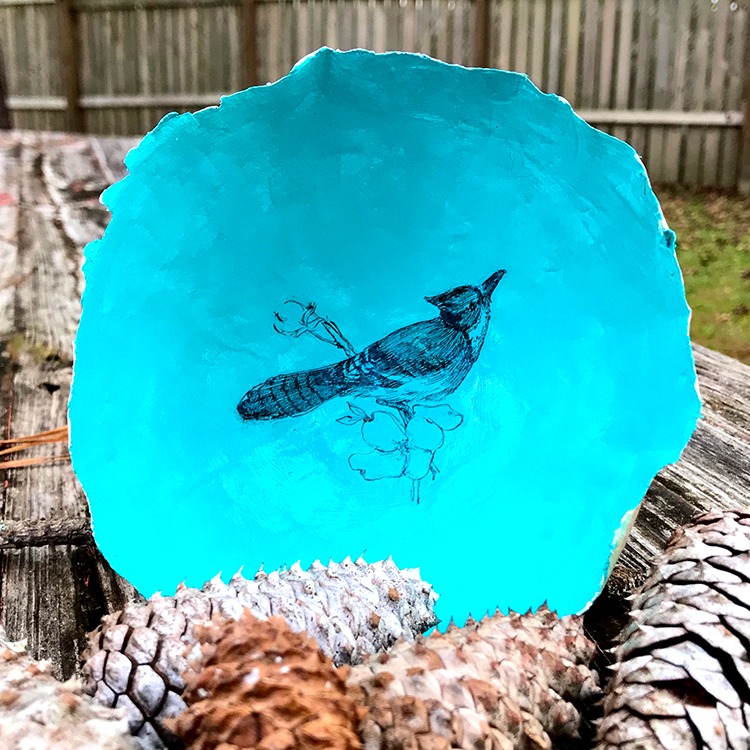
That was a bunch of messy, creative FUN!!! I hope that you enjoyed The Paper Mache Beginner’s Guide and learning How to Make Your Own Paper Mache Bowl with me!! When I am not exploring with new and old Techniques for Mixed Media in my Graphics Fairy sandbox, I also create Photoshop Elements tutorials and craft project tutorial videos over on The Graphics Fairy Premium Membership site . You can find even more of my books, junk journals, mixed media art, classes, and whimsical shenanigans on Rebecca E Parsons Dot Com .
May joy be with you all,
You May Also Like These
November 21, 2021 at 8:34 am
Rebecca, you make this sound so easy! I once made a hot air balloon with my daughter for her bedroom (long, long ago) Tonight my grandboys are spending the night and I am thinking we will use your directions and make a Christmas bowl for their mother! Thank you so much. I also thought with them making the bowl maybe a photo transfer of the two of them might be fun. Have you tried that? Anything I need to be cautious of doing or not doing. I would hate to ruin their bowl. They loved making paper together so I am thinking they will love this. Again thank you for the very clear instructions.
Karen Watson says
November 21, 2021 at 4:12 pm
Hi Sandy, I’m so glad you liked Rebecca’s project! What a great idea to make a Christmas bowl with your grandkids! If you are going to do the photo transfer, I would definitely create a little scrap paper mache piece that you can experiment on before doing it on the actual bowl. Since we all have different types printers, ink, and use different brands of paint, it’s best to try it for yourself on a practice piece so that you know exactly how it will turn out, with your supplies I hope that helps!
Giuseppa says
November 8, 2021 at 8:30 am
Grazie. La spiegazione è chiarissima.
November 8, 2021 at 6:07 pm
November 4, 2021 at 6:25 pm
Thanks so much Rebecca, I remember doing this at school. What a fun project!❤️
November 5, 2021 at 10:18 am
I’m so glad you enjoyed Rebecca’s post Sue! 😊

Get Access to the FREE DIY & Craft Hub & discover something new to explore!

FREE RECIPE EBOOK! Get your copy! >
A Beginner’s Guide to Papier Mache
Papier Mache is a really fun craft to learn and do. Here you will find out everything you need to know about how to create papier mache objects!
Papier Mache always reminds me of my school days when art lessons would involve quite a bit of papier mache!
I very vividly remember once creating a papier mache ball – we pasted the special mixture over a regular balloon and then once it was dry we popped the balloon – and lo and behold we had a papier mache ball!
It was a great craft to do at school – it was somewhat messy (kids love that!), you didn’t feel like you were actually doing ‘school work’, and you could create some amazing things!
Papier Mache is a really really fun craft to try and do. You can really use your hands and imagination to create some amazing things with paper and a gluey mixture! You don’t need to be a kid to appreciate the fun creativity of papier mache.
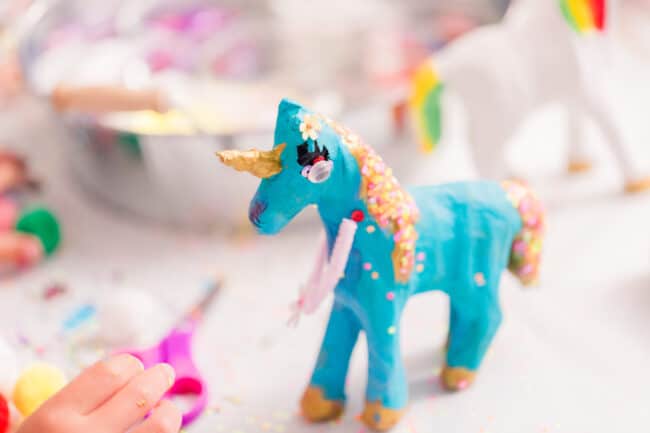
What is Papier Mache?
Papier mache, (pronounced “pap-ee-ay mash-ay,”) is a crafting technique involving paper and a paste-like mixture to create a wide variety of objects.
The name itself comes from the French words “papier” meaning paper and “mache” meaning mashed or mashed-up. That is exactly what papier mache is all about – mashing up paper to form unique creations!
Where Did Papier Mache Originate?
The origins of papier mache can actually be traced all the way back to ancient Egypt and Persia.
These ancient civilizations this method to create masks and coffins. However, it was during the Renaissance period in Europe that papier mache started to flourish and gain popularity.
In the 17th and 18th centuries, papier mache became a fashionable and affordable alternative to expensive woodwork and decorative items.
Papier mache was extensively used to create ornate furniture, intricate boxes, and even musical instruments.
The technique then spread to other parts of the world, with each culture adding its own unique touch and designs to the craft.
How Do You Make Papier Mache?
Making your own papier mache is incredibly easy and fun! Here is a simple step-by-step guide to start your own:
1. Gather your materials: You will need torn or shredded newspaper, a paste mixture, a bowl, and a mold (if desired).
2. Prepare the paste: There are various paste recipes that you can use, but a basic one involves mixing equal parts of flour and water until the mixture is a smooth consistency. You can also add some salt to the mixture to prevent the growth of mold.
4. Let it dry: Allow your creation to dry completely. This may take a few hours or even a couple of days, depending on the size and thickness of your project.
5. Decorate and finish: Once your papier mache is fully dry, you can paint, varnish, or decorate it as you wish. Get creative and let your imagination run wild!
Papier Mache is a really versatile crafting technique that can create so many different objects and designs.
You can create practical items, decorative pieces, and also fun pieces such as party supplies with Papier Mache.
Here are a few ideas of Papier Mache crafts that you may want to create:
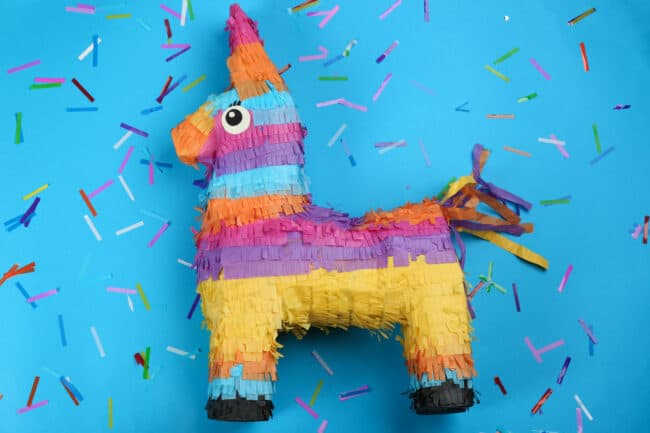
Pinatas You can create your own pinatas for birthday parties and other fun gatherings. Making a pinata is also really fun and rewarding. You can choose your own shapes and colors for your creations, and fill it with whatever you want to!
Decorative Bowls You can make some amazing decorative or functional bowls with Papier Mache. To make a bowl you will need a mold, either a balloon or a bowl.
To this mold you add strips of newspaper that are dipped in the special paste. You will layer the strips over the mold and then let it dry. Once the bowl is dry you need to gently remove the mold and then paint the bowl in the colors you choose.
To make a mask you will shape a mask base over a face mold or your own face. Once this base is dry you can paint it and decorate it as you want.
Sculptures Papier Mache can also be used to create some amazing sculptures. This requires a bit more creativity and more work and time, but it is well worth it.
You can create abstract shape sculptures, animals, and all kinds of things! To make a papier mache sculpture you will need to start with a wire armature in the shape that you desire.
You then cove the armature with the papier mache mixture to build up the form. Once the form is dry you can color, paint and embellish it.
Papier Mache is also a really great craft project to do because you can just experiment and try all kinds of different shapes and objects!
Papier Mache is a really fun craft to learn and do. Here you will find out everything you need to know about how to create papier mache!
Make Calm Lovely is about creating calm and lovely in your life: through organization, productivity and exploring your creative side. I have great DIY & craft tips & ideas (including great IKEA hacks!) Plus lots of organization and productivity tips and advice, so you can create more time for the lovely in your life!
Leave a Reply Cancel reply
Your email address will not be published. Required fields are marked *

The Ultimate Guide to Paper Mache for Beginners
Are you interested in learning how to make paper mache? Paper mache is a craft that you may think of in a time of creative inspiration.
The concept of paper mache has been around for longer than paper creation. Despite its age, it has stayed strong in the crafting world throughout history. Paper mache has since been established as effective but easy to utilize.
This craft may seem overwhelming to those who have not had any experience with paper mache before.
Thankfully, everything down to the mixture you will use is things found in everyday life. Let’s get to everything that you need to know about paper mache.
What is Paper Mache?
The history of paper mache, paper mache in modern times, what supplies do i need for paper mache, how to create paper mache art, tips for paper mache art, paper mache video tutorials.
Paper mache, or papier mâché (“chewed paper” in French), is a method of art that involves paper and a paste that the artist creates.
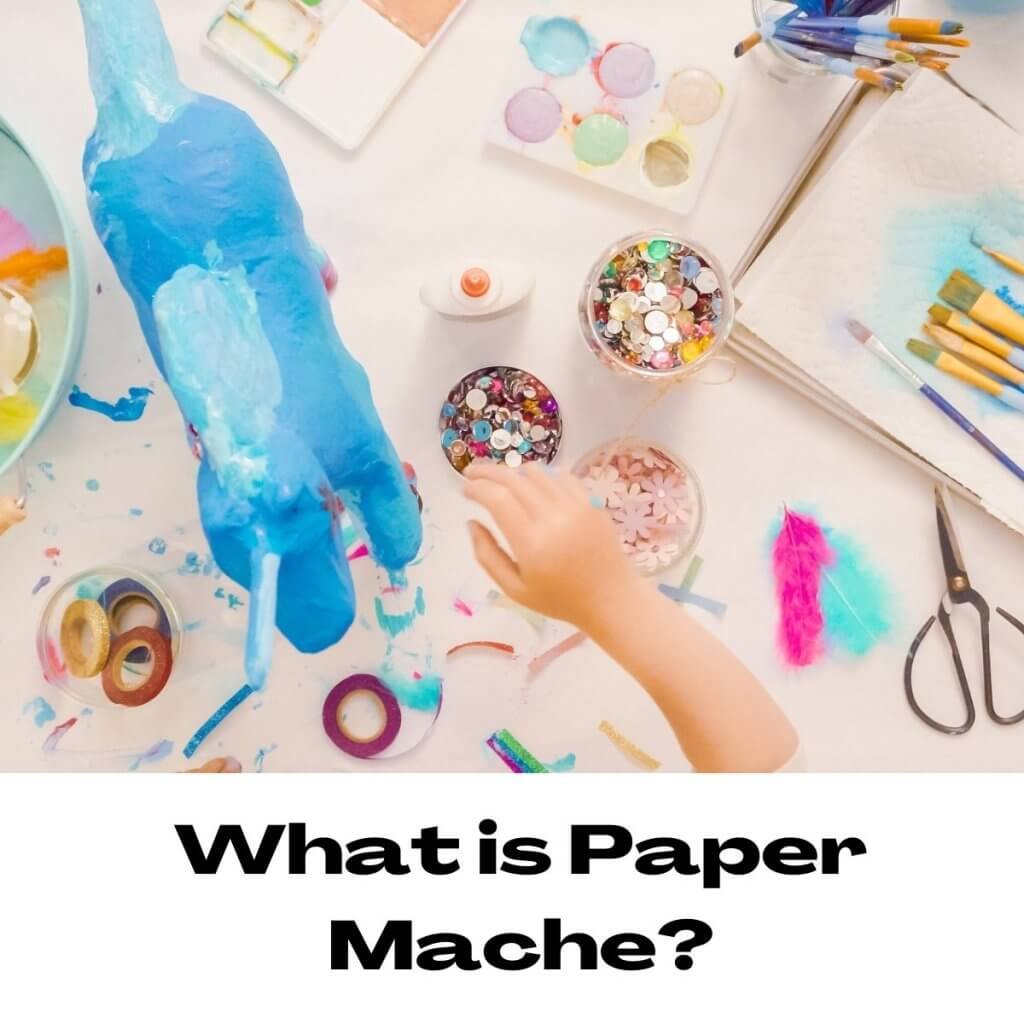
This paste is made of easy-to-find ingredients that you may already have in your house, saving you a trip to the craft store!
The paper you have will be torn into strips and then coated in the mixture you make before being put onto a surface of your choice. Surfaces can consist of things such as balloons, bowls, or vases.
The paper you use that is saturated in the paste will harden as it dries, becoming a light but durable material.
Once it has dried, the paper mache will be strong enough to hold what it needs to hold but will break if put under enough pressure.
Paper mache as we know it today is thought to have originated from China, where paper itself was first invented.
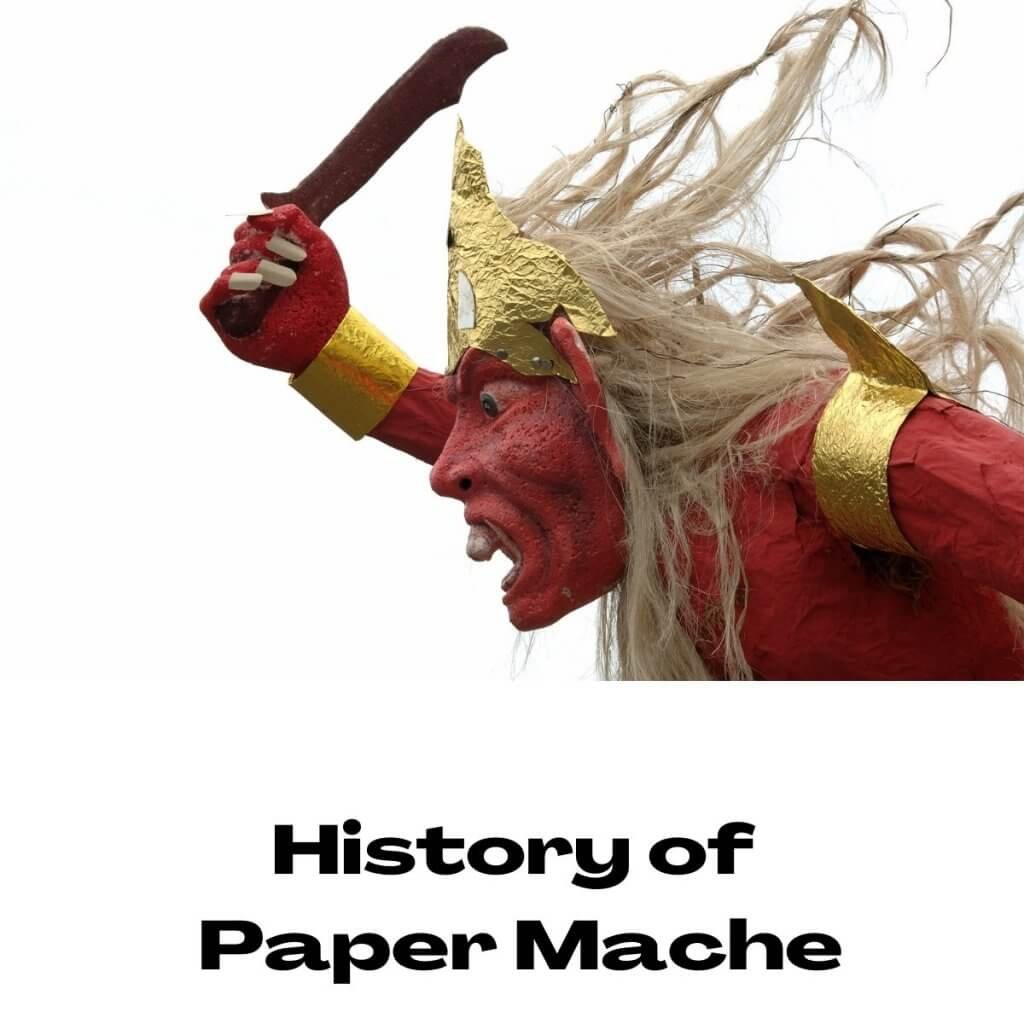
These first instances of paper mache were likely for helmets. While paper mache is not strong enough to save you from any of today’s weapons, it does show how highly they valued this material.
While China has the first known instance of paper mache as we know it today, if you look further back in history, you will see a close relative that can be found dating back to Ancient Egypt.
Ancient Egyptians would coat pieces of papyrus or linen into the plaster to create objects for funerals. Coffins and Egyptian death masks would be crafted from this paper mache version.
Perfect Hobby For You:
- Polymer Clay
- Needle Felting
- Wood Burning
- Collage Art
Paper mache is a popular crafting method even in the modern era, but it has also been known to be used for practical uses.
It was not that far back in history that paper mache was being used for fuel tanks and canoes.
While this practice has not necessarily continued into modern day as we know it, it was less than 100 years ago that the craft was being utilized for these items.
Today, it is much more common to see paper mache used to make objects such as pinatas and parade floats. You also may see artists using paper mache to create figures, jewelry, and more.
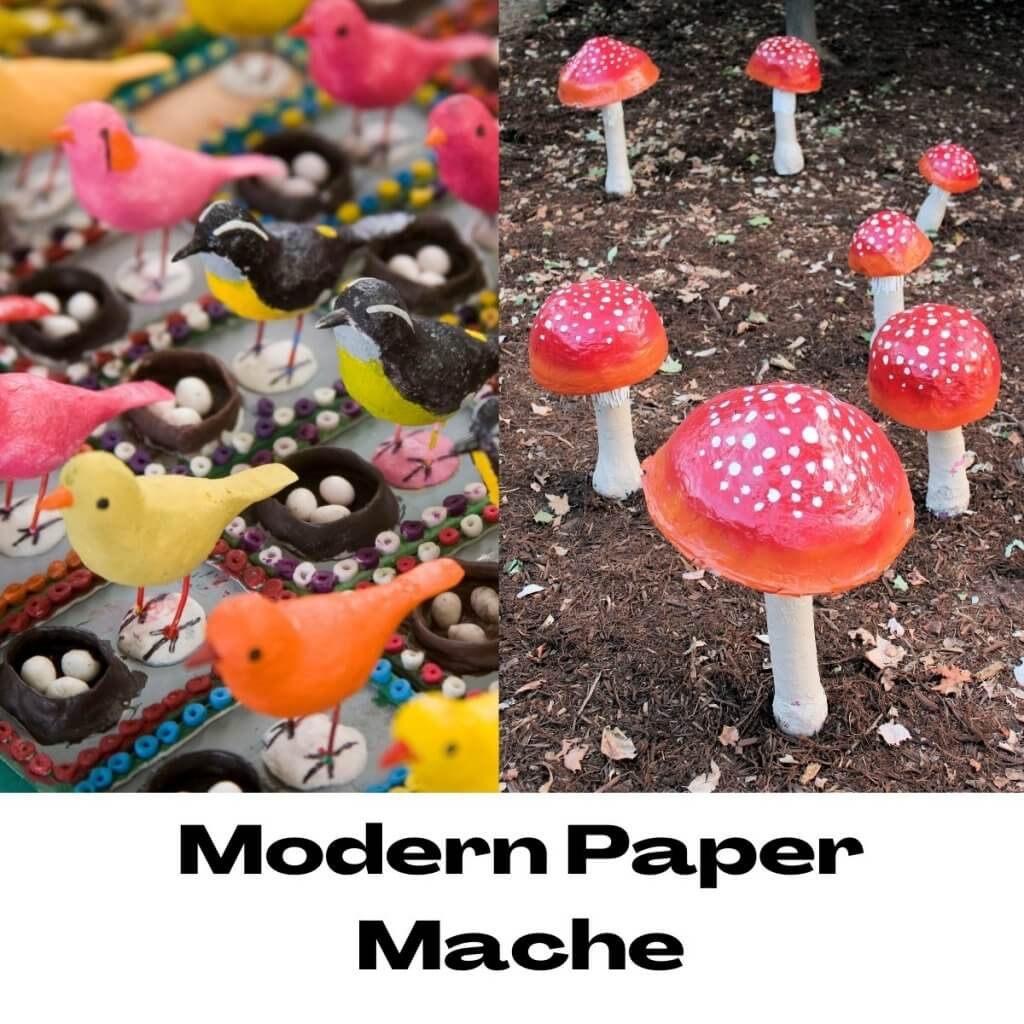
Paper mache can be incorporated into whatever craft you are interested in.
If you are into fairy gardens , you can make a paper mache piece for an indoor terrarium.
Artists globally produce their own impressive works of art with paper mache, with a portion of these artists making their profession solely in paper mache.
If you are a crafter who would prefer a more hands-on method with your craft, consider paper mache a great candidate.
Flour or Glue
Base of choice.
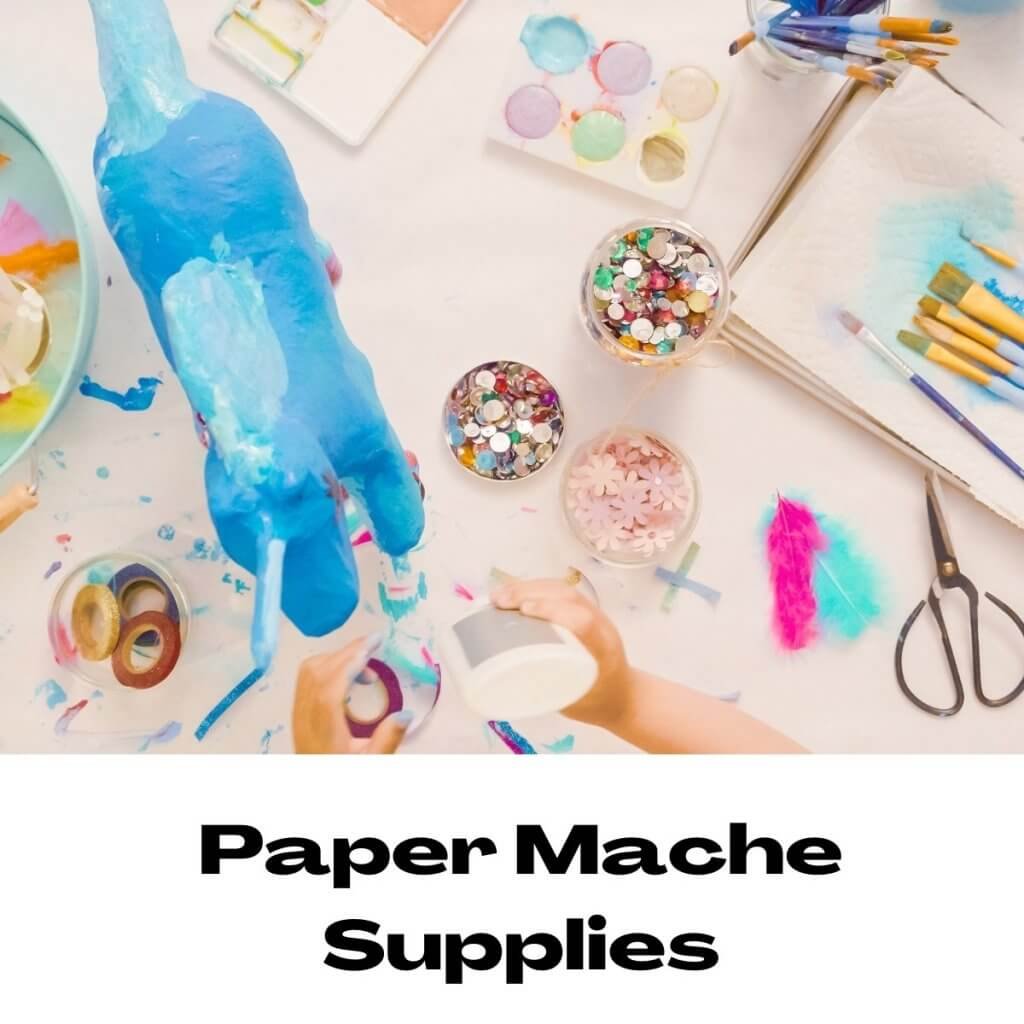
When you are gathering materials for your paper mache project, paper will be the absolute necessity.
Feel free to upcycle any old newspaper or magazines and use their pages as the strips of paper for your paper mache project.
This is a great way to be more environmentally friendly while also saving yourself money.
If you did not have anything spare lying around, Amazon offers over five pounds of blank newspaper for your crafting needs.
Water is one of the next priority materials for paper mache. Water will be your friend, as it is a significant ingredient in your paste.
Without any moisture, there wouldn’t be a paste after all. It does not have to be any particular kind of water; simple tap water would be sufficient.
While there is a way to also do paper mache using glue as the base, flour is a more available product for this craft.
Just as water was a significant ingredient for the paste, flour is the next ingredient.
The dry powder of the flour will mix with the water to slowly create a paste with a consistency based on your personal preference.
If you are using glue, the glue will mix with the water just as the flour does.
Your paste will need something to be mixed in. You will need a container that will be large enough for you to easily coat strips of paper in, as well as holding the paste mixture itself.
Salt is recommended by some paper mache artists to be added to your paste for its antifungal elements.
However, it isn’t a miracle worker, and you will still want to take extra precautions to prevent mold.
While the whisk is not a necessity in your paper mache experience, it will certainly ease the way.
The whisk will help to mix your paste together, breaking away any dry clumps to give you a smooth mix.
The bases you can use are endless, but one great beginner’s item is balloons.
You can apply your moist strips to the balloon to form your project’s shape. When it is dried, you can pop the balloon to remove it easily.
Another option is to use these masks to create paper mache masks that can be used as decorative items.
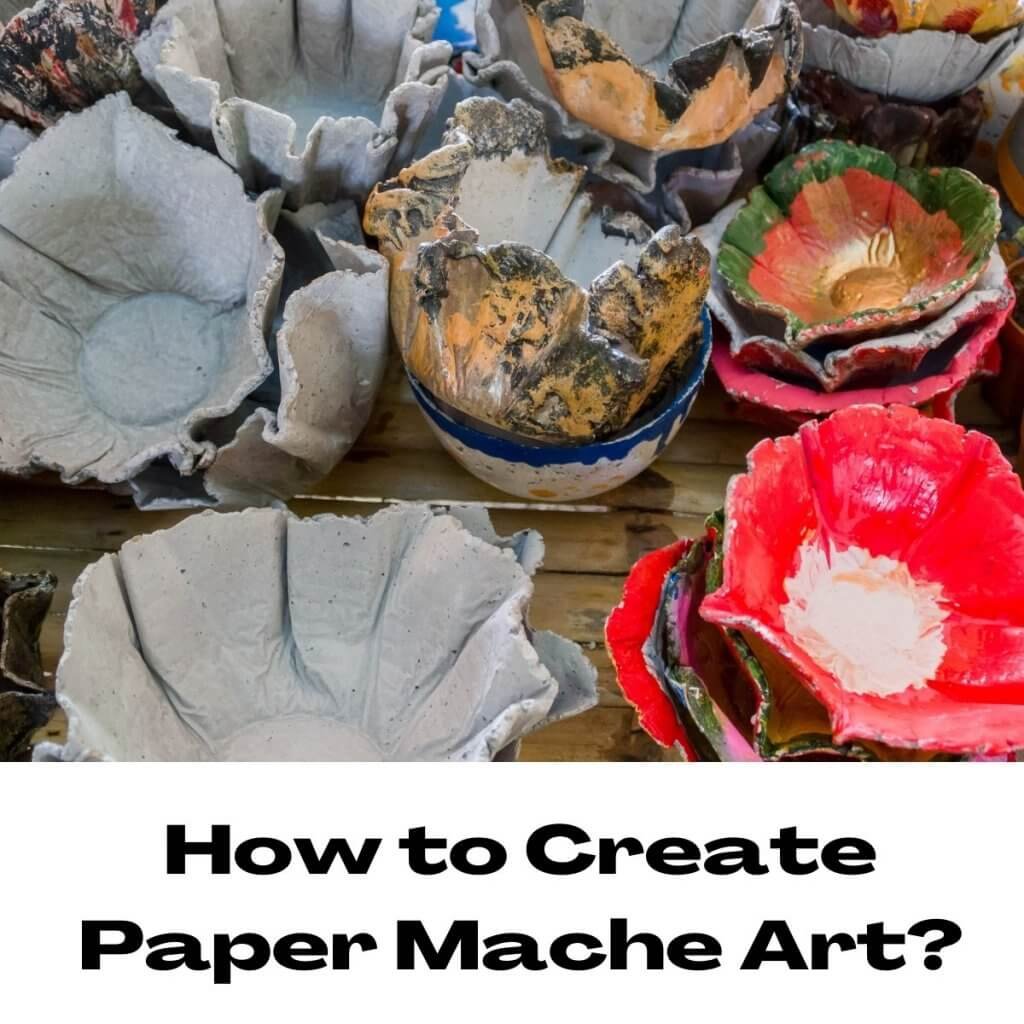
- Gather your materials and prepare your crafting area. Make sure all your materials are within reach. You also want to be sure to protect your environment, so prepare your crafting area ahead of time.
- Combine flour/glue and water into the bowl and mix until desired consistency. When you begin to make your paper mache mixture, you will combine your two ingredients in a bowl until it reaches the desired consistency. If the mixture is thick, you add water. If the mixture is thin, you add flour or glue.
- Add some salt if you want. While not a necessary step in this procedure, if you add salt to your mixture, you will help keep your work free of any potential mold while it is drying.
- Whisk until smooth. When you combine these elements together, you will want to mix it until there are no dry lumps. This is a very similar situation to stirring some batter.
- Cover your paper in the mixture of flour and water. When your mix is to your liking, this is when you will begin creating with it. You will grab strips of paper one at a time and saturate them with your mixture.
- Ensure no excess mixture is on the paper by using your fingers to wipe the strip. While you want your strip of paper to be saturated enough to stick to your project, you do not want it to be so soaked that it dries slower. Because of this, you can take off any excess by brushing down with the paper strip in between two of your fingers.
- Place the paper over whatever base you have chosen. If you have selected a balloon, this is where you will keep your balloon steady and begin applying the strips. However, if you’re using a bowl or something else, you will want to apply a nonstick element to your bowl before adding the paper mache.
- Cover the surface as much as you wish. Whether you are creating a bowl and thus only utilizing half of the balloon or if you’re making something different that requires the whole balloon, it is entirely up to you.
- Let dry before beginning a second layer, or you may risk mold. If you are going to apply more than one layer of paper mache, waiting for the previous layer to dry before adding another is the best idea. Even with the salt element, you do not want to risk mold from over-saturation.
- Apply as many layers as you wish. While you have to wait for each layer to dry, apply as many layers as you want if you have the patience!
- Allow it to dry. Finally, when you have added all the layers your heart desired, it is time for you to wait for it to dry completely.
- Remove your base. If you were using a balloon, this is where you can simply pop the balloon. If you were using the bowl, this is where you will be thankful that you used a nonstick agent, as the bowl will be much easier to remove than if you hadn’t.
- Decorate as you please! If you plan on coloring your paper mache masterpiece, it is best to use acrylic paints ! There are also many more decorating ideas to truly customize your project.
Place the Paper Mache Strips In As Many Ways As Possible
If you place every paper mache strip in the same direction, you will have a fragile piece when your project dries. Instead, try to apply your strips of paper to create a strong base in as many directions as possible.
Do Not Paint Until Project is Dry
In the same light as not applying another layer of paper mache until the first layer is dry.
You will not want to paint before your project is completely dried. This increases the chances of mold, which can entirely ruin your work.
You Can Add Aromatherapy Scents
If you do not like the smell of your flour and water mixture, you can also feel free to add aromatherapy scents to your mix.
Be Prepared to Be Patient
When you are doing paper mache, you need to be patient. With how much dry time is involved and how crucial dry time is, you will be spending a lot of time waiting to move onto the next step in your project.
You may want to consider a different craft if you are all for instant gratification.
Paper mache is a craft that has grown with humanity, from its ancestry in Egypt to its origination in China.
The materials you need to craft with paper mache are accessible and may already be things you have in your home.
There are so many potential projects for you to test your new crafting skill and a world full of information waiting to be learned. Whatever your reason for learning paper mache may be, the path ahead will be adventurous.
Leave a Comment Cancel reply
Save my name, email, and website in this browser for the next time I comment.
Privacy Policy

Papier-mâché – Definition, Examples, History & More – Art Techniques and Materials Glossary
Table of Contents
What is Papier-mâché?
Papier-mâché is a versatile and inexpensive art form that involves the use of paper, adhesive, and water to create sculptures, masks, and other decorative objects. The term “papier-mâché” is French for “chewed paper,” which refers to the process of soaking paper in water and adhesive to create a moldable material. This technique has been used for centuries to create intricate and detailed works of art.
History of Papier-mâché
The art of papier-mâché dates back to ancient Egypt, where it was used to create masks and other decorative objects. It gained popularity in Europe during the 17th and 18th centuries, where it was used to create elaborate theatrical props and decorations. In the 19th century, papier-mâché became a popular craft for children, who would create masks and figurines using simple materials.
Materials Needed for Papier-mâché
To create papier-mâché, you will need a few basic materials: – Newspaper or other thin paper – Adhesive, such as white glue or flour and water paste – Water – Paint and brushes for decoration
Techniques for Creating Papier-mâché
There are several techniques for creating papier-mâché sculptures and objects. One common method is to create a base form out of wire or cardboard, and then layer strips of paper soaked in adhesive over the form. This creates a sturdy and moldable structure that can be shaped and painted once dry. Another technique involves creating a mold out of clay or other materials, and then layering papier-mâché over the mold to create a detailed sculpture.
Uses of Papier-mâché in Art
Papier-mâché is a versatile medium that can be used to create a wide range of art forms. It is commonly used to create masks, puppets, and sculptures, but can also be used to create decorative objects such as bowls, vases, and ornaments. Papier-mâché is often used in art therapy as a way to express emotions and explore creativity in a safe and therapeutic environment.
Tips and Tricks for Working with Papier-mâché
– Use thin paper, such as newspaper or tissue paper, for a smoother finish – Allow each layer of papier-mâché to dry completely before adding another layer – Use a hairdryer or fan to speed up the drying process – Experiment with different shapes and forms to create unique and interesting sculptures – Seal your finished papier-mâché with a coat of varnish or clear sealant to protect it from moisture and damage
In conclusion, papier-mâché is a versatile and accessible art form that can be enjoyed by artists of all ages and skill levels. Whether you’re creating a simple mask or a detailed sculpture, papier-mâché offers endless possibilities for creativity and expression. With a few basic materials and some patience, you can create beautiful and unique works of art that will be sure to impress. So gather your supplies and get started on your next papier-mâché project today!
JerwoodVisualArts
Hundreds of articles, guides and free resources
Email: [email protected]
Follow Us !
Copyright © 2024 All Rights Reserved
Privacy policy
Cookie Policy

15% OFF PATTERN ORDERS OF $30 OR MORE – USE CODE: 15%OffOver30
How to Make Paper Mache – The 5 Basic Steps

This is a reader-supported site. When you buy through links on this site, I may earn an affiliate commission . Thanks for your support! :)
If you want to know how to make paper mache, this post is for you.
Paper mache (or papier-mâché, if you prefer to say it with a French accent) :) ) is a versatile sculpting material for artists of all ages. It’s a fun way for kids to create their first sculptures, but it can also be used to create museum-quality works of art – and anything in between. (To see some of the paper mache art that our readers have submitted, click here .)
Teachers and parents : If you need a printable PDF copy of this post click the button below and then save the file to your device:
Table of Contents
All paper mache projects start with these basic steps:.
- Create an armature for your sculpture, or find an object that has the shapes you want for your project.
- Make some paste , or mix up some paper mache clay . (I show you how to find the free recipes below).
- Apply the paper mache to your form.
- Allow the paper mache to dry all the way through.
- Use acrylic paint to decorate your paper mache sculpture and seal your sculpture with acrylic varnish.
Step 1: Creating a Form or Armature
Wet paper stuck together with paste has no particular form of its own, so the real sculpting happens when you build your armature. Take your time with this step, because it’s important.
Many of the sculptures on my site were made using a cardboard pattern inside. I don’t go into that here, but if you’d like to try that method, you can see how the patterns are made here .

For a really fast way to make paper mache sculptures and masks, choose one of my patterns for paper mache . The downloadable templates create all the shapes for you – just add paper mache and paint!
Armatures Made with Crumpled Paper and Masking Tape:
For years I created my animal sculptures with crumpled paper and masking tape.
That’s how this little dragon was made. Newspaper was crumpled into the shapes of the body, legs and head, and then held together with masking tape.

Armatures Made with Crumpled Foil and Hot Glue:
To get even more detail in your armature, you can use crumpled foil held together with hot glue. This method is a little more expensive, and the glue gun can burn you if you aren’t paying attention.
However, if you’re careful it can be a lot easier to make an armature with foil instead of crumpled paper. The paper tries to un-crumple itself while you’re getting the tape off the roll. The foil doesn’t do that, so it’s easier to use.
If you’re going to cover your foil form with paper strips and paste, you’ll need to cover the foil with masking tape, first. The paste doesn’t like to stick to foil. However, if you’re using paper mache clay, no masking tape is needed.
This little owl was made with a foil armature:

Paper mache owl armature made with foil.

How the little owl looked after he was covered with paper mache clay and painted. This is a great project for beginners – you can see the tutorial here.
Using Found Objects for a Form for Paper Mache:
Many paper mache items can be made over objects you find around the house. This paper mache bowl was made using a small ceramic bowl for the form. Our friend Rex Winn uses plastic bags to make the forms for his pumpkins , and many people make masks using milk jugs or paper plates.

Using paper mache clay, made with colored tissue paper, to make a bowl.

The finished paper mache bowl, after it dried. You could do the same thing with paper strips and paste, and then paint it.
Paper Mache Over a Clay Model:
Gerda left a comment to remind us that you can use clay to sculpt a form, and then cover the clay with paper mache, like I did when I made my African Mask , and when I made a strange helmet mask years ago. (That video isn’t very good, but I really like the mask. :) )

Make your form first, with clay, and then cover it with plastic wrap.

Then cover the form with several layers of paper mache. I used brown paper to use as a base for the final painting. Always varnish your paper mache sculptures and mask after the paint is dry, to seal out moisture.
Paper Mache Over a Wire Armature:
Patricia mentioned that she often makes armatures with either chicken wire or aluminum mesh. It’s traditional to make paper mache parade floats with a chicken wire form, but I’ve never tried using it myself. Patricia points out that large sculptures made that way are very light because they’re hollow.
Aluminum mesh is a really good armature choice for large flat areas, like elephant ears or the wings on my big dragon , that might warp if you used cardboard covered with paper mache.
Scroll down to the comment area to see Gerda and Patricia’s comments.
Step 2: Make Your Paper Mache
You can cover your form with paper strips and paste, or with a mixture of pulped paper that has been mixed with some kind of binder or glue.
Paper mache clay:
On this site, many of the projects use paper mache clay. You can find printed recipes for many variations of paper mache clay on this page.
Watch the video below to see how my favorite new paper mache clay recipe is made:
Paper mache paste:
For the more traditional way to make paper mache, you’ll use paper strips and some form of paste to apply the paper strips to your armature. The easiest paste recipe is just flour mixed with warm water.
You can see how easy it is to mix in this video:
Many people worry about mold if they use a paste made with flour and water. This can be a real problem if the paper mache doesn’t dry quickly.
However, mold can’t grow without water, so make sure your sculpture dries fast, and then seal it with varnish so it can’t absorb water from the air.
Watch this video to see how to keep mold from ruining your sculpture.
Another (minor) problem is that you’ll need to make a new batch of the flour and water paste every day, because yeast from the air tries to turn it into sourdough starter. When that happens, the paste doesn’t smell very good and it isn’t as sticky.
Flour and water paste doesn’t cost much, though, so just throw it out at the end of your sculpting session, and start with a new batch in the morning.
Paste with no flour (and no mold!):
A really good alternative to home-made paste used to be Elmer’s Art Paste, but they don’t make it anymore. In fact, that’s what I used for the African mask that I made over a clay form. However, there is an alternative to the art paste, that is also gluten-free, and it will never attract mold. It’s called methylcellulose, and I have a video showing how to use it here. You can store it in a jar on your shelf for months, but remember to mix it before using it again.
Methylcellulose is a great paste to use in a classroom, because a 2 ounce carton makes up an entire gallon of paste that you can keep using for months without it going bad.
Methylcellulose isn’t thick, like traditional paper mache paste, but it is still really sticky. If you’re teaching kids how to make paper mache sculptures, or if you live in a hot, humid climate where nothing ever seems to get dry, that’s the paste you’ll want to use.
Make paper mache with glue:
A lot of people like to use Elmer’s Glue-All or Elmer’s School Glue for paper mache. Mix it with a little water before using it. That helps soften the newspaper so it will lie down flat on your form.
You can also use Titebond Wood Glue, for a really strong, fast-drying paper mache.
Be sure to see this page for more recipes and videos for paper mache paste.
Step 3: Apply the paste or paper mache clay to your form.
Applying paper mache clay:.
To use the paper mache clay, just mix it up and apply it over your armature with a knife. It’s a lot like frosting a cake, but you’ll want to use a very thin layer so it can dry quickly. The Egyptian Blue Hippo below was made with a foil armature covered with a very thin layer of paper mache clay.

A paper mache copy of the famous Egyptian Blue Hippo, made with foil and paper mache clay.
You can find many tutorials for animal sculptures made with paper mache clay on this page, and in my book Make Animal Sculptures with Paper Mache Clay .

Applying paper strips and paste:
You’ll want to use paper that’s soft enough to bend over the curves of your form. You also need to tear off all the cut edges, because they will show as straight lines on the finished sculpture. The torn edges kind of melt into the shapes, so they look better.
There are some tricks to getting the paper strips to lie down flay (or should I say “ lay down flat?” I don’t think I ever get that right! :) ) You can see some tips for applying your paper mache in the video below:
Step 4: Let your paper mache get dry all the way through.
The one biggest mistake people make with paper mache is not letting it dry long enough before painting it. If you seal any moisture inside, there’s a very good chance that mold will start to grow. You’ll eventually see it as dark spots on the outside of your sculpture, and at that point there’s very little chance of saving it.
So give your sculpture plenty of time to dry! Paper mache is not an ‘instant’ sculpting material. Here’s a video that talks about how long it will take for your paper mache project to dry:
Step 5: Paint it!
This is the exciting step that brings your paper mache sculpture to life.
I often use an acrylic gesso before I paint my sculptures, because it seals the paper mache and gives you a nice white surface to paint on. It seems to make the colors brighter, and you don’t need as much paint to achieve the look you want.
However, I have painted a lot of sculptures without gesso, so it’s really optional.
I always use acrylic paint, but you might want to experiment with oil paint or watercolors .
When your paint is dry, be sure to seal it and protect the paint with a coat of acrylic varnish. I love using the Deco Arts Ultra Matte varnish, because I don’t like a gloss varnish on my animal sculptures.
However, there are many types of sculptures or decor objects that look best with a shiny varnish, so choose the one that will give you the look you want.

Now Your Paper Mache Sculpture Is Done!
Be sure to show it off on the Daily Sculptors page so we can all see how it came out. After all that work, you deserve to brag a little! :)
Related Posts:

Jonni’s Favorite New Recipe for Paper Mache Clay

Cooked Paper Mache Paste Recipe

Patterns for the Lion King Jr Headdress Masks
34 thoughts on “How to Make Paper Mache – The 5 Basic Steps”
Could you please tell me the powder to water ratio? I know you stated 2 ounces will make a gallon, so just add 2 ounces for every gallon of water?
Do you mean the Methylcellulose recipe? Yes, you need two ounces for a gallon of water. Did you watch the video I made about that paste?
Walmart doesn’t seem to carry Proform joint compound any longer. After DAP — which won’t work — it seems like the brands most readily available is USG or Wurth. Are you aware of any problems with those brands? Thank you for the information. I’m very eager to try this recipe as I’d like to be able to smooth the sharp edges on the masks.
USG works really well. I was able to get Wurth to work by substituting Gorilla wood glue for the Elmers – but someone recently told me that it was lumpy when she tried it. So I’d stick with the USG brand if you can find it. In fact, I just bought some a few days ago at Lowes.
I think my question is probably a travesty to your art form, judging from all the information and comments I see…
I used paper mache to make a mold of the inside of a bowl. Its purpose is to serve as a sort-of dressmaker’s dummy so I can accurately sew a fabric lining for the bowl. I don’t intend to keep the mold beyond its intended use.
Here’s my question: I lined the bowl with paper mache about one-and-a-half to two inches thick. Of course, I didn’t exactly know what I was doing; I thought it would dry within a 24-hour period. It seems I was sadly mistaken. But I lined the bowl with a very thin piece of plastic first, so there’s no air getting to the core of the paper mache other than through the top surface. I wondered if it would trash the mold if I lifted it out of the bowl, peeled the plastic off, and turned it upside down so it could air-dry a bit faster. Does that seem like a good idea or not?
Hi Minerva. I have never made anything with paper mache that thick. In fact, I never use a layer over 1/4″, and usually start with a layer that’s even thinner than that. Paper really likes to hold on to water, and mold spores will move in quickly, as long as there’s any moisture at all. I think your only option is to pull the paper mache out of the bowl and turn it upside down on a sheet pan. Use foil or parchment paper to keep it from sticking to the pan – and remove the plastic wrap, of course. “Bake” it at 250° F to dry it out, and if your oven has a fan, be sure to turn it on. Even with it in the oven, it will still take many hours to dry all the way through. It will dry on the outside first, of course, so I don’t know how you’ll test it to make sure there’s no moisture deep inside, but if you’re only using it temporarily, that might not matter, as long as you can get it dry enough for your project. Good luck with it!
So I took your advice and pulled my mold out of the bowl. It seemed sturdy enough to do that without making it collapse. I then peeled the plastic off; it came off easily. Since the very top surface of it was pretty dry already, I just flipped it upside down, sat it on a small box on the floor, and turned a floor fan on it (at low speed). The drying seems to be moving along at a good pace. Luckily, I’m not in a big hurry, or I would have used your oven idea, too. Thanks for your help.
Am about to start putting paper Mache on my bear. The bear is covered in newspaper and masking tape. Can I lay the paper Mache right on top of this or do I need plastic bag or aluminum foil first?
You would only need the plastic bag or foil if you want to remove the dried paper mache from your form. Otherwise, just put your paper mache directly over the newspaper and masking tape.
I found your youtube videos on paper mache recently and I love them! Your pieces are amazing! I’m also a fan of paper mache and I’m currently working on a project for Halloween. In your posts and videos, you say that you just use paper, but is it a thicker paper? It’s brown and it looks almost like thinner cardboard. I’m curious because, in the past, I would use newspaper, but for this project, I know I wouldn’t have enough so I bought and am using butcher paper. I read that it’s a little stronger. But, my current project is very large and it still seems flimsy after two layers. Do you think I would just have to add more layers for strength? Thanks so much!
Hi Megan. The brown paper I often use is about the same weight as newspaper, but it’s easier for me to see the shapes without all the print. I get it from amazon and walmart shipping boxes. You can use the heavy brown paper used for paper bags, but it’s stiffer so it’s harder to make the paper mache smooth. I almost always have something under my paper mache, like an armature or one of my lightweight cardboard patterns. If your paper mache won’t have any support, it will probably need more layers. You might even want to try the Titebond III wood glue instead of paste, to make your project stronger. I have a video about it here .
You’re awesome! Thanks for the quick response! Great! Maybe next time I’ll try the brown paper but I guess the butcher paper will have to do. I do have an inflatable ball underneath to hold the structure. I did find your video on using Tite Bond III before I started and it’s working great! Thanks for all your help! I wish I could send you a picture to show you what I’m working on, but any way, have a great holiday season!
We would love to see it when it’s done! You can show off your work on the Daily Sculptors page . :)
Hi, I am absolutely living your videos! Thank you so much for sharing all of them! My question to you is, can you use this paste on cardboard? I made a “vase” from cardboard and was going to use strips, but then thought I’d your clay. Would that work? Thank you, Amy
Hi Amy. Yes, you can use the paper mache clay over cardboard. We do it all the time. Try to use a thin layer, so it can dry all the way through. And have fun. :)
After it dries, can you add more to it the next day?
Yes, we do that all the time. :)
Hi Jonni! I was wondering if the paper mache clay sticks to duct tape? Thanks, Kim
Hi Kim. I put duct tape on my big dragon , although I can’t remember why. The paper mache clay did stick to it. I can’t remember what brand of tape I used, though. You might want to do a small test to make sure it will work with the tape you have.
Does paper mache stick to plastilina clay? I have a sculpt ready to add paper mache to bu don’t know if I need to cover with petroleum jelly or not.
In my experience it’s a lot easier to get the dry paper mache off the plastilina clay if you use the petroleum jelly. It doesn’t seem to hurt the clay, but I suppose it might make it slightly softer.
Thank you, dear Jonni for this very useful and thorough tutorial! In the future I will pay more attention to my armatures! Though, I once made an orc head which was hollow, it didn’t need an armature, because I first made the head from real clay and used that as a mould which I covered with paper strips and paper mache clay. When it had dried thoroughly, I had to cut the head in halves to remove it from the mould, then glued the halves together and gave it another layer of paper m. clay. Then I painted and varnished it. It was a very strong head!
Do you have a photo of your Orc head, by any chance? We would love to see it ! :)
Hi, Jonni, yes I have, and I did show it to you a few years ago. Do you want me to post it in the group where people show their art works? If so, please tell me how I should do that.
P.S. I found the place (Daily Sculptors, I think it was), but I don’t know if the photo got uploaded.
Hi Gerda – I’m glad you found it. Your photo did upload, but the posting isn’t automatic, so it often takes several hours for them to show up. You can now see your post here . Thanks for showing it to us!
That would be great! The only work we have of yours that can be found with the search bar is your Witcher’s Head Dress (which is fabulous, by the way). You probably showed us your Orc through the old system that put images in comments. The search system doesn’t find things in comments, and there are over 40,000 comments on this site, so nobody reads them all. If you post it again on the new form, people will actually be able to find it. :)
Just go to the Daily Sculptors page and hit the yellow button to find the form. I edited the post, by the way, to include your tip about using clay as a form for paper mache. I’ve done it many times myself – I don’t know why I forgot. Thanks so much for reminding me!
Very helpful tutorial. I learned how to do paper mâché using chicken wire or a much smaller gauge screening to build my basic shapes. You use way less material since a rounded body shape would be hollow and the screen/wire is very bendable. I cover with paper strips and then add your paper mâché clay recipe for detail. It is just recently I’ve started using cardboard armature and filling in with foil. I guess there are many ways to achieve your desired shape. I just thought I’d add this idea. I love your work and site. It is wonderful!
Pat, I have never used the chicken wire method, (the sharp points of the cut wire scare me because I’m a big chicken…) but I know a lot of people do it that way. Have you have ever taken progress photos of one of your projects? If you have, would you be interested in writing a guest tutorial for the blog? I’d really like to see how you do it. You might even convince me to give it a try. :)
Jonni, more than chicken wire, I use a finer grade hardware cloth most of the time. I’ll have to check and see if I have any pics of a piece in progress. I think all I have is one already covered in paper strips. I also don’t use a pattern. I just wing it and it works for me. If you check my website, you’ll see that the pieces come out looking pretty good I think. I will check and see if I have a photo of a piece in progress and let you know.
Dear Patricia, I have visited your website and I really love your artworks! Your animals are made with humor, and they are also touching. Thank you for showing them! Kind regards, Gerda Quist.
Thank you so much Gerda. That means a lot to me.
Hi can you use something to put over the paper mache statues for outside use?
Very thorough tutorial! I agree with the first first and most important step being armature. I have a tendency to underthink that part and end up kicking myself later.
Leave a Comment Cancel reply
Save my name, email, and website in this browser for the next time I comment.
Notify me of followup comments via e-mail. You can also subscribe without commenting.
Affiliate Disclosure – Privacy Policy – Cookie Policy – Shipping and Refund Policy

FREE PRINTABLE DOWNLOAD:
"5 best recipes for paper mache".
Includes Jonni’s famous Paper Mache Clay recipe, and tips on choosing the right recipe for your next project.

- Jun 1, 2021
What is Paper Mâché? A deeper dive than your typical DIY Balloon Piñata
Updated: May 10, 2023
Paper Mache is derived from the French term “Papier-mâché”, the literal translation of which is “chewed paper”. Despite its French name, the technique originated in China During the Han Dynasty. Today we are going to explore paper mache, its history , materials , and how it is being used by contemporary artists .
* Please note: All images belong to the original artists and sources as listed in descriptions*
Paper mache began in China, with the first examples dating back to the Han Dynasty (BC 202 – AD 220). They used it to make helmets and coated the paper mache in many layers of lacquer to toughen it. It was also used for every day objects like pots lids.

Next we see examples of Paper Mache appear in Japan and then-Persia as trade
brought the techniques to them from China. In Japan It was often used in celebratory paper decorations and mask making . Paper mâché became a widely used practice across Asia
Around the 10th century AD, paper mache techniques made their way to Western countries where the French officially named it “papier mâché”. Papier-mâché was used to create affordable ornamental decorations and wall motifs.
[Join us for a virtual paper pulp sculpting workshop]
Over the years paper has been mixed with a variety of materials to create papier mâché. Some of these materials include:
Mashed Potatoes
Acrylic Glue
Nowadays, most people just use a combination of water, wheat-flour, and white glue. You can learn more about found materials here . While people think of childhood crafts when they hear “paper mache”, there are many contemporary artists who use papier-mâché in their gallery-quality artwork.
Roberto Benavidez
Roberto Benavidez , a Texas native, creates paper art in the form of intricate piñatas. He uses papier-mâché to form and mold each highly detailed and colorful sculpture. He says “there’s something very forgiving about paper. You can wet it, slightly, to manually manipulate the form and once it’s dry, it’s rigid papier-mâché again. You can wet it to reform it.” ( Colossal, 26 May 2020 )

Xiaoqianfeng
Xiaoqianfeng is a Chinese handicraft artist who has gained her fame on social media. She frequently uses different papier-mâché techniques to create a variety of three-dimensional forms from wonderland-like dioramas and decorations, to wearable mecha armor, to large fantasy sculptures. Xiaoqianfeng primarily uses recycled cardboard and newspaper to create her papier-mâché.
James Morrison
James Morrison is an Australia-based artist who uses papier-mâché and ink to create taxidermy-like tableaus. His monochromatic sculptures evoke a sense of dark fantasy. Morrison spent his childhood in Papua New Guinea and often draws his inspiration from folk stories he heard there.

Papier mâché techniques have been around for centuries and can take on a variety of different forms and purposes. It is not just that elementary school paper mache craft that many of us grew up doing, laying newspaper strips on a balloon to create a paper mache bowl or DIY piñata. Papier mâché art can be incredibly intricate.
Did you enjoy learning about papier mâché? Read this post to learn about Fiber Art or discover the history of pigments and color .
Want to expand your own creative skills? Join us for a virtual art or music workshop ! You can also read about a previous Paper mâché workshop here .
Sydney Davis-Campos is the Virtual Learning Coordinator at Able ARTS Work, Learn for Life. She has a B.A. in Studio Art and Art History. Sydney has worked at Able ARTS Work for almost 5 years where she has also held the positions of Art Instructor and an Assistant Program Manager.
Related Posts
What to Do When You Have No Art Supplies!
Colors of the Earth, Nature, and Modern Times
Q & A with Los Angeles Fiber Artist: Aneesa Shami Zizzo

Join Our Virtual Workshops
Expand your artistic and musical knowledge in our affordable, fun online workshops

Need Continuing Education Units?
We offer pre-recorded CAMFT approved CEUs for mental health professionals and are constantly adding more course options.
Do you love organizing? This newsletter is for you! →
How to Make Paper Mache
By Karo @ CraftsyHacks.com
on Jan 28, 2022, Updated Jun 03, 2024
This post may contain affiliate links: full affiliate disclosure .

Make paper mache with kids with all-natural ingredients. You can then use it to create all sorts of cute projects for kids and teens.
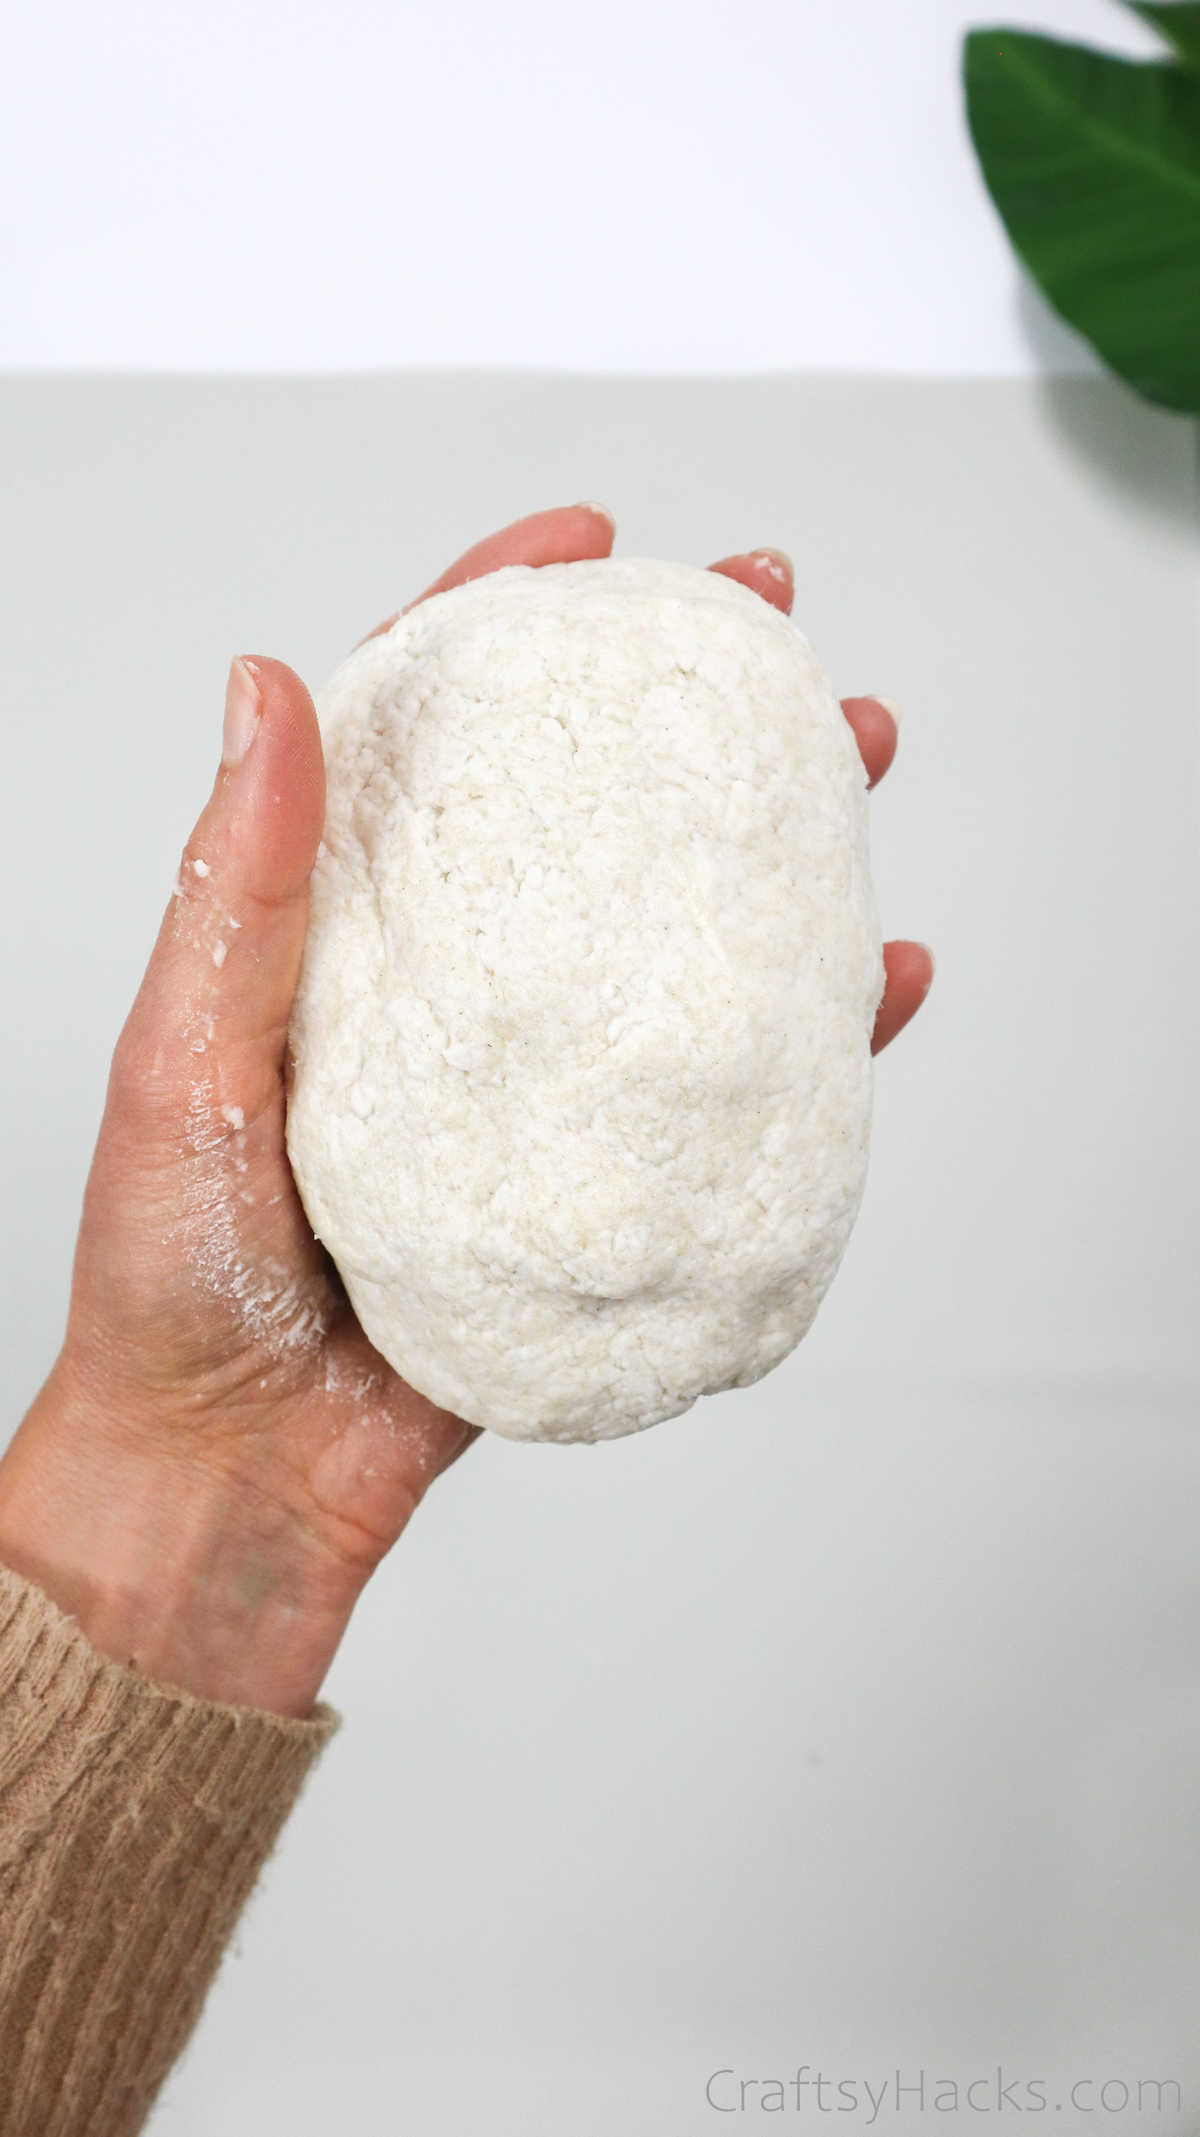
Doesn’t paper mache just take you right back to your childhood? I remember long summer afternoons when my mother and I would get our hands all messy and squishy making our very own paper mache dough from scratch!
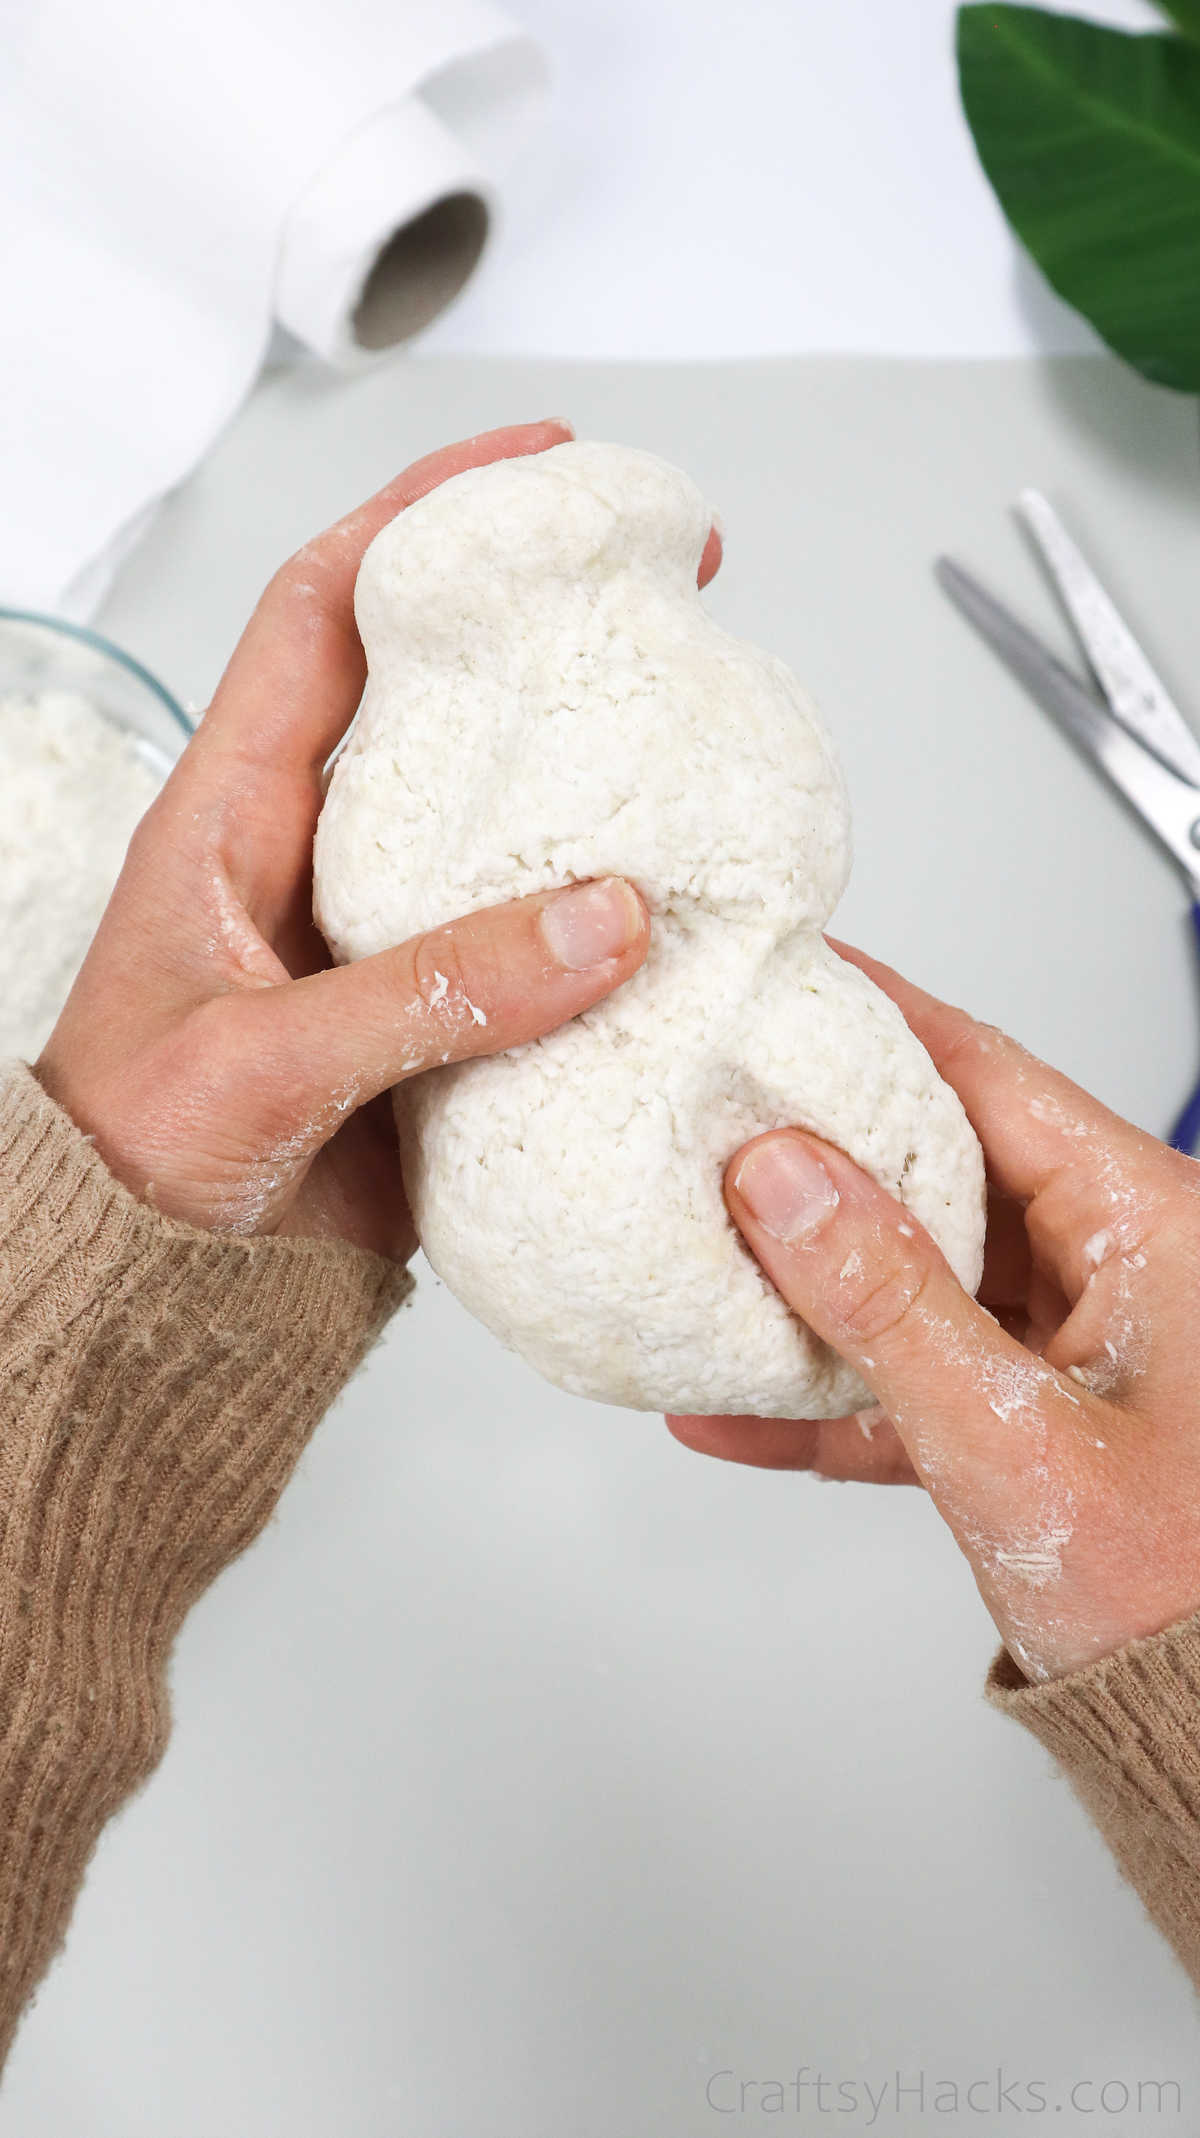
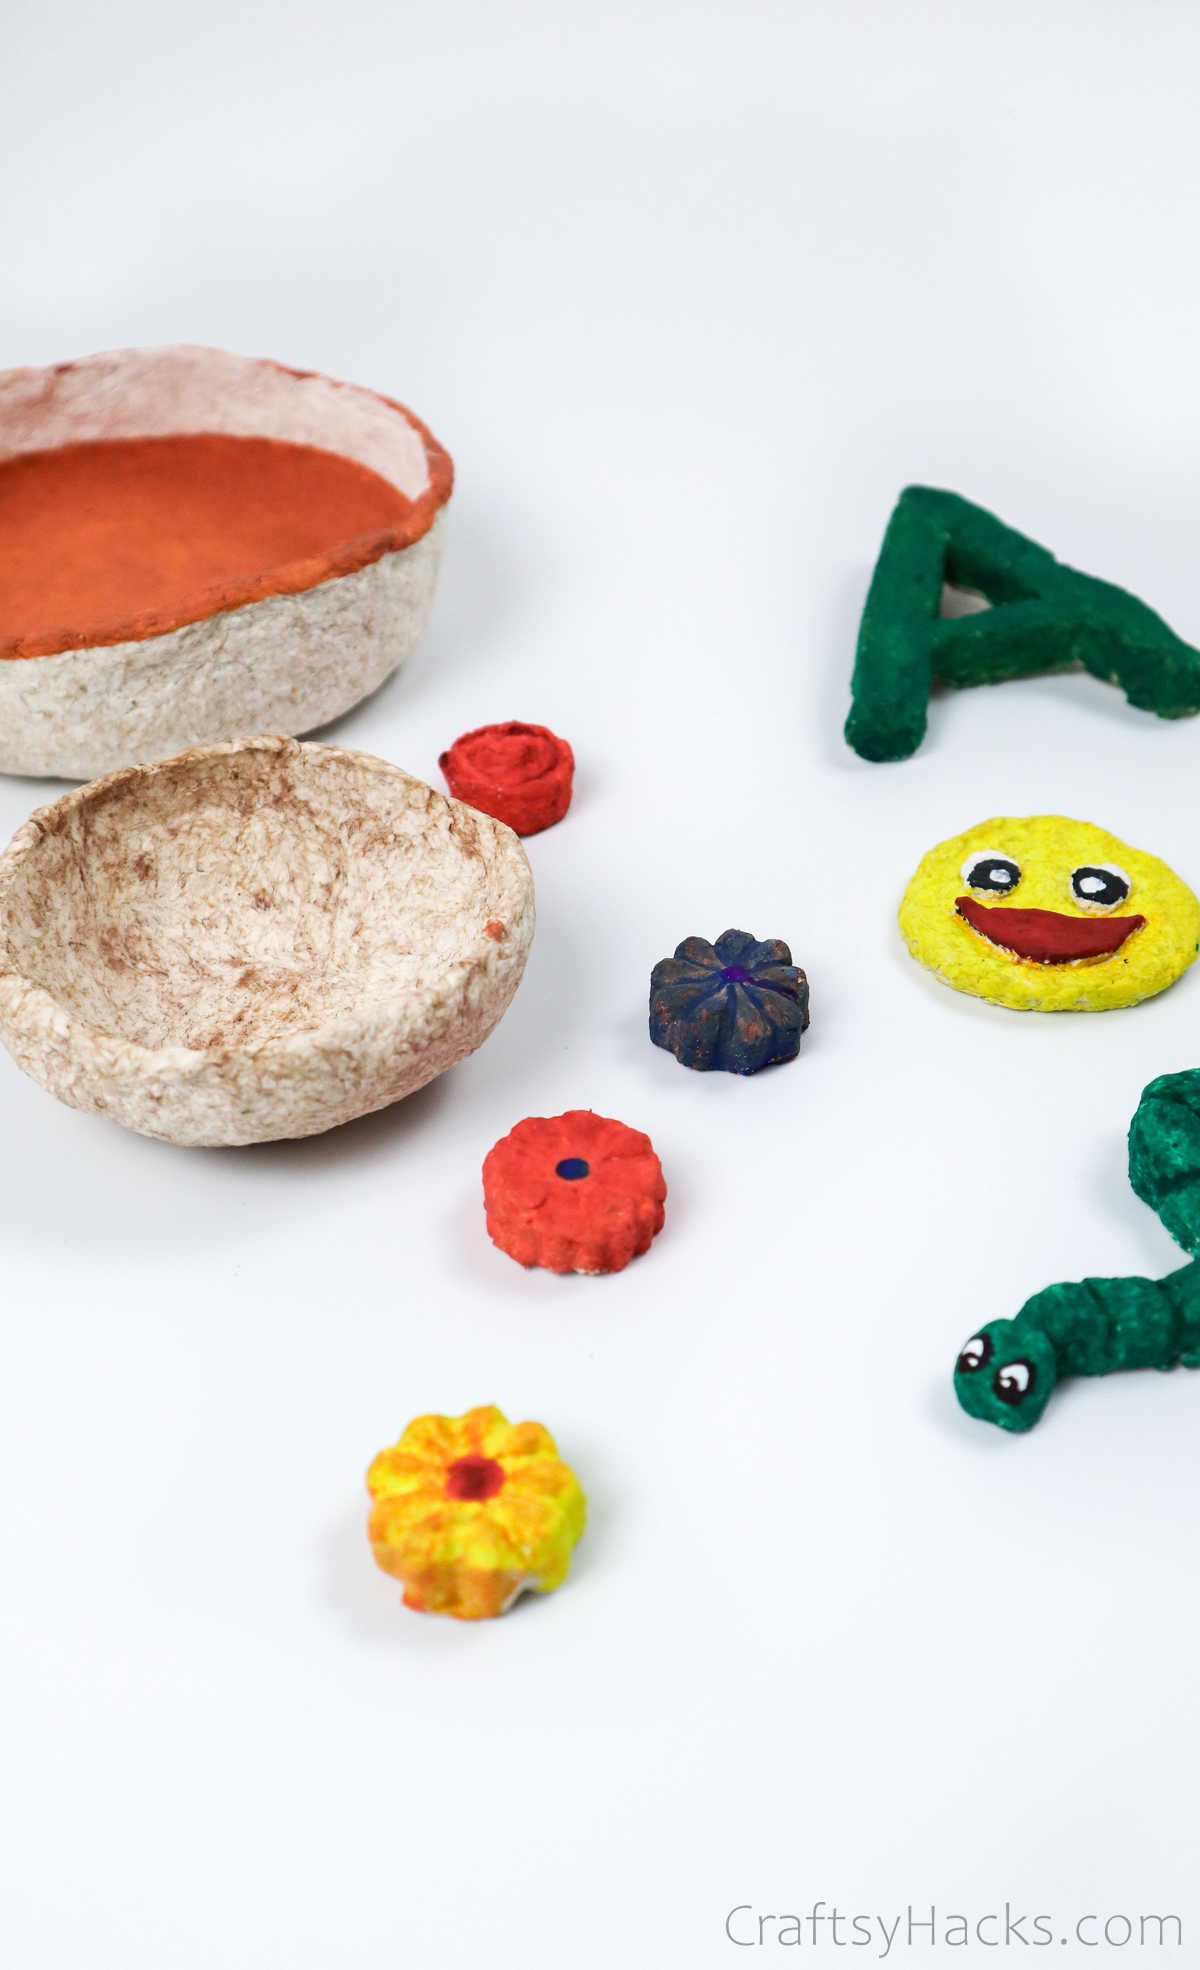
Just making the dough—we called the lumpy paper that and the name stuck—was super fun, but why stop there? You can make a ton of craft items with it, like little trinket bowls, ornaments, and even paper mache alphabets.
Watch Full Tutorial: How to Make Paper Mache
Supplies and Tools You’ll Need for Paper Mache
Here’s a list of supplies and tools you need to make your paper mache dough:
- 1/2 toilet paper roll
- Cheesecloth
- 1/2 glass of water
- 1/2 glass of wheat flour
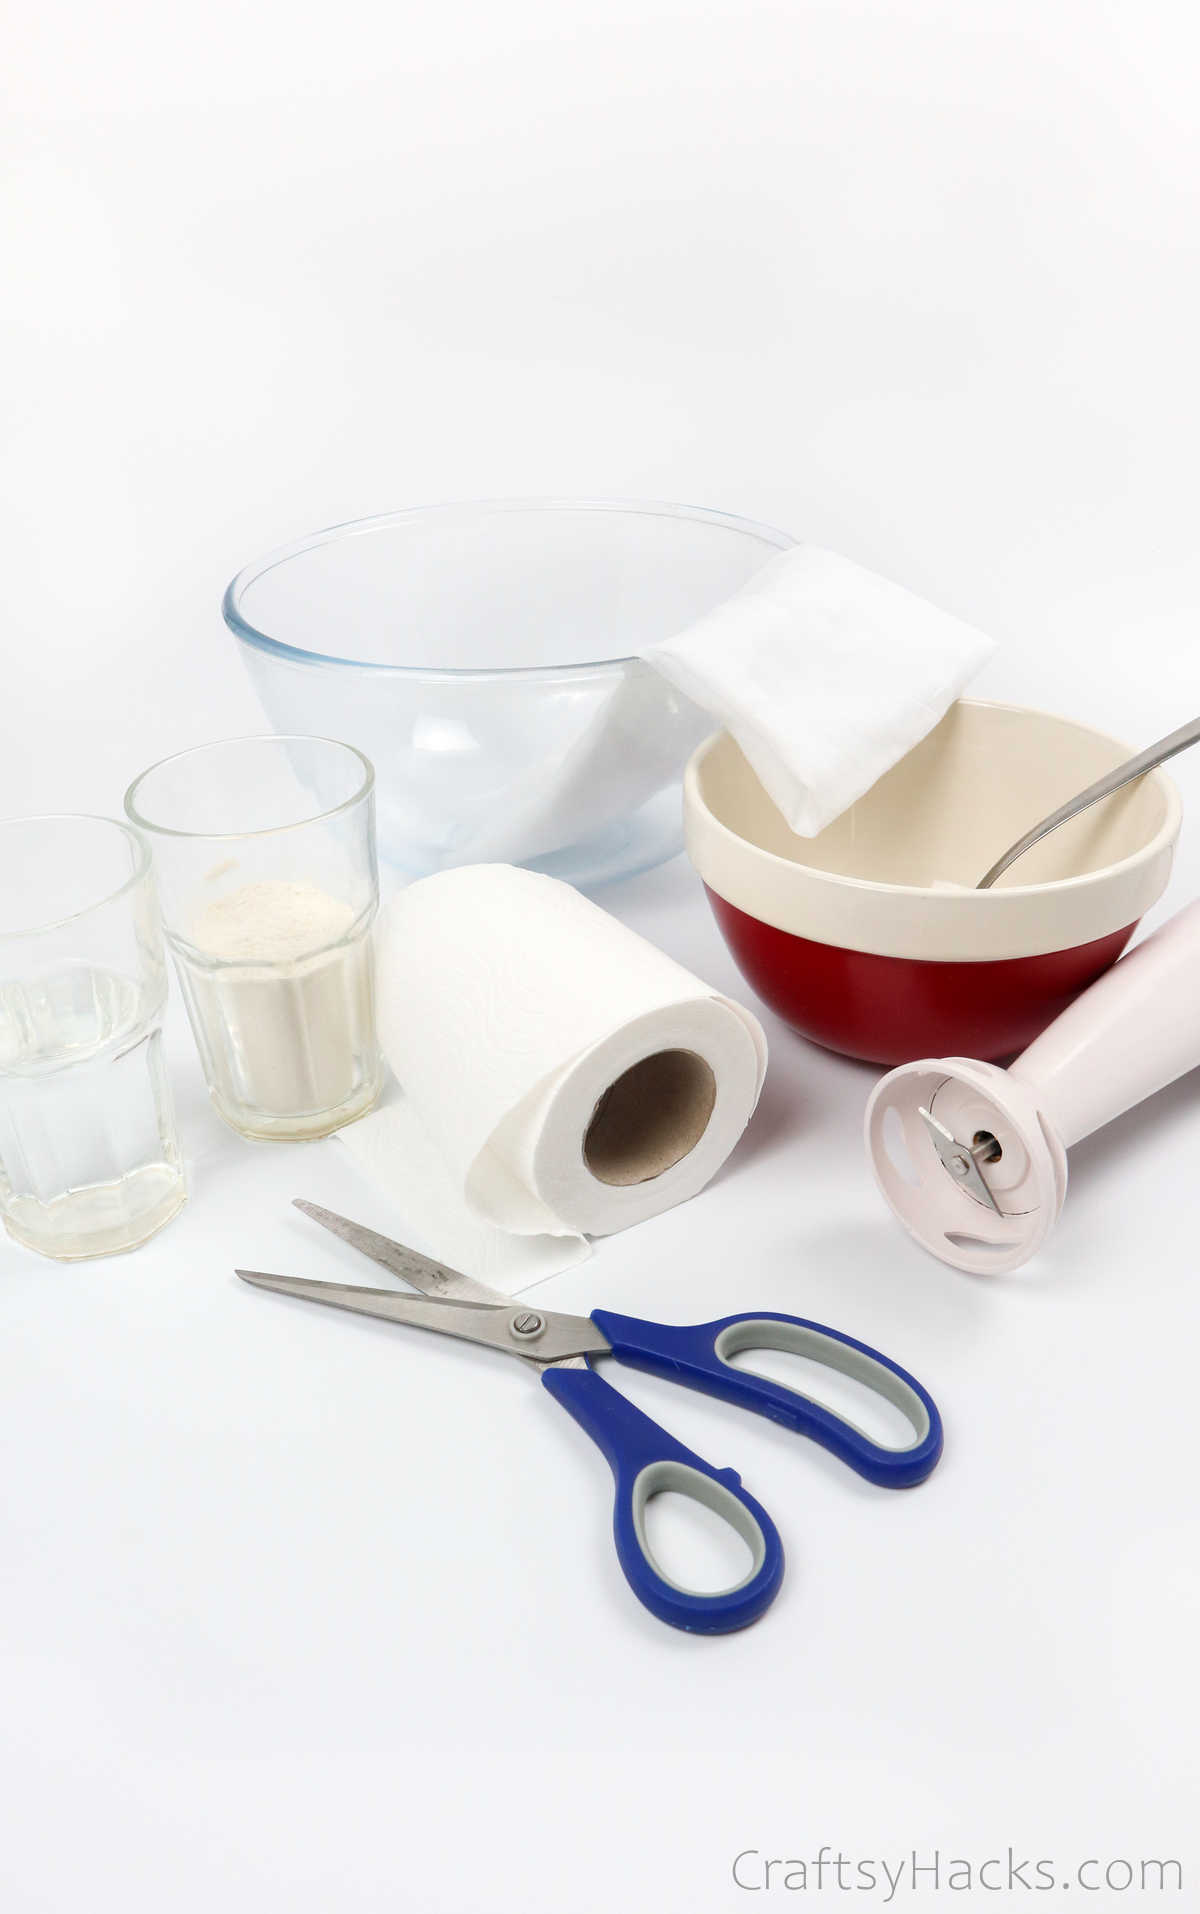
You should definitely consider laying out plenty—and I mean plenty —of paper towels or newspapers around you while you work on this DIY project . It’s going to be messy right from the get-go.
If you’ve laid out newspapers over your work surface, you can get right down to the fun and therapeutic part of this project: shredding paper!
Go ahead and start ripping your paper into smaller pieces before putting them in a bowl.
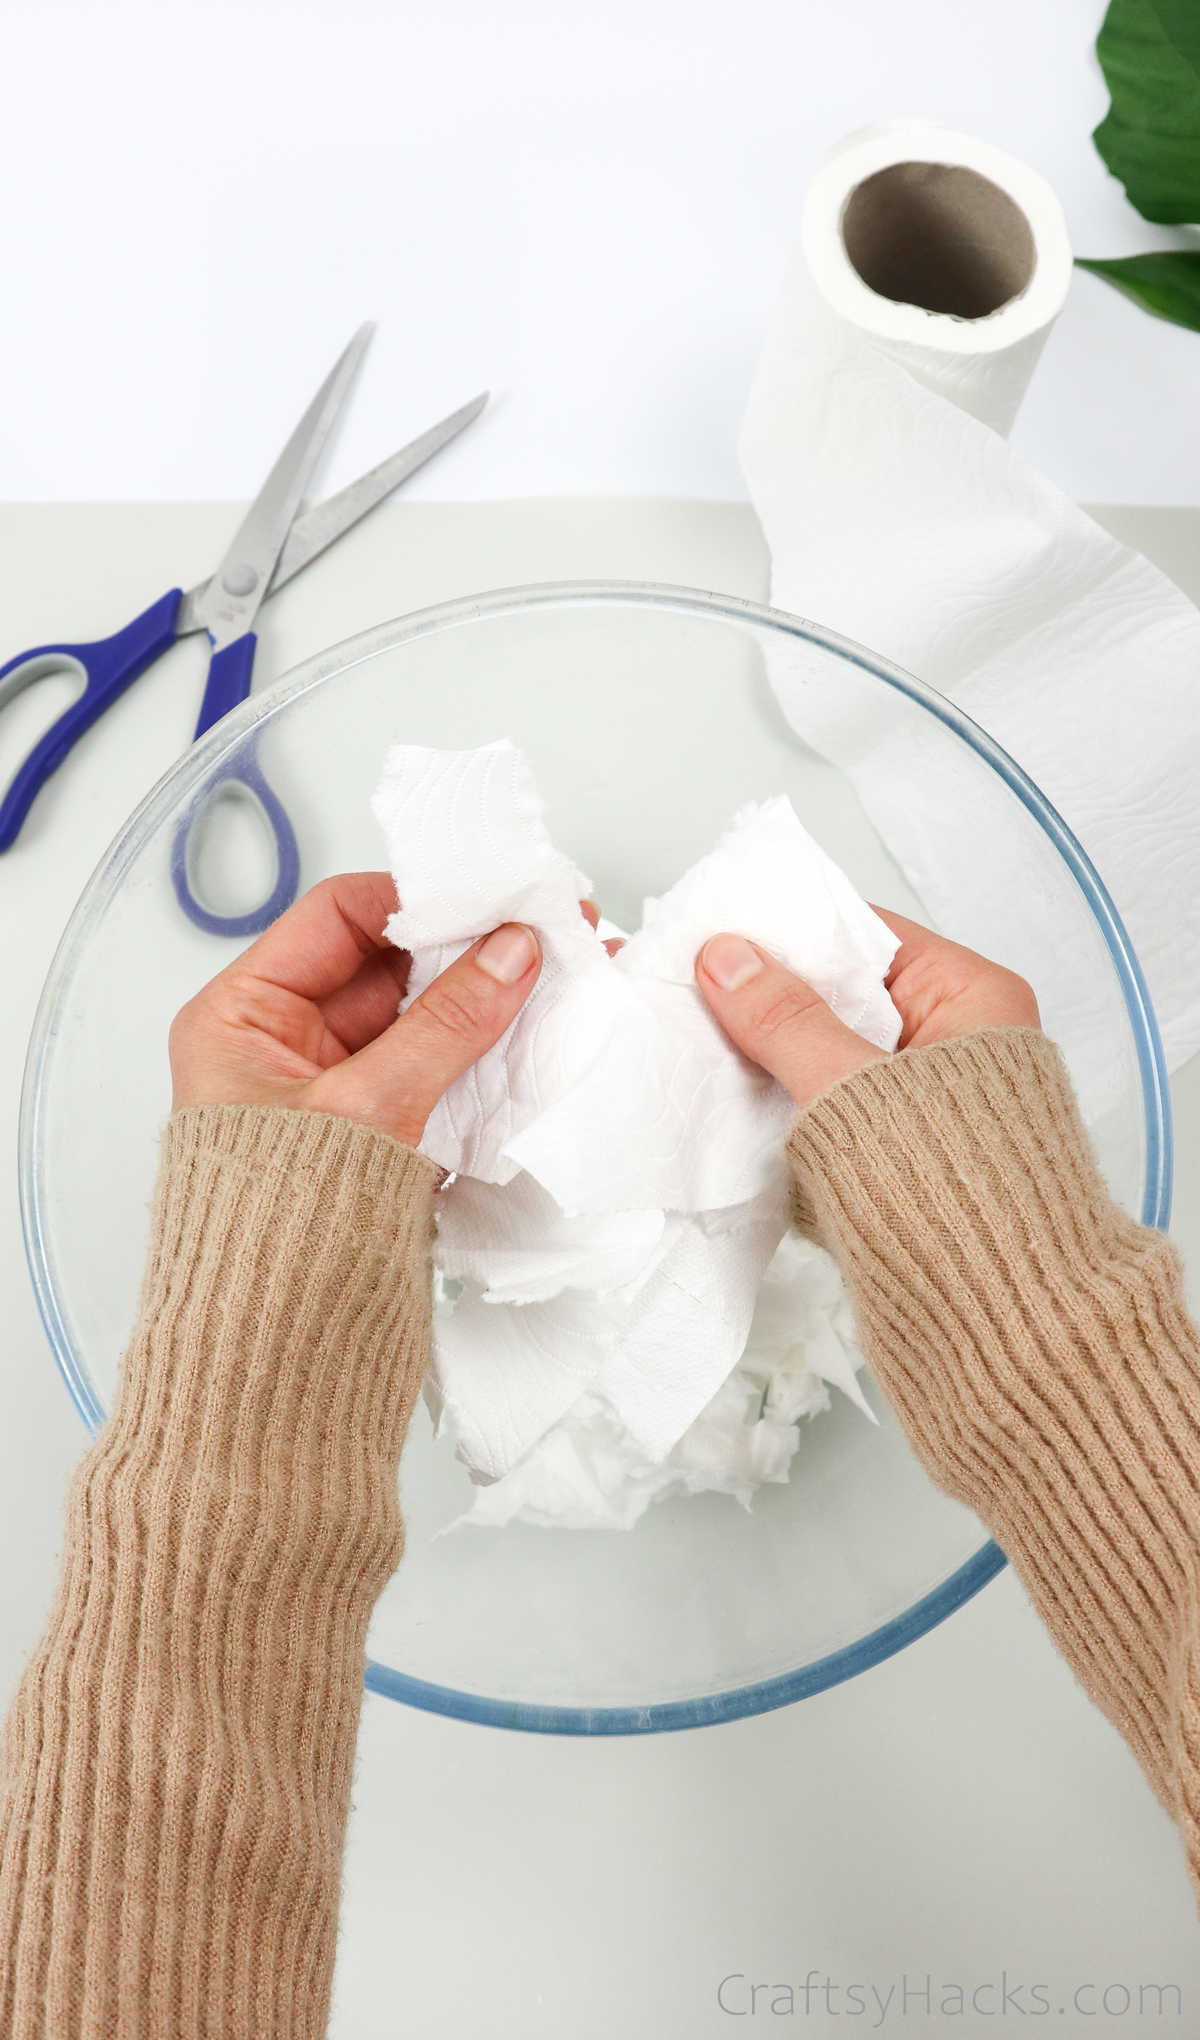
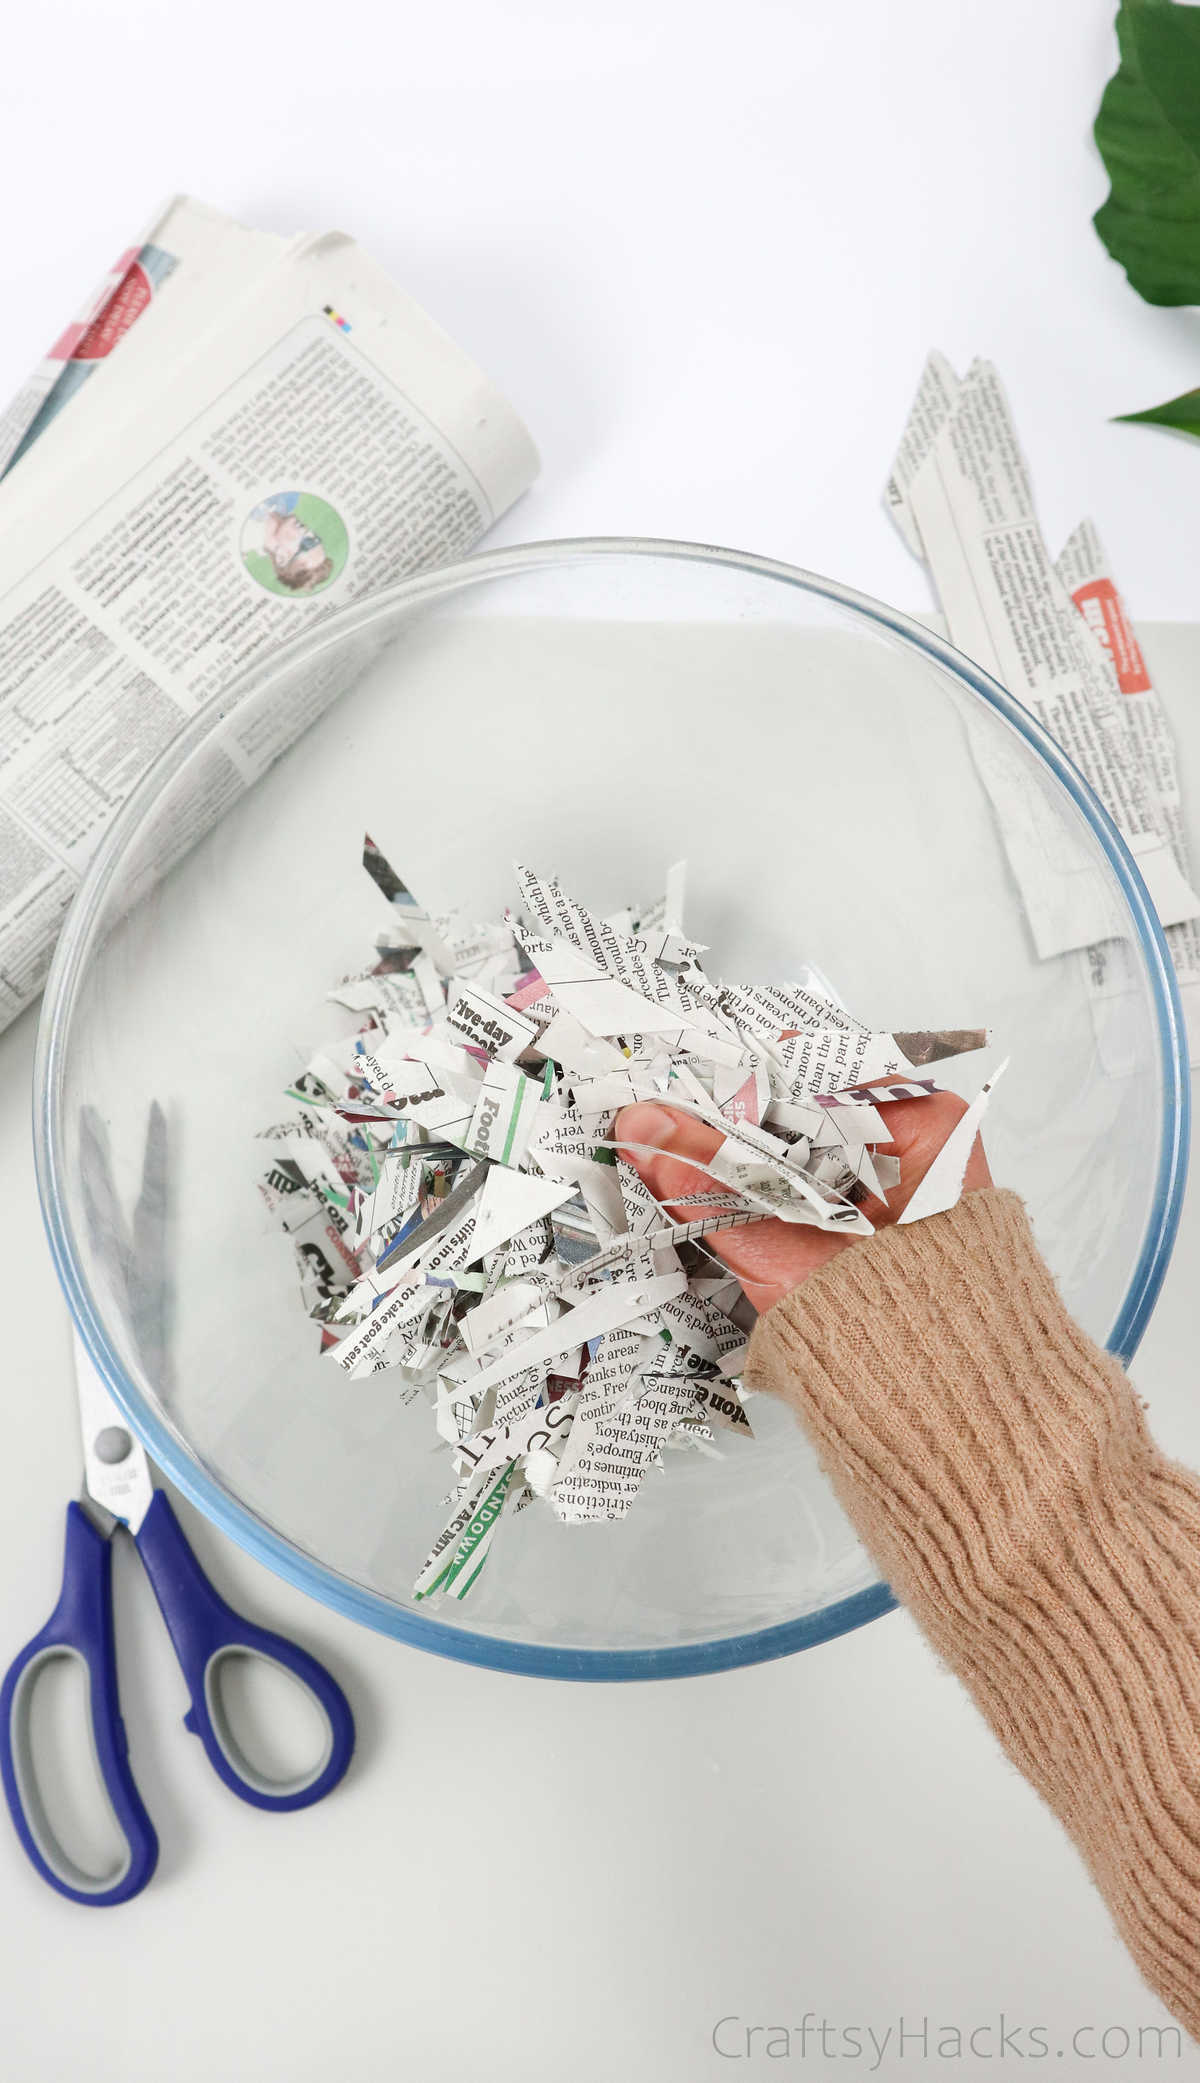
You can definitely use newspapers, as well. Just remember to tear the newspaper into really small pieces as the dough will end up thicker and harder if you don’t.
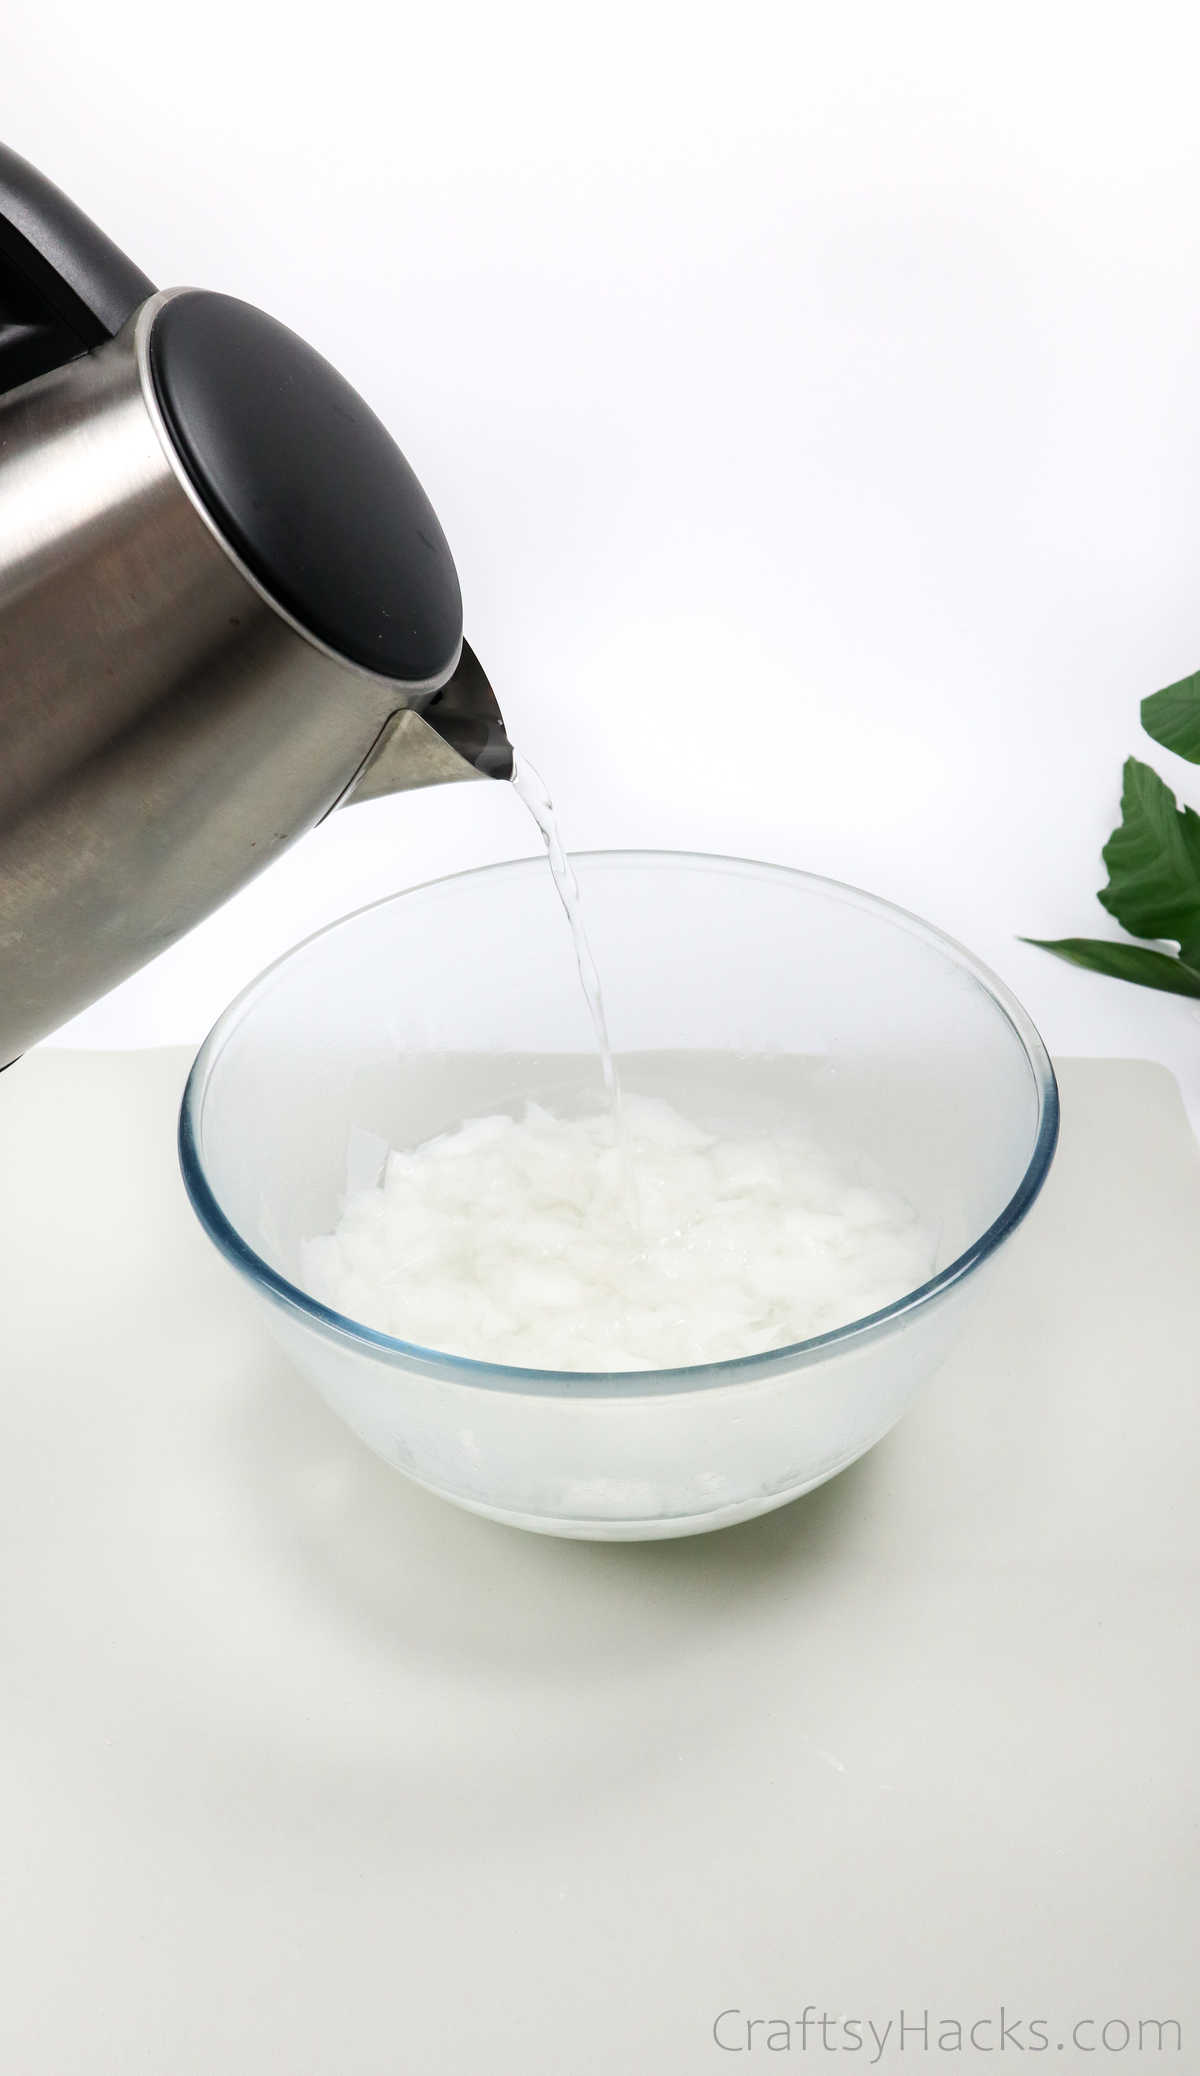
While you’re shredding the paper, put a kettle on. It’s not just to make yourself a cup of tea, although you definitely should. You’re going to pour boiling water over your shredded paper and let it sit for a couple of hours.
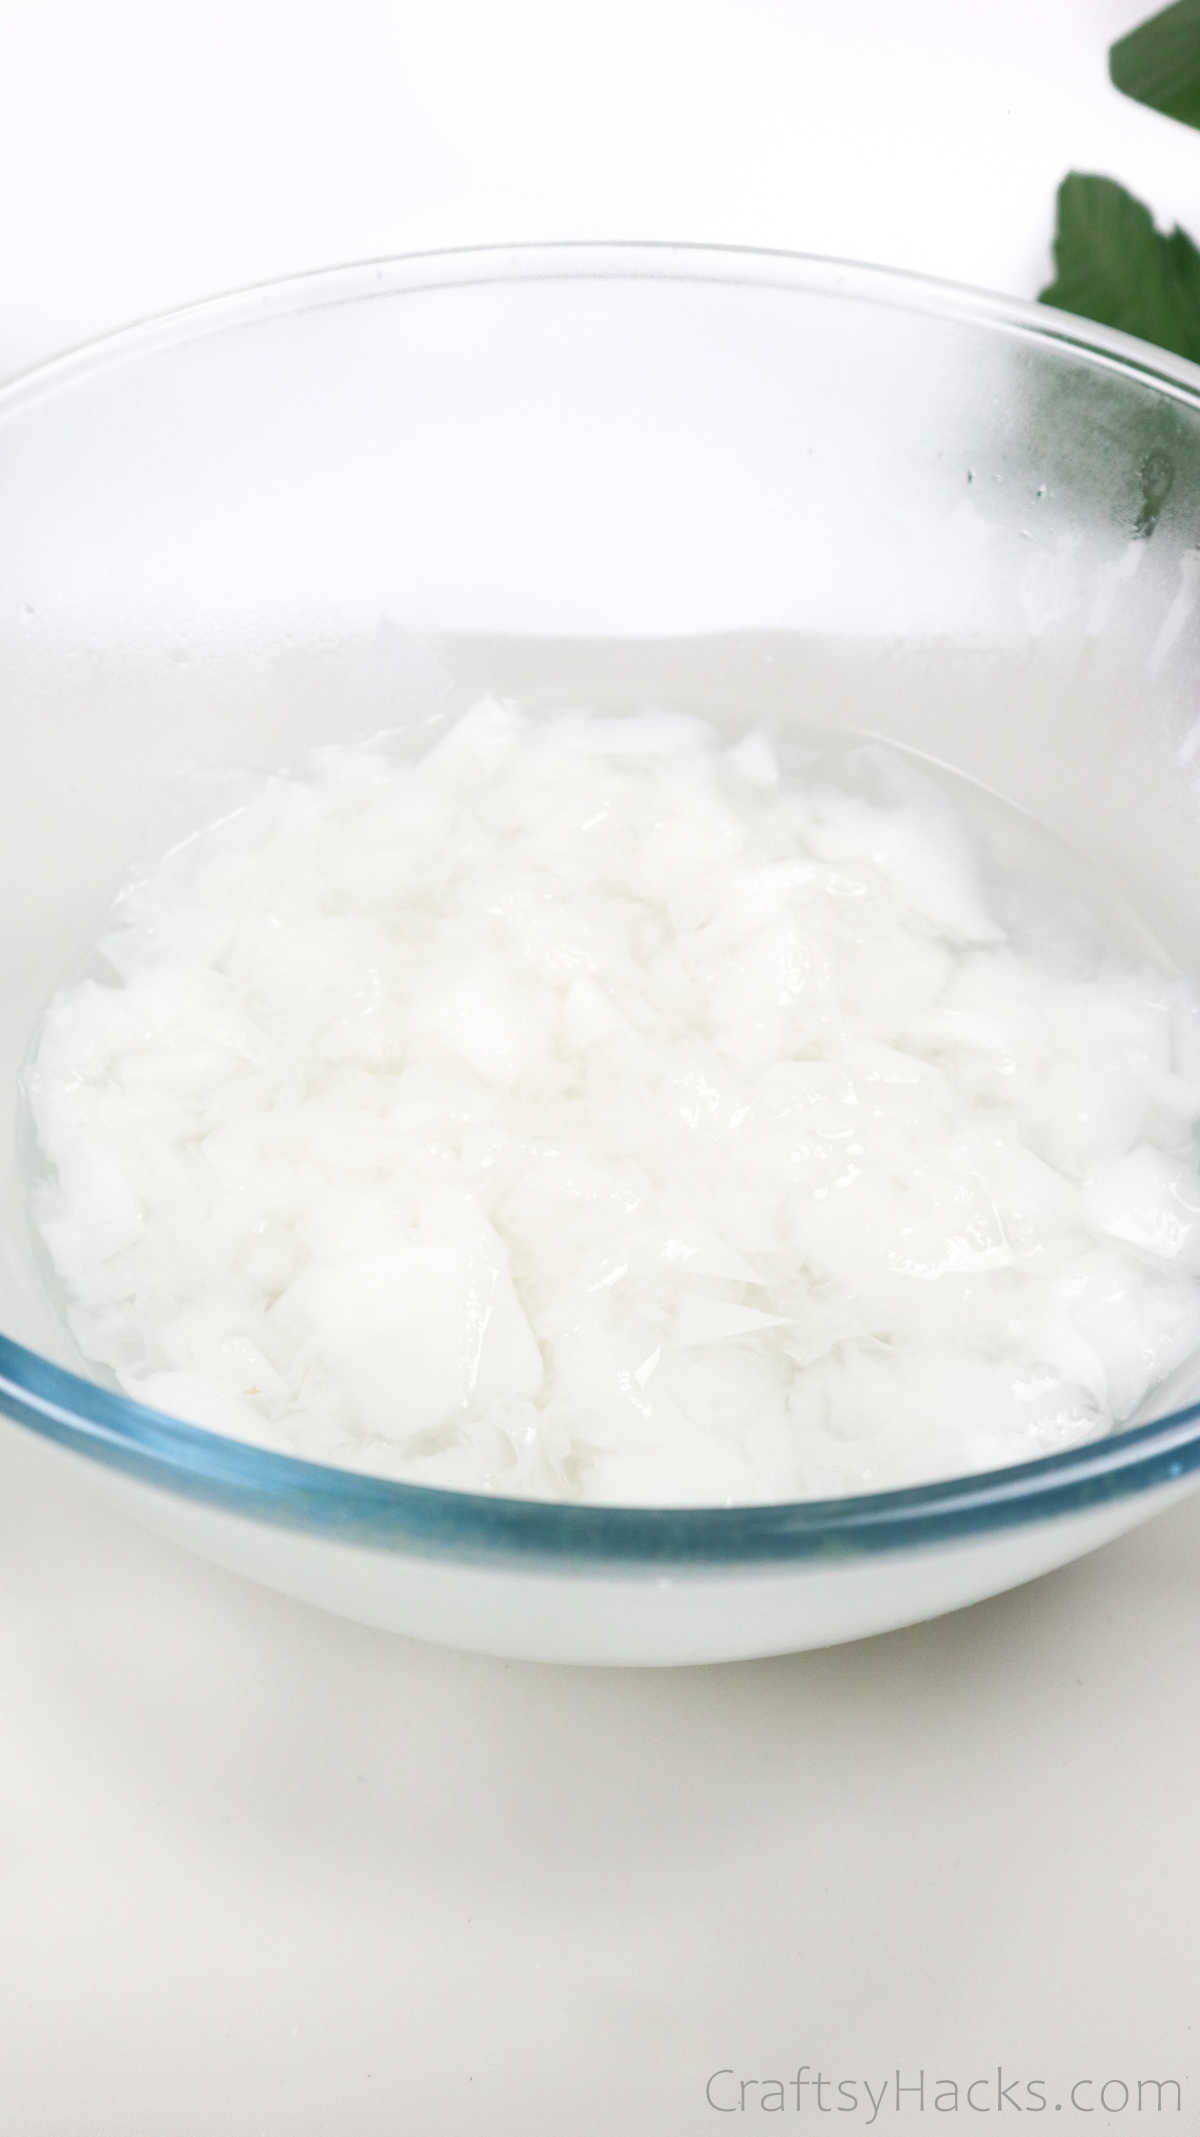
The hot water helps with breaking down the cellulose, and your paper will get all soft and squishy. Don’t skip this step, though. When you let the paper sit in the boiling water, your dough will end up more pliant.
Also, if you use newspaper, then you will have to let it sit in the water overnight. Newspaper is much thicker and needs more time to soften and for the cellulose to break down.
Next, when you’re sure your paper has been sitting in the water long enough, grab a hand blender and mush everything into pulp. You will either love the squelching sounds you’ll hear, or you won’t.
Me? I get a kick out of it!
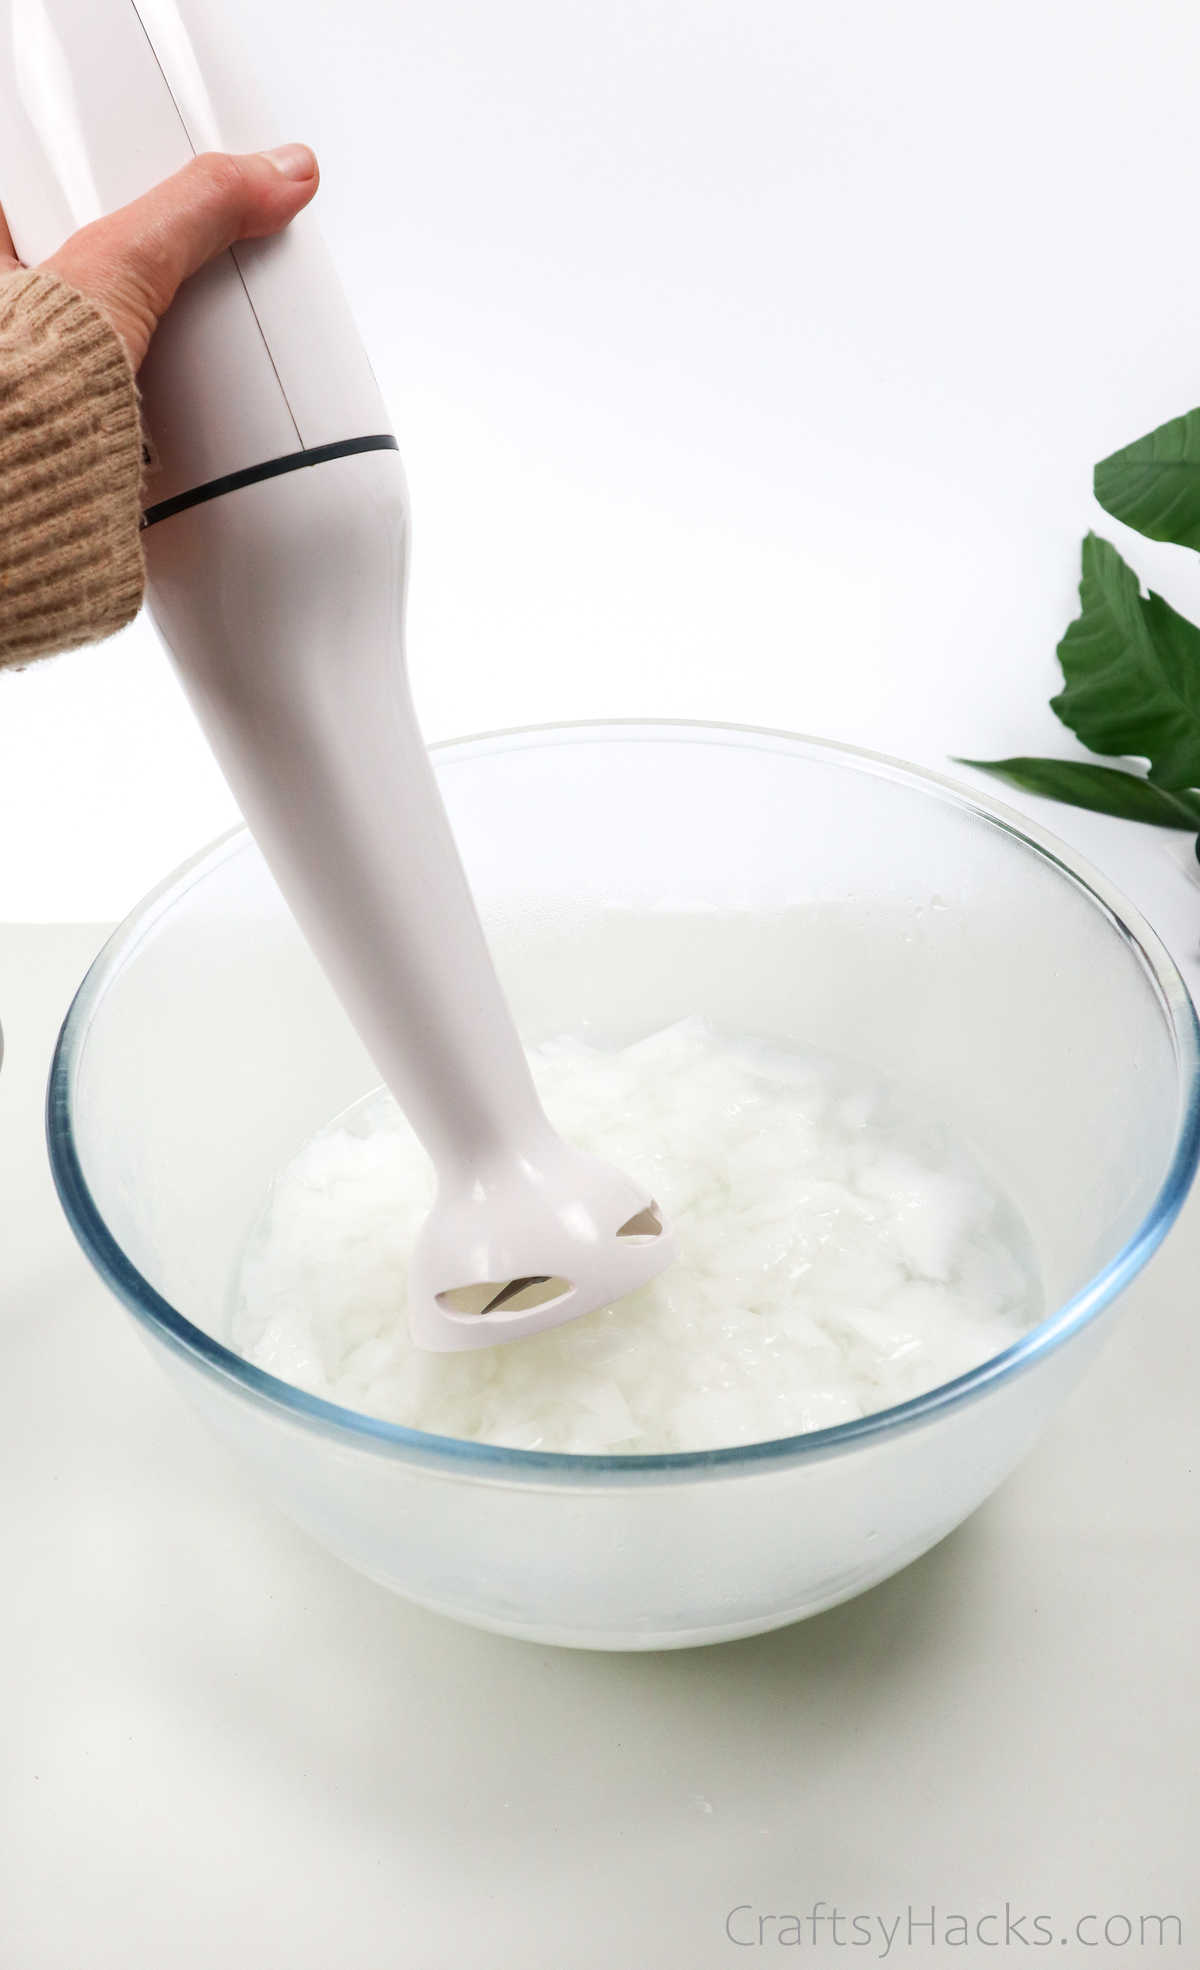
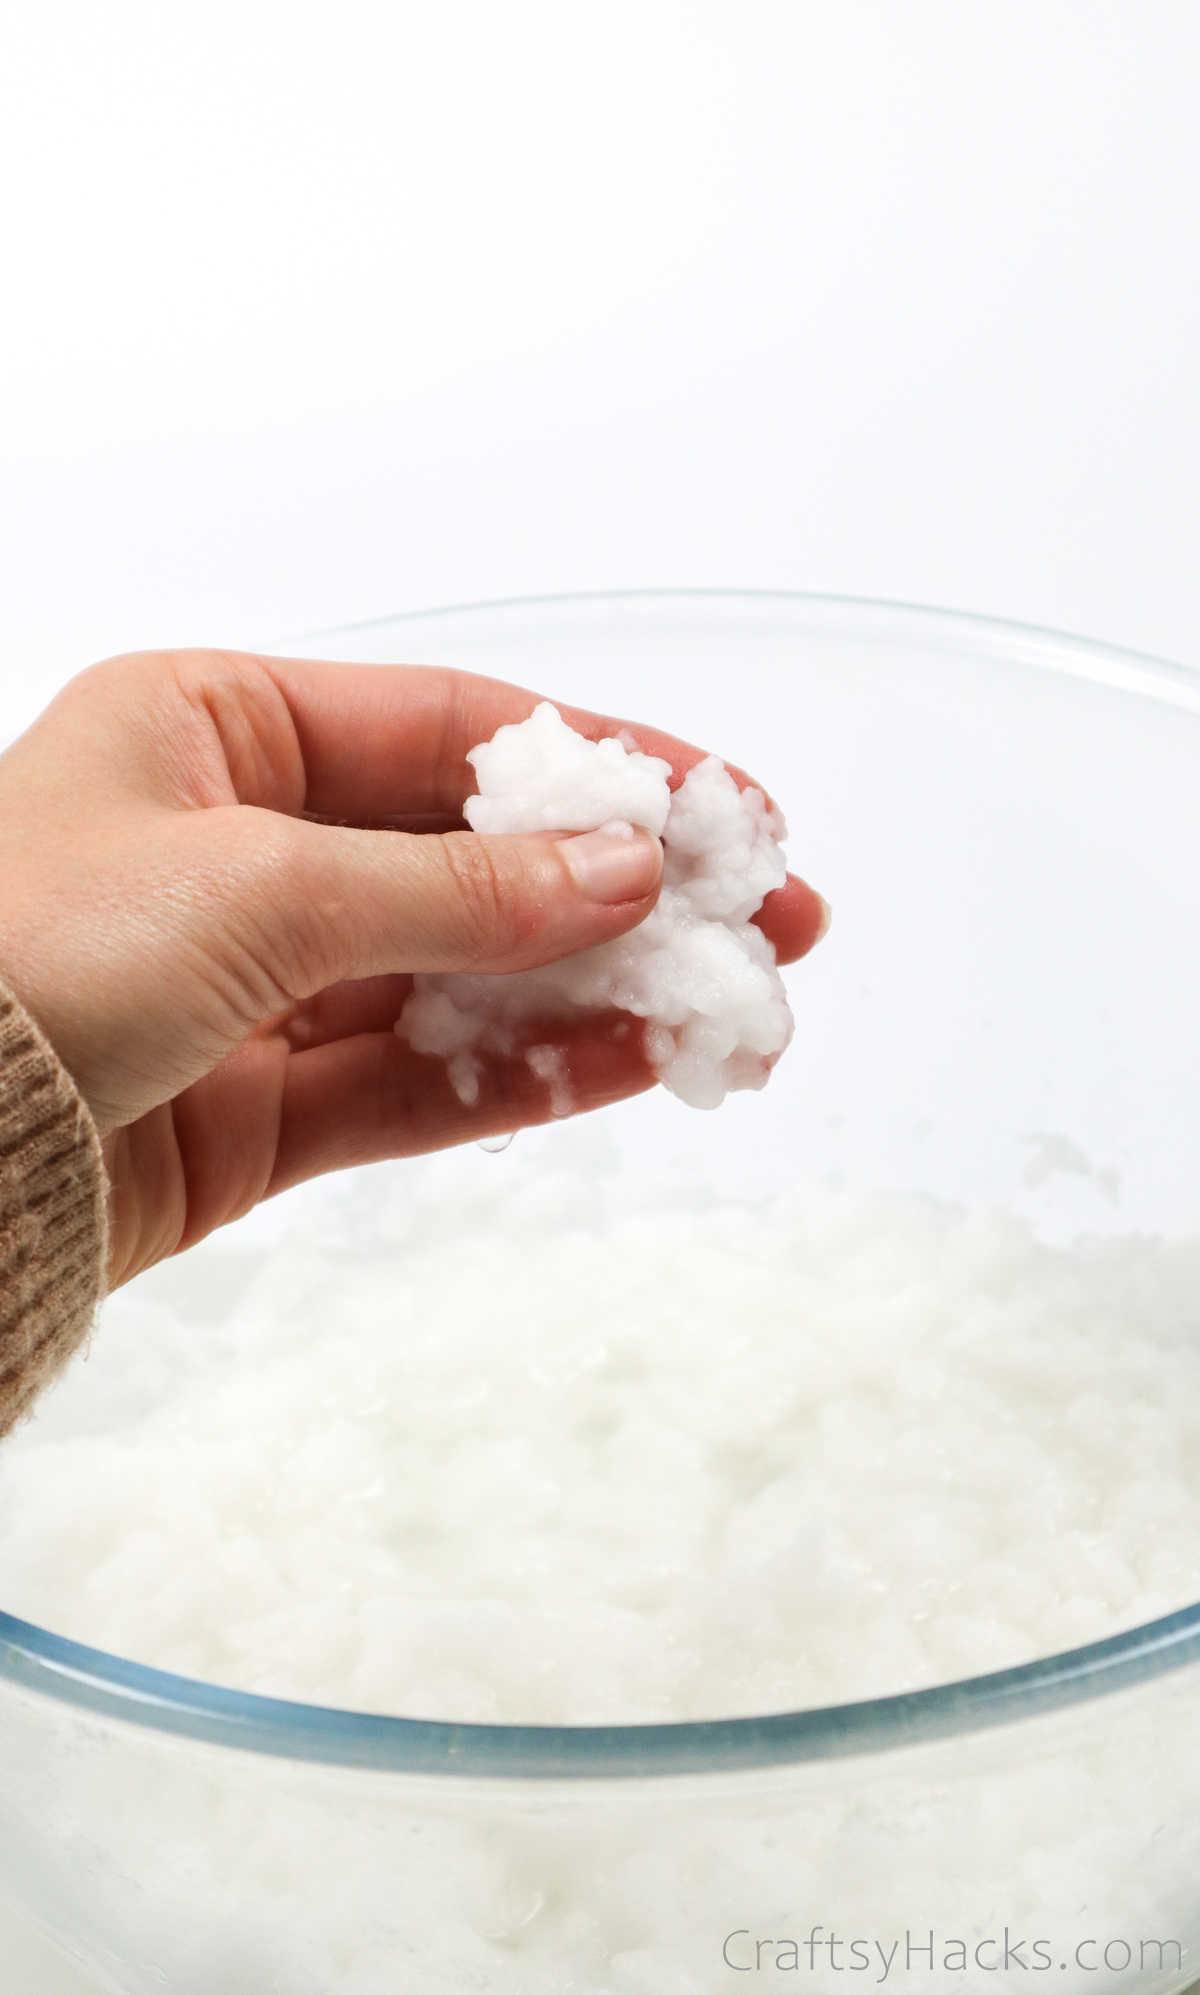
Stop pulping the paper when it looks something like this.
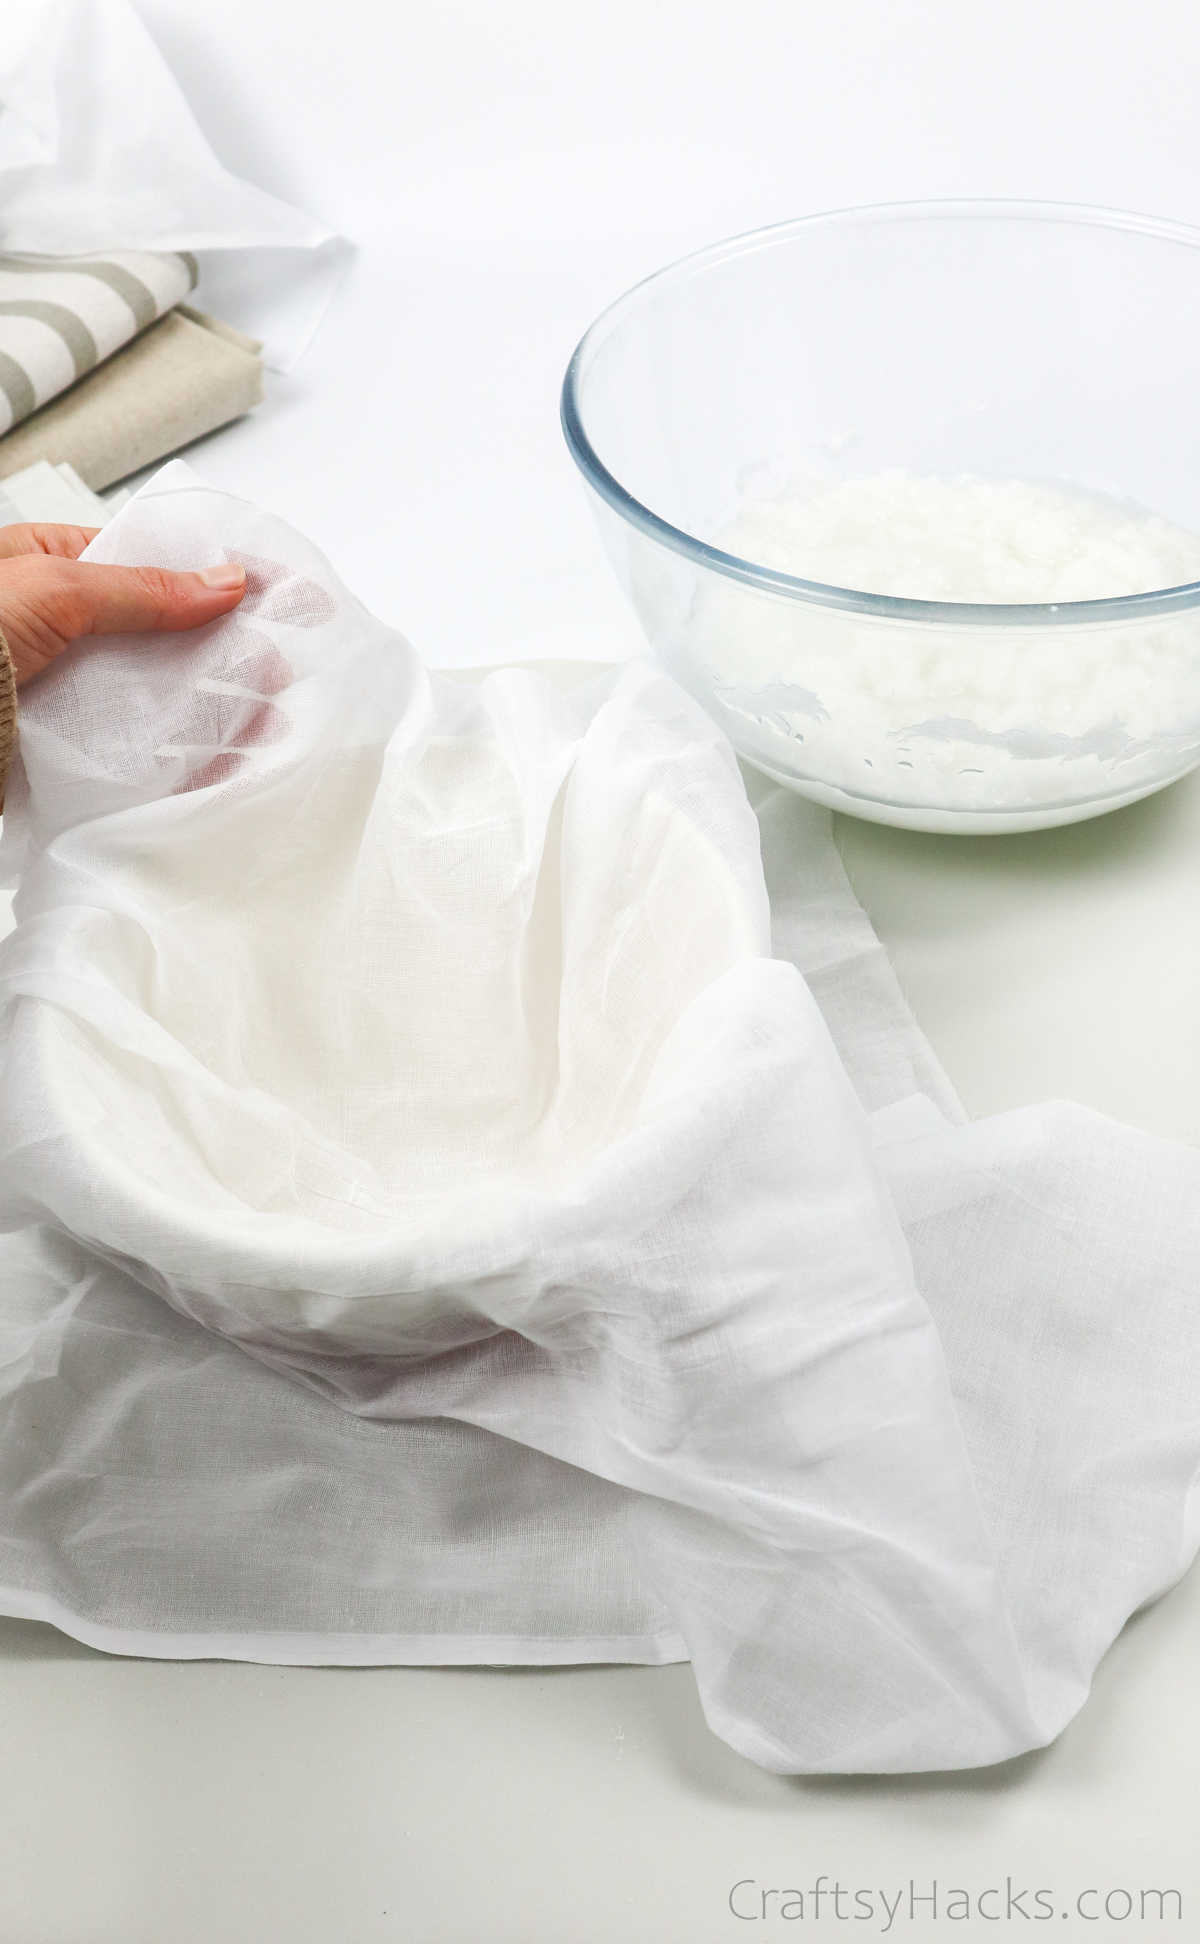
It’s time to strain your pulp and drain all that water. Place a cheesecloth over a big bowl and carefully pour your paper pulp into the cloth.
Gather the ends and squeeze the excess water out of the pulp into the bowl below. If you think you’ve squeezed enough, just do it again, just to be extra sure!
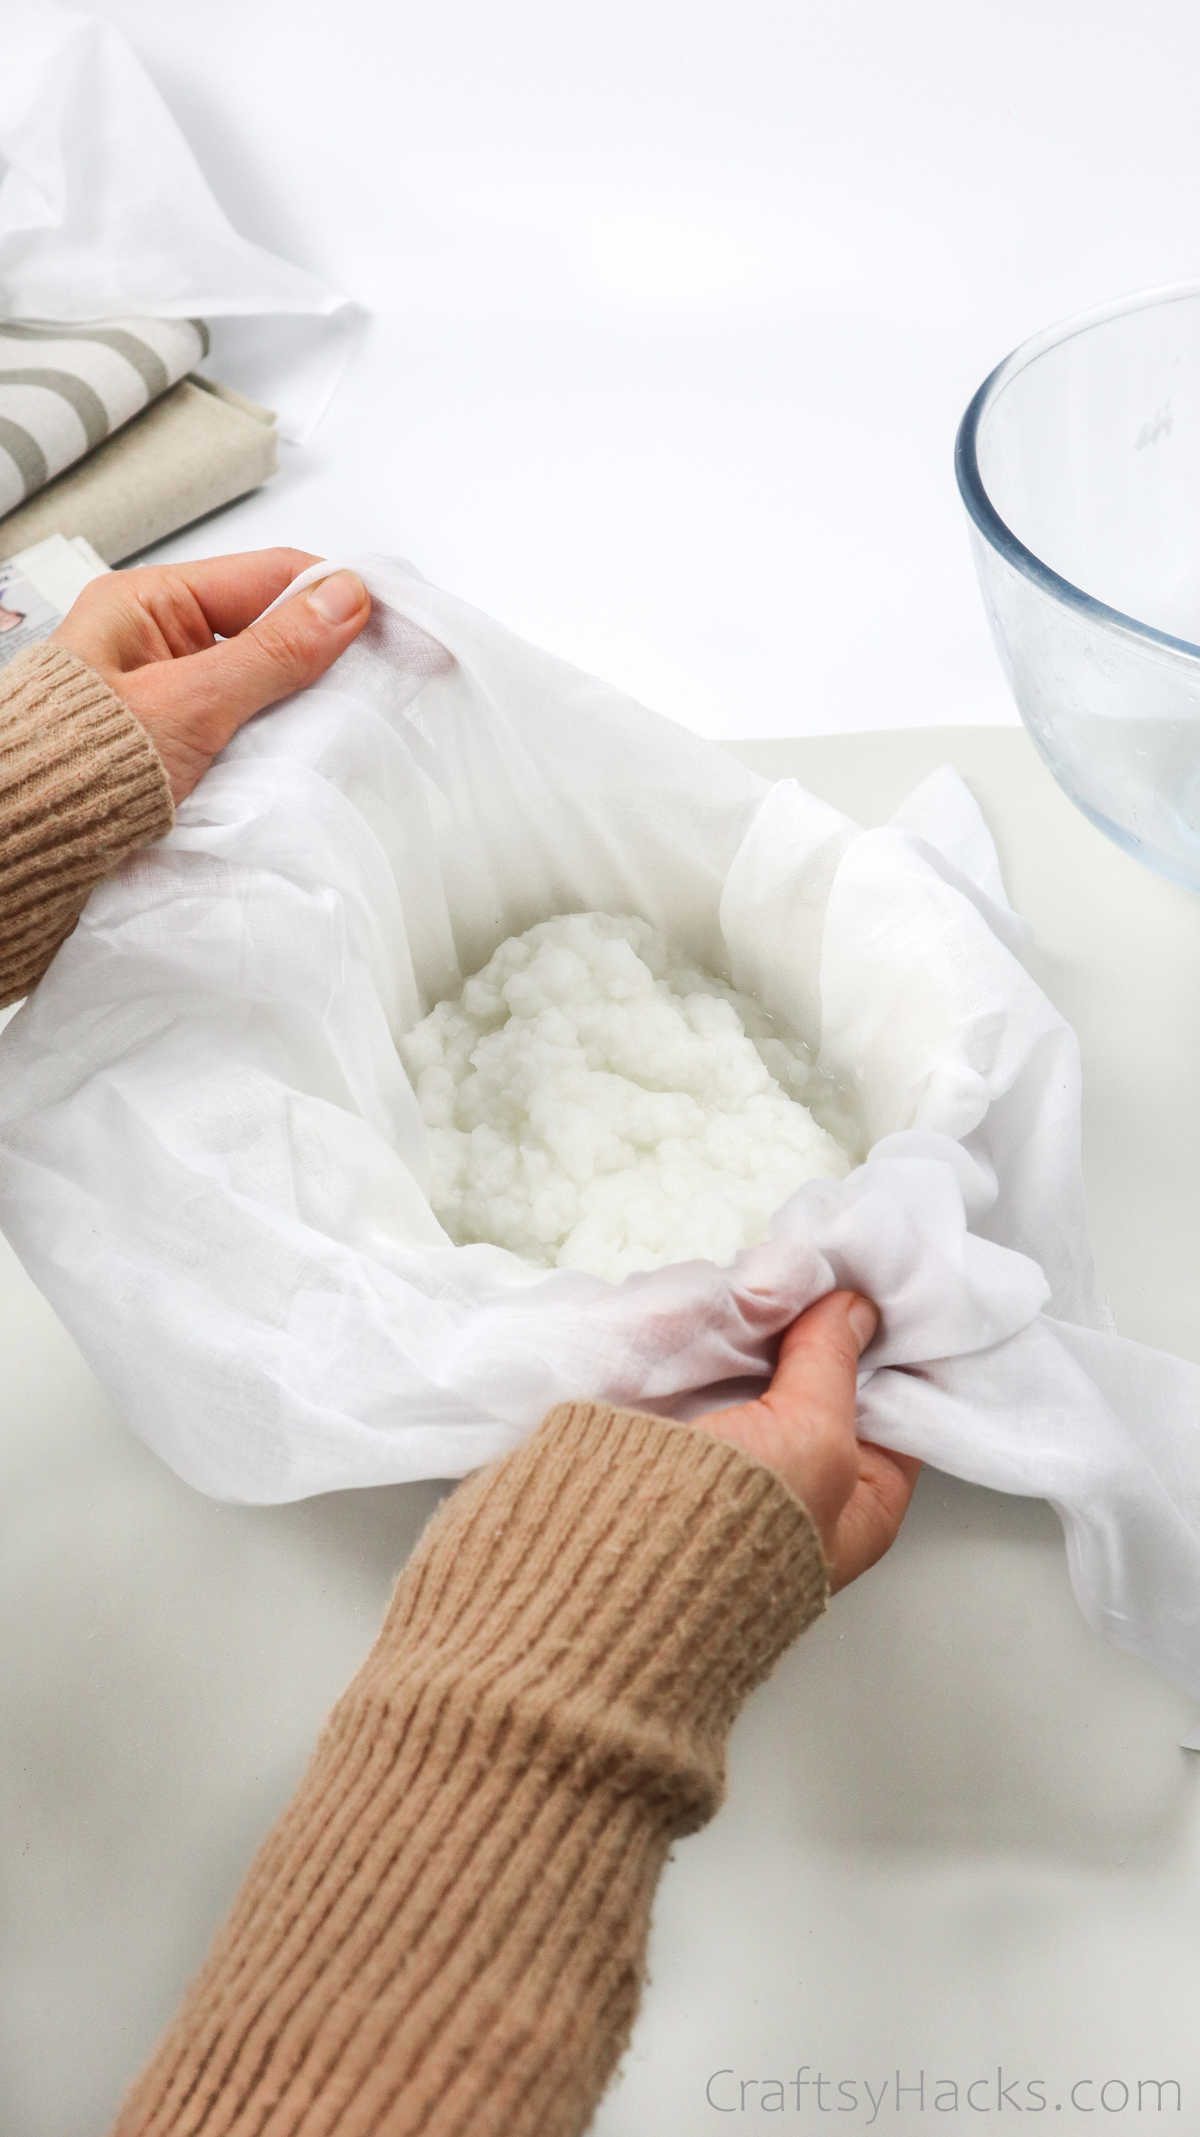
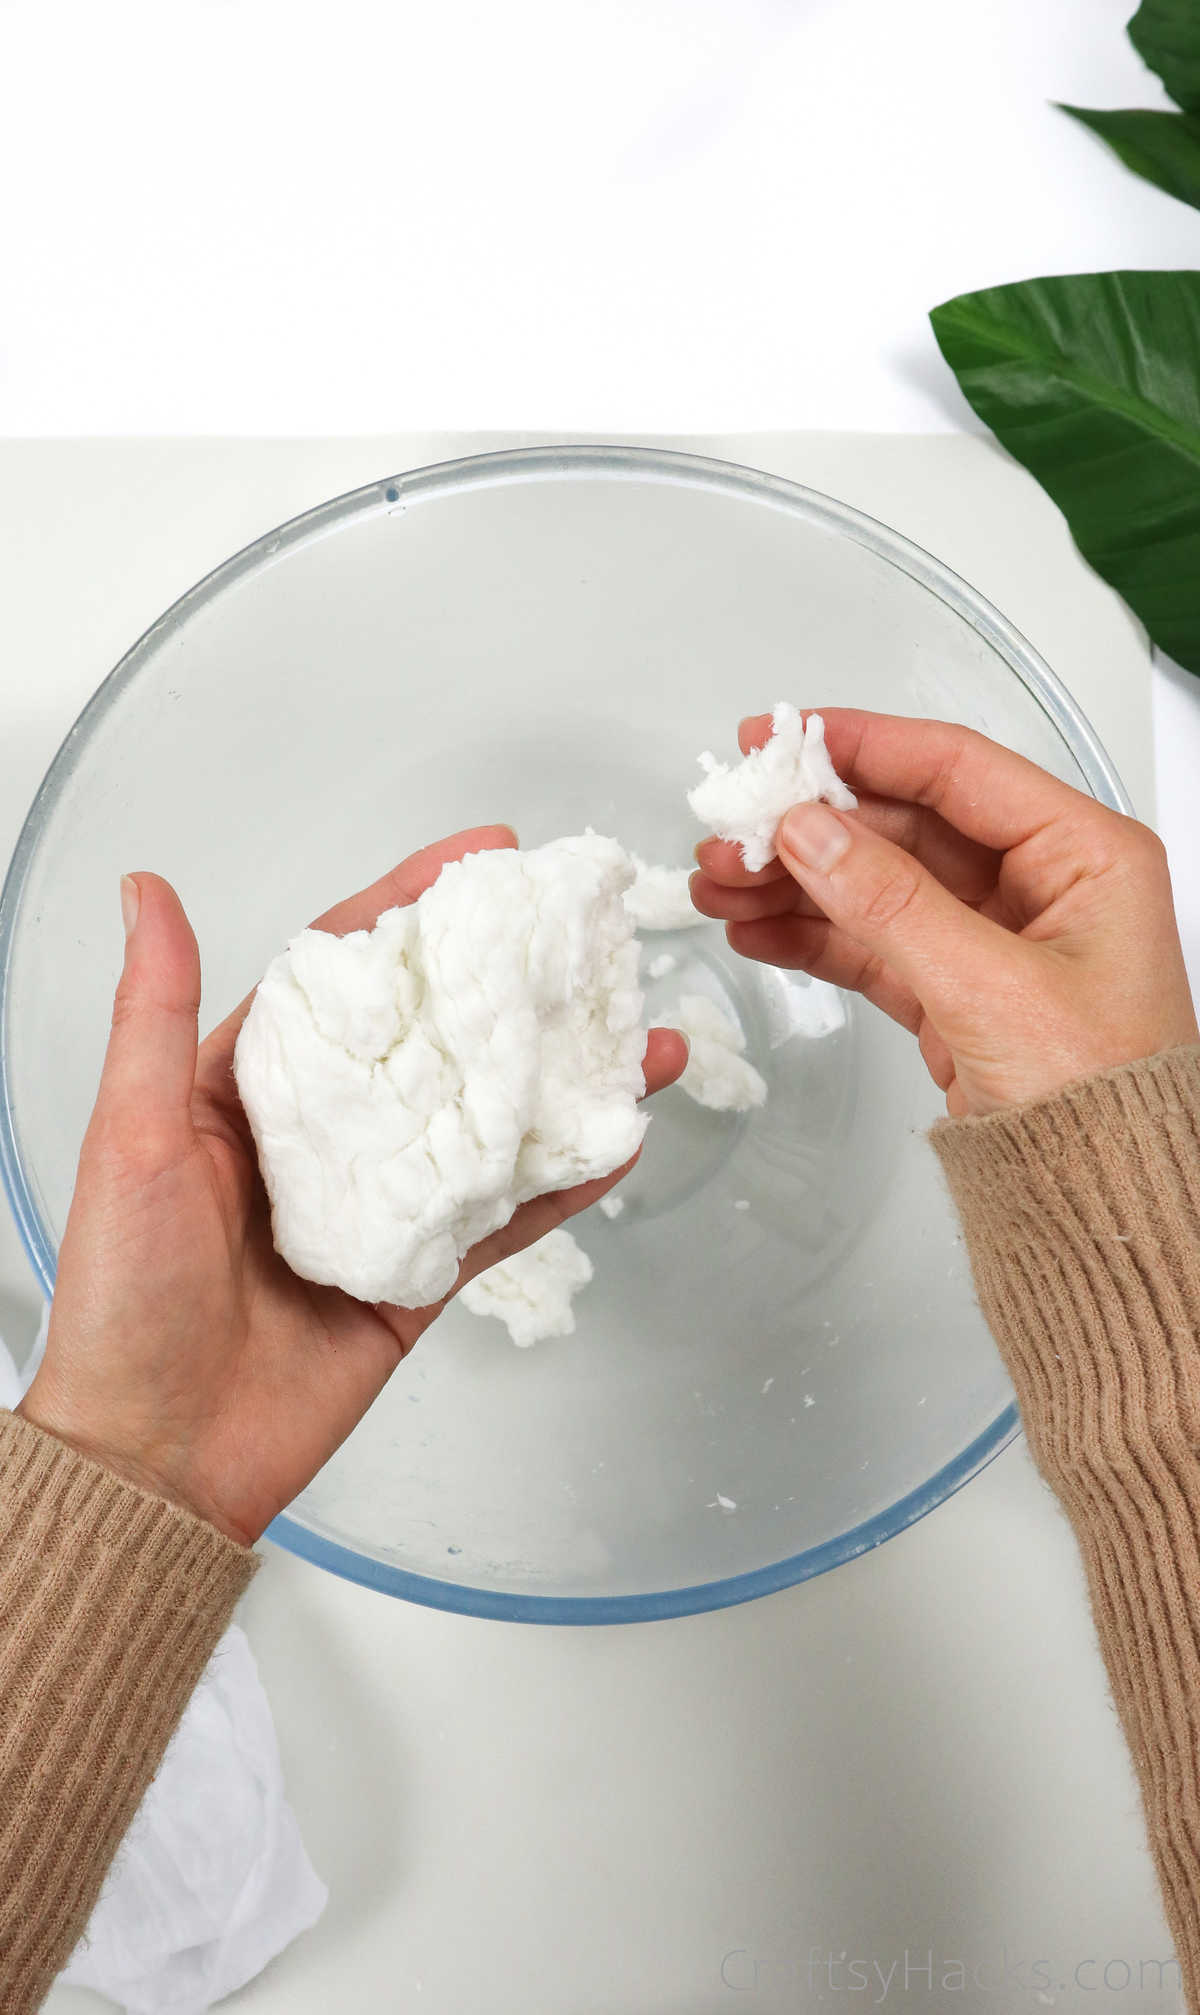
When you take the pulp out of the cheesecloth, it should look something like this. Break the pulp into little pieces and put them into a bowl.
If I didn’t know better, I’d say it looks an awful lot like ricotta or cottage cheese.
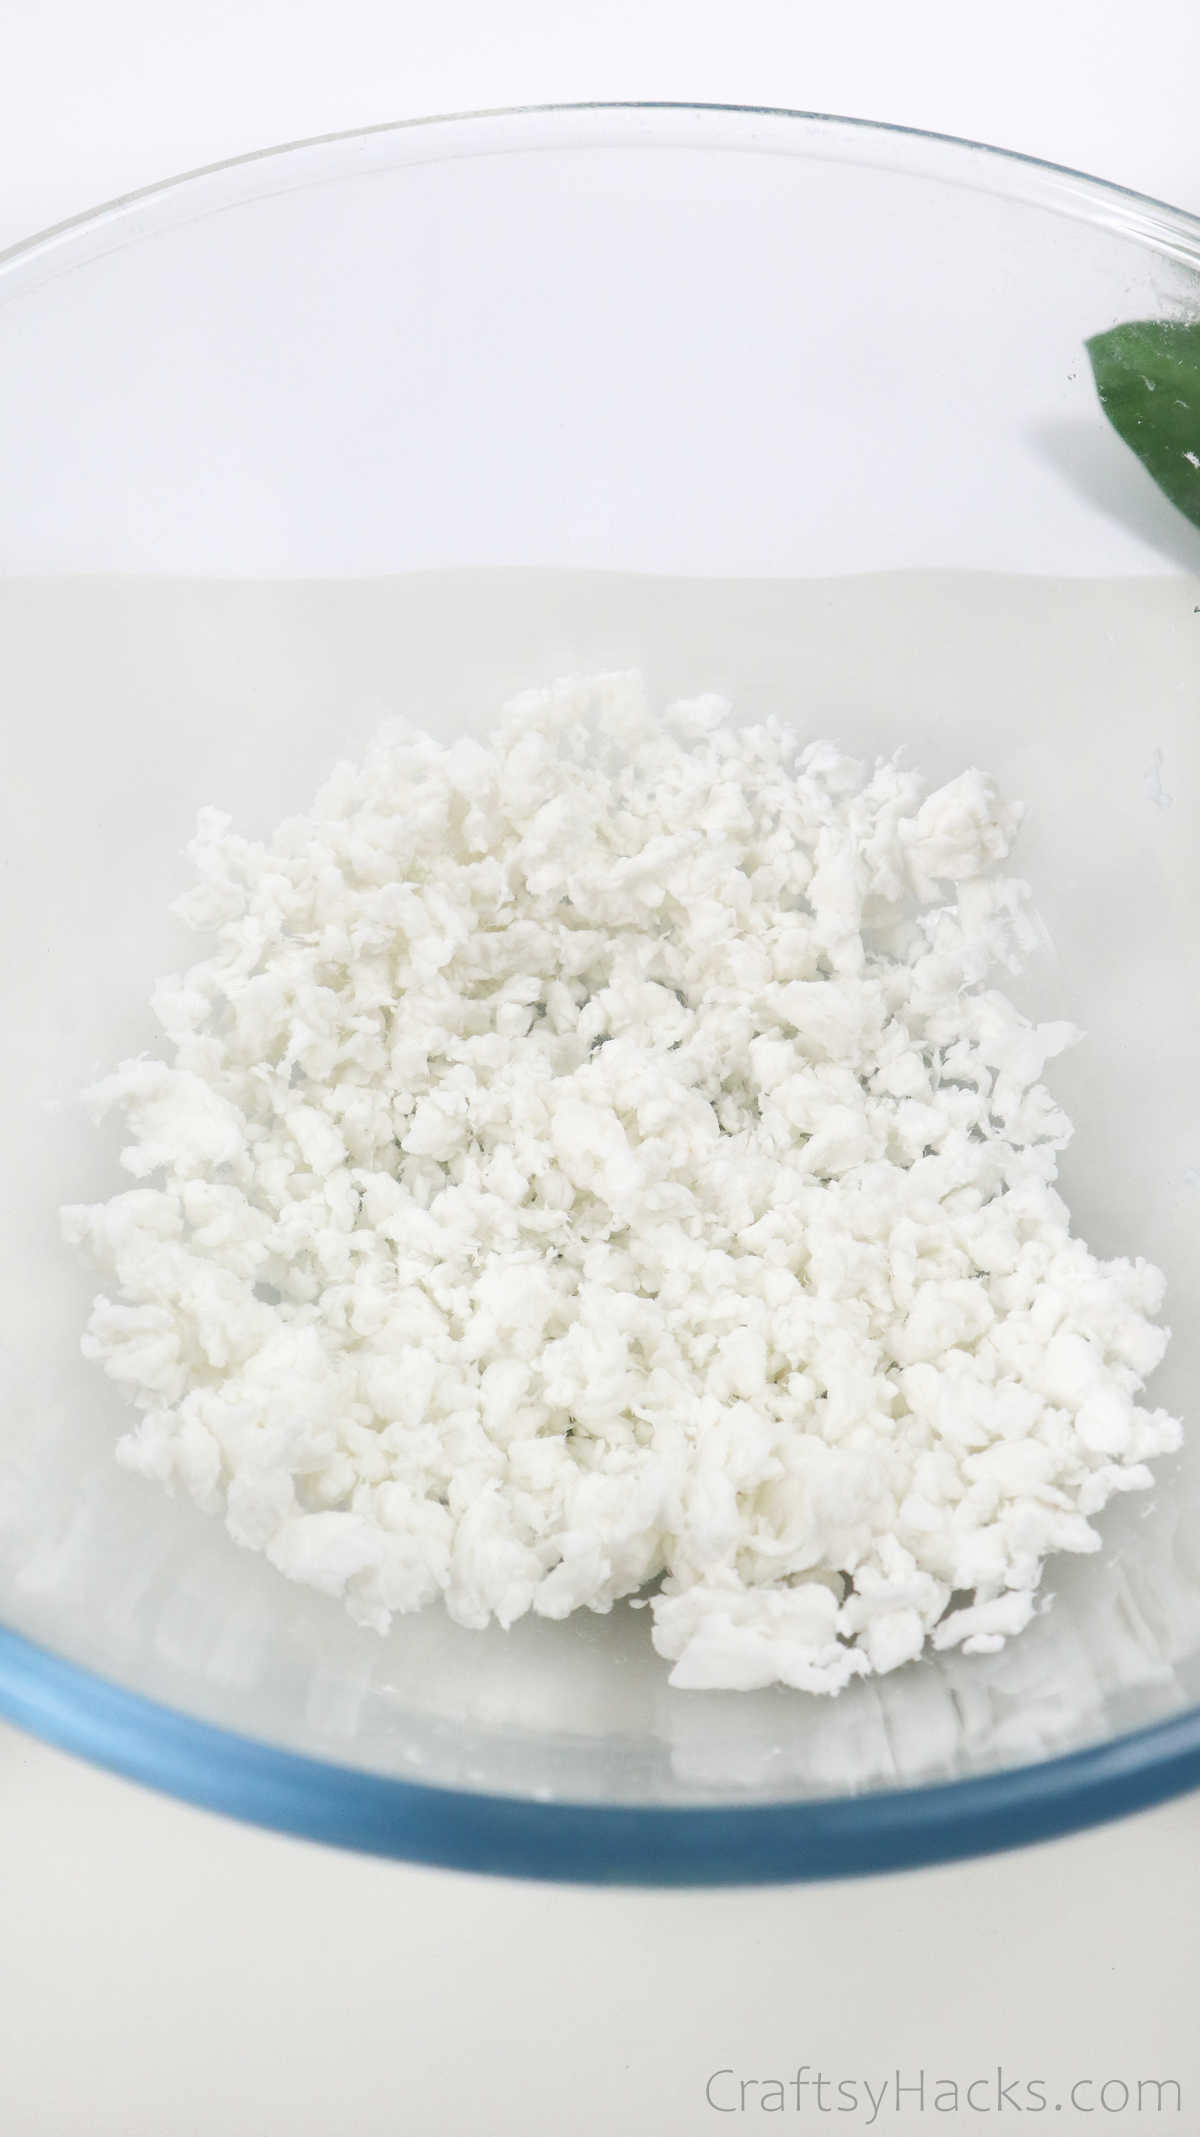
Now, you’re going to prepare the binding paste to turn that pulp into your paper mache dough. Grab another bowl and add your white flour to it. You can just as easily use cornstarch which will be just as effective, if not more so.
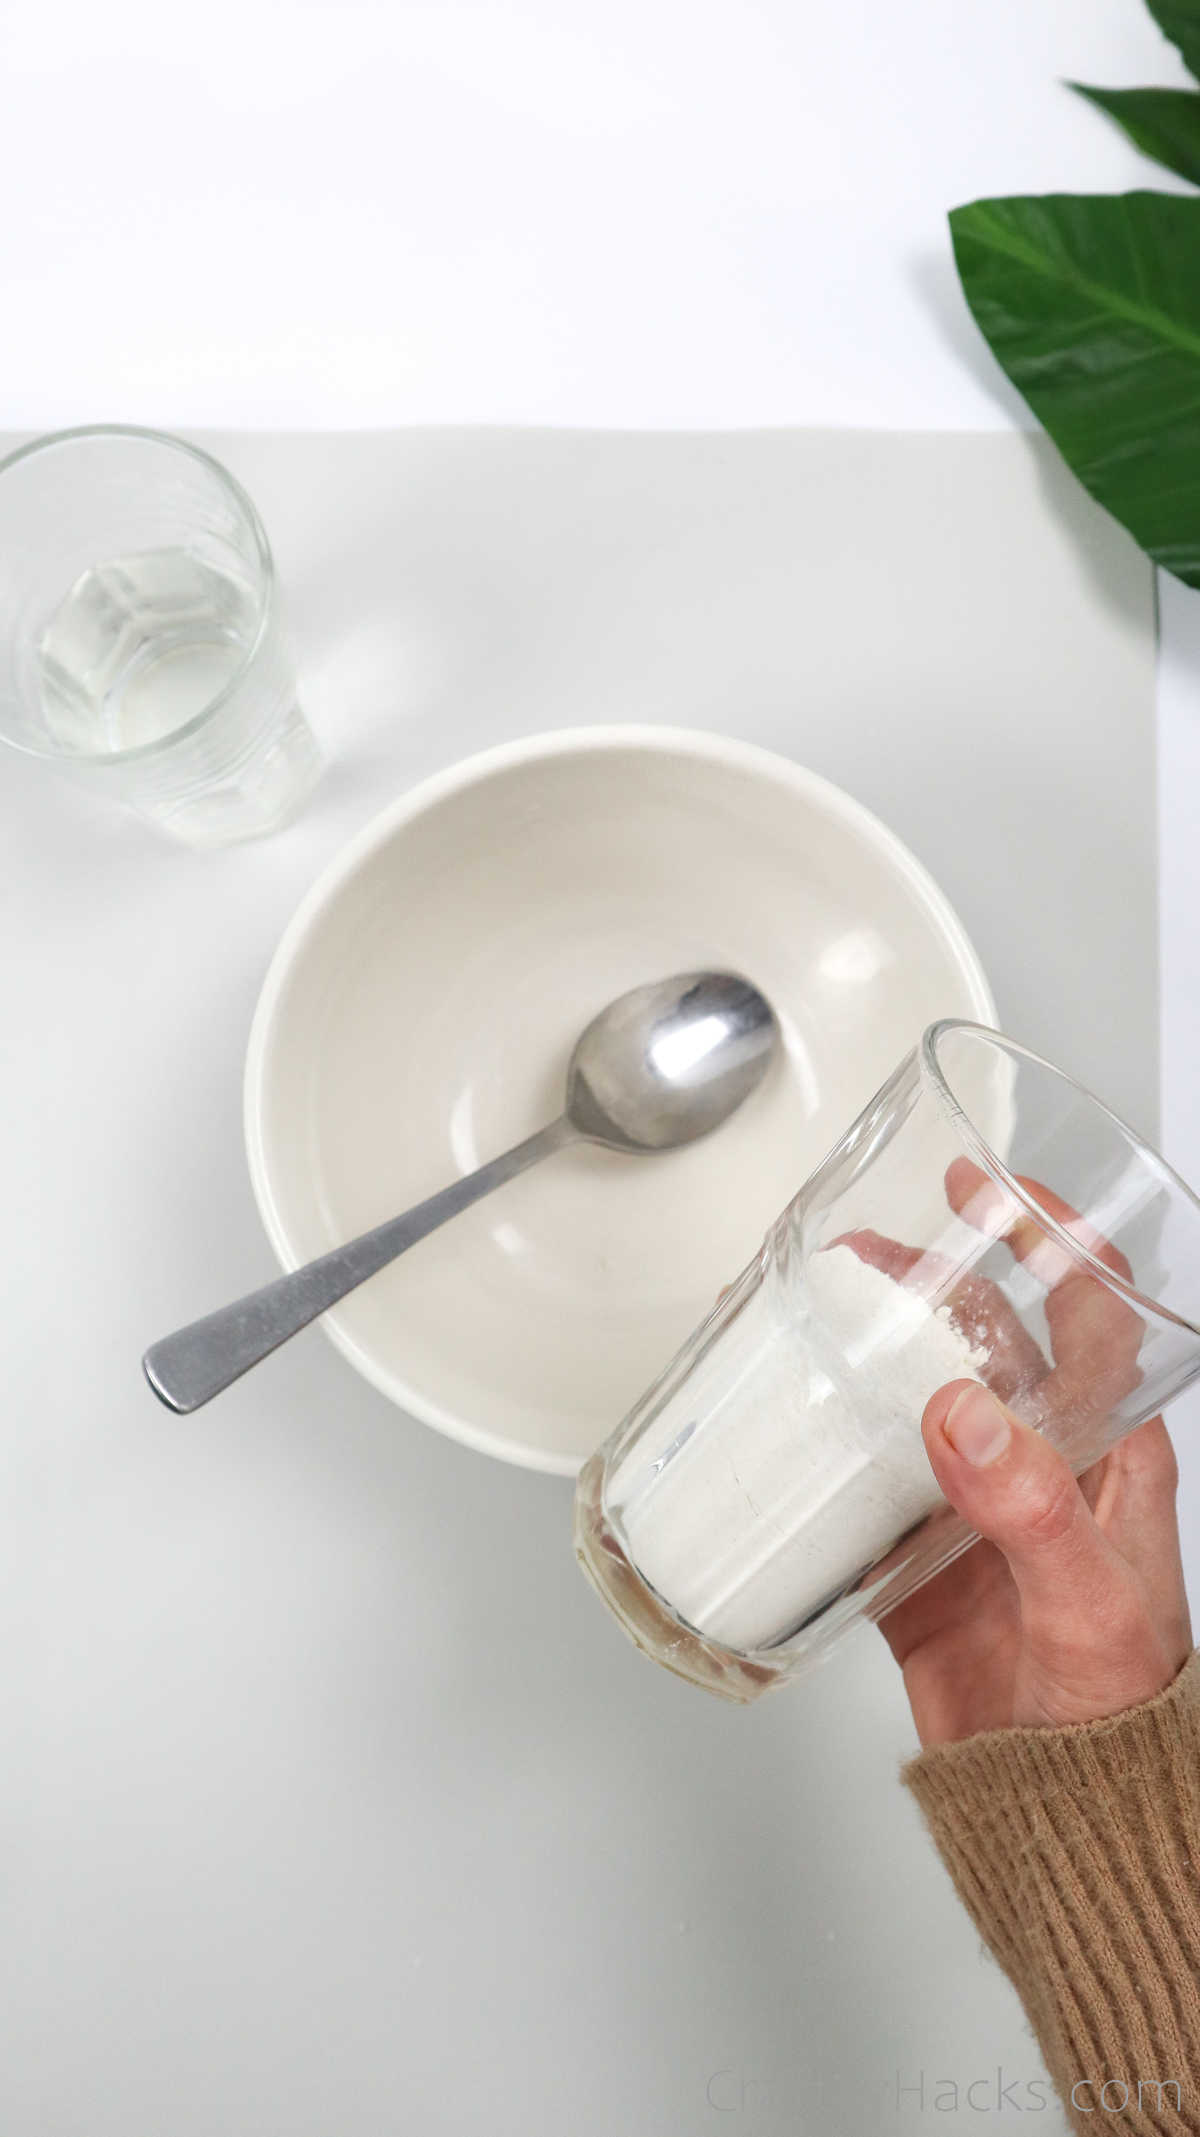
Stir your water in—not all at once, but in parts so that the flour doesn’t turn lumpy. Your paste should be smooth and sticky but not runny. You will need to cook this paste, so to speak. Place the contents in a saucepan with the heat on low.
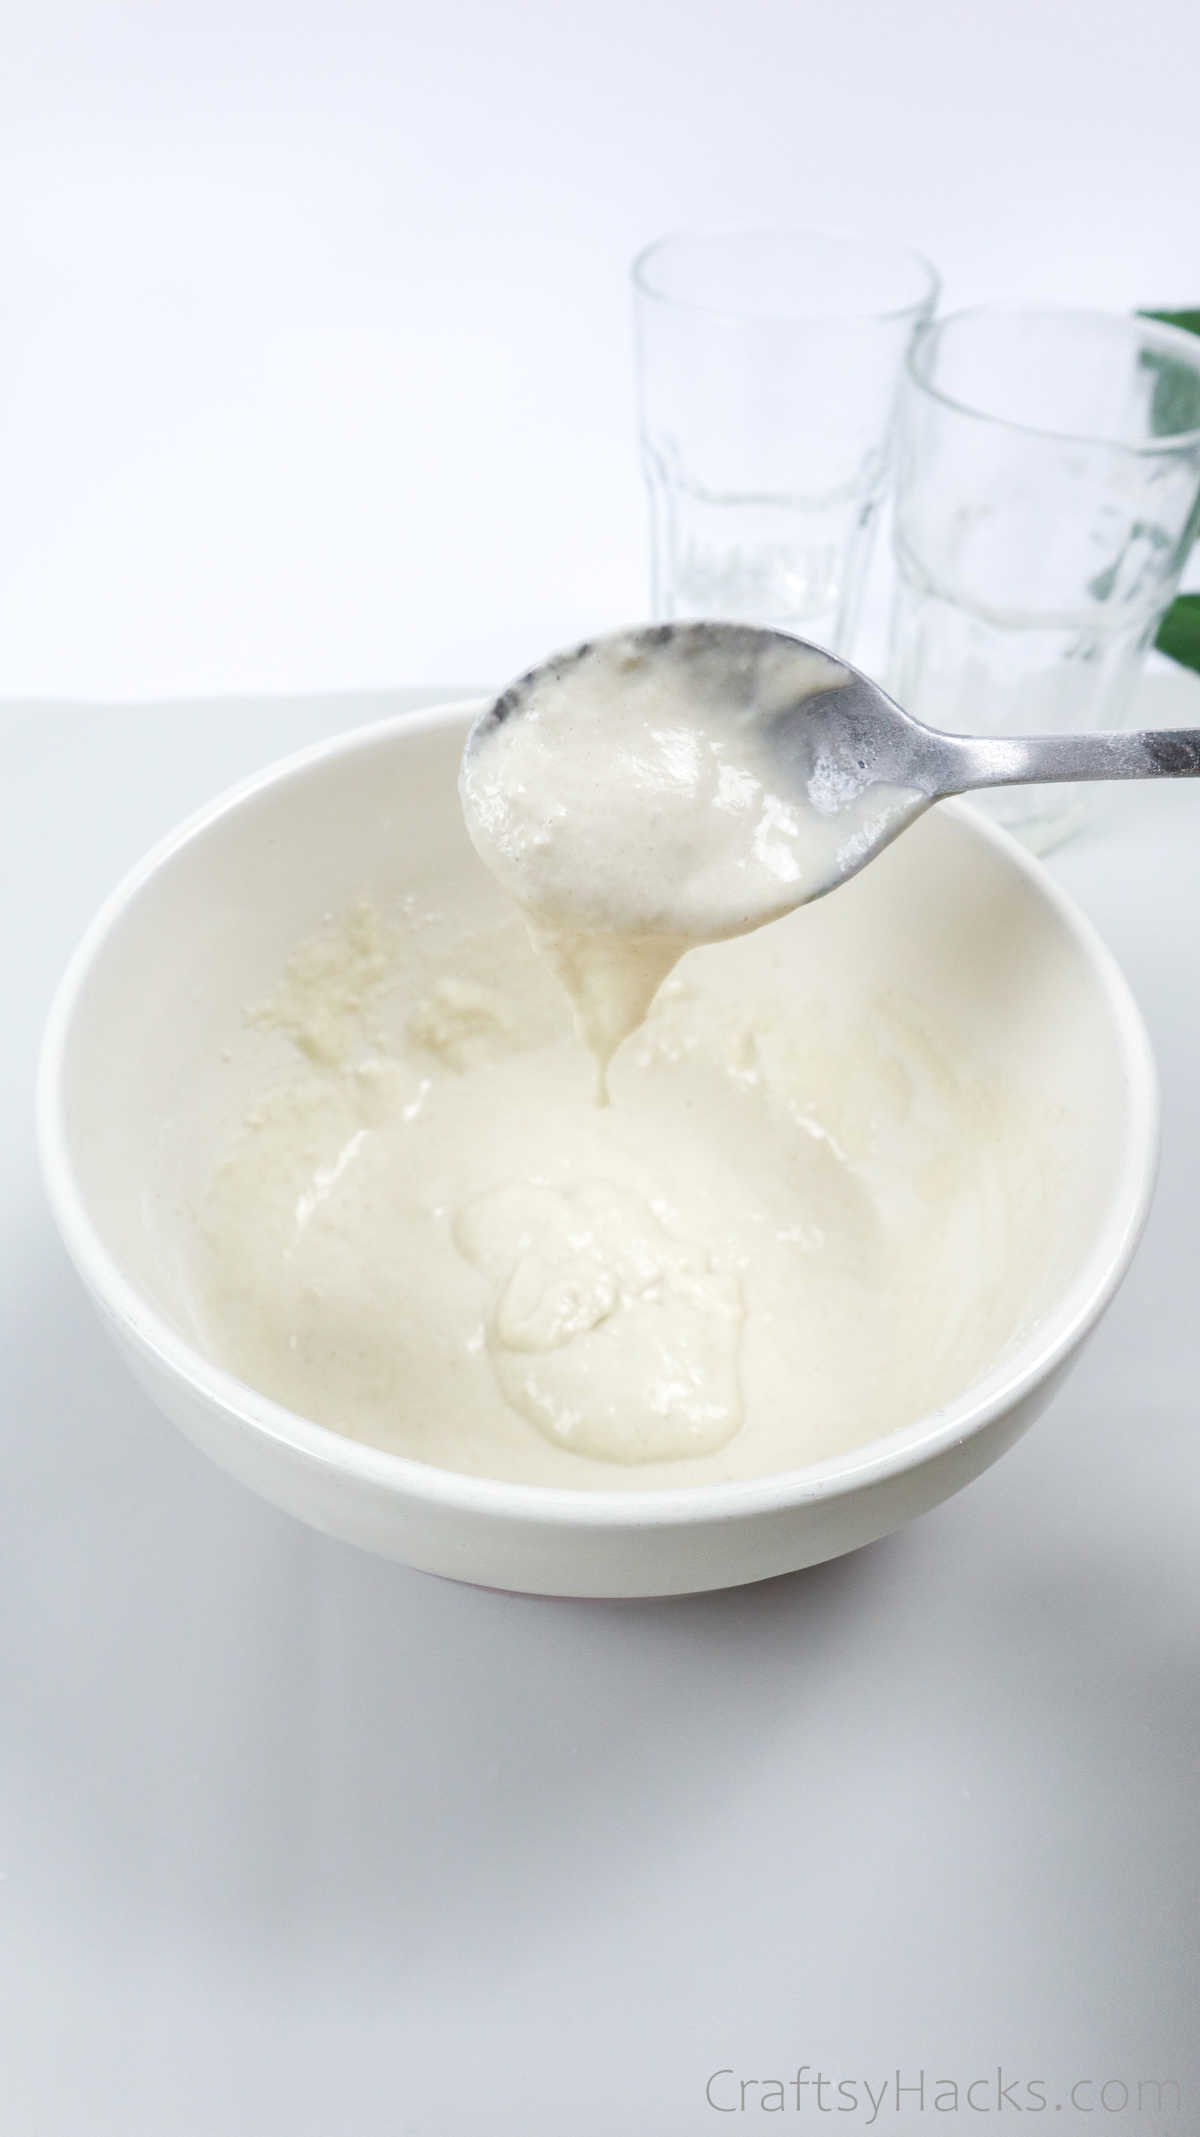
The mixture needs to be heated for around five minutes, or until the water evaporates and you have a thick and creamy paste. You have to keep stirring the paste constantly, or it will burn.
Alternatively, you can pop it into a microwave. Heat the paste for 15-20 seconds, take it out, stir vigorously, and then it goes in there again for another round. Repeat this a few times till the paste thickens.
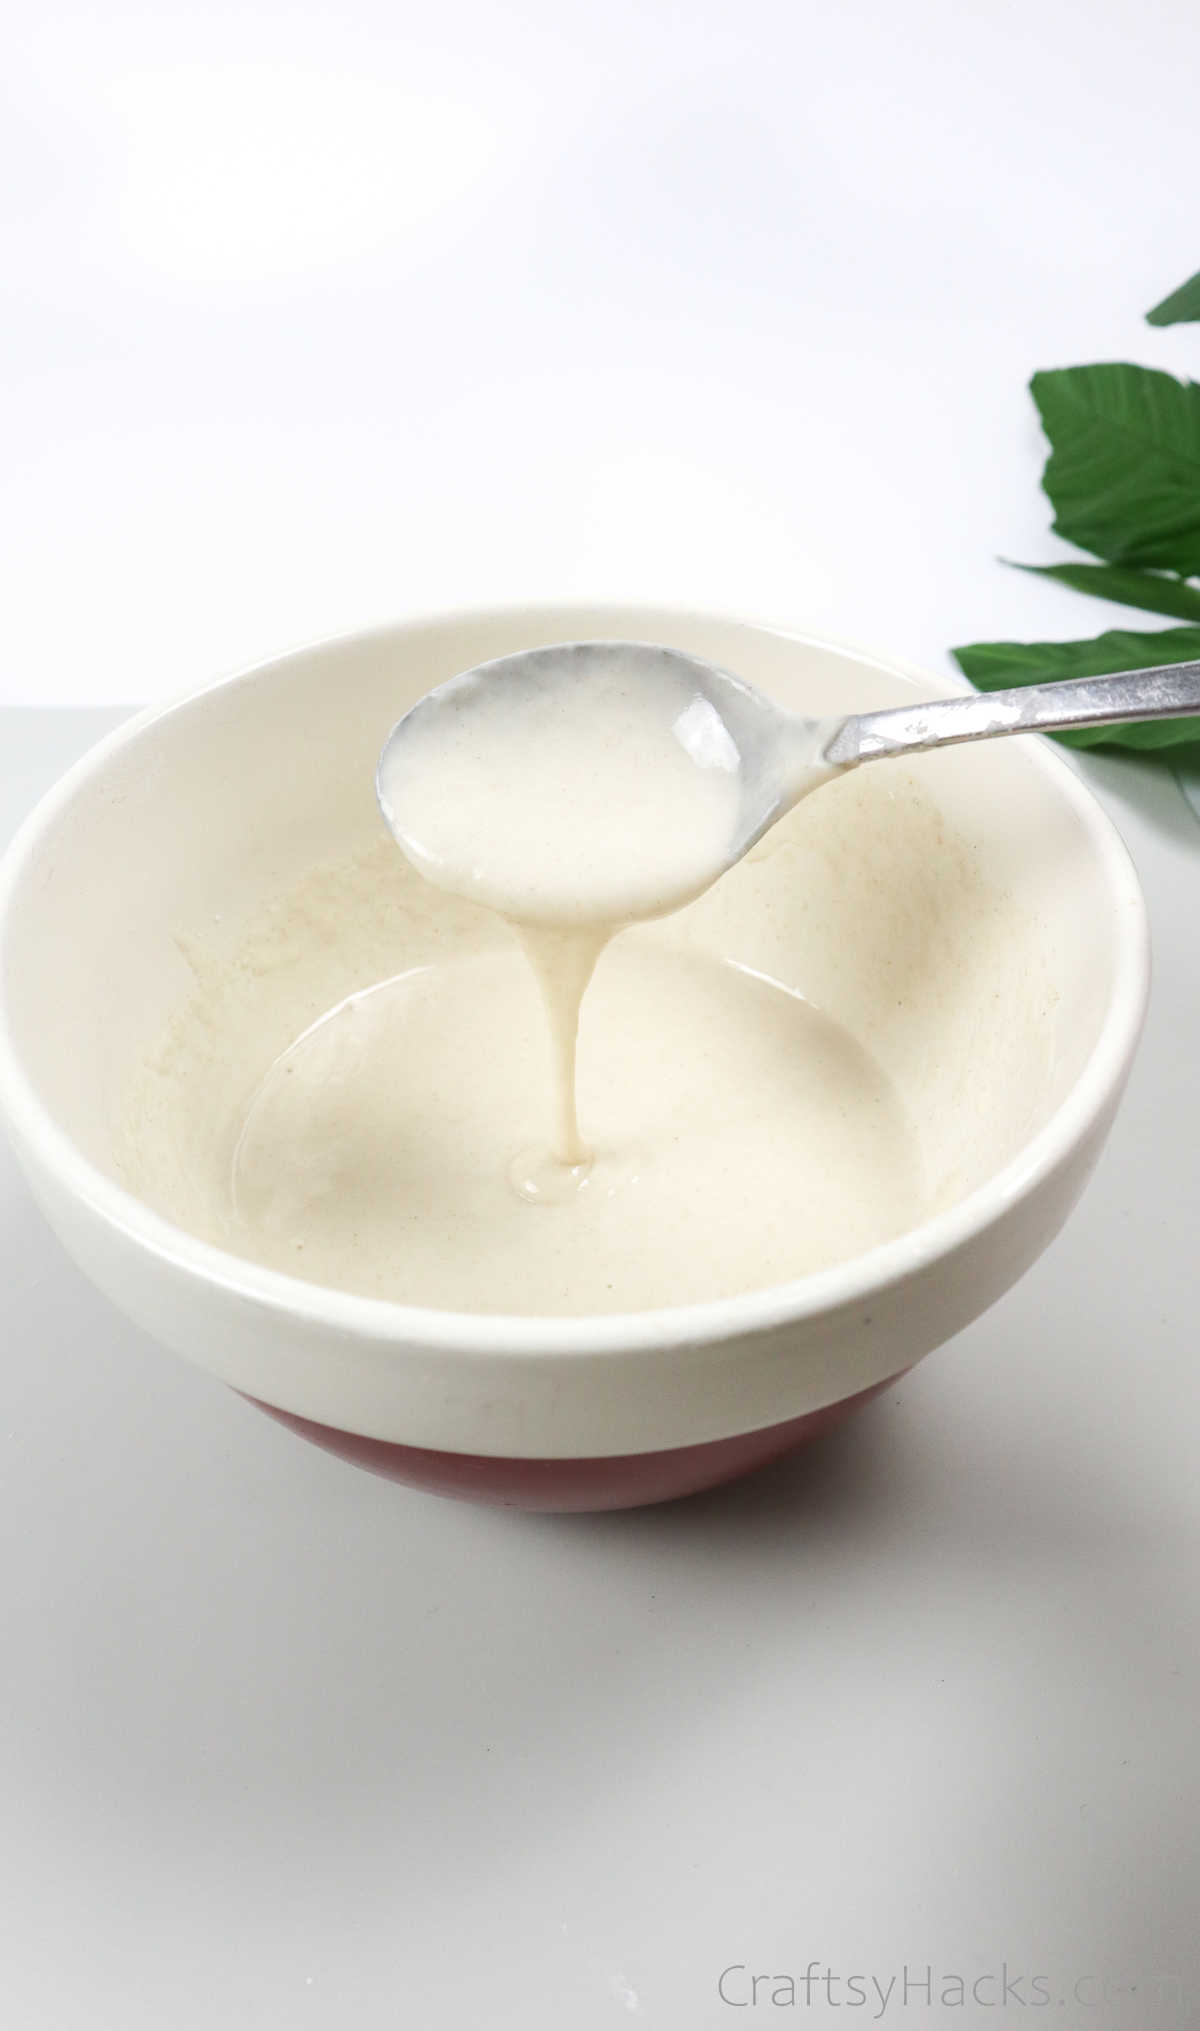
Spoon the paste onto the pulp.
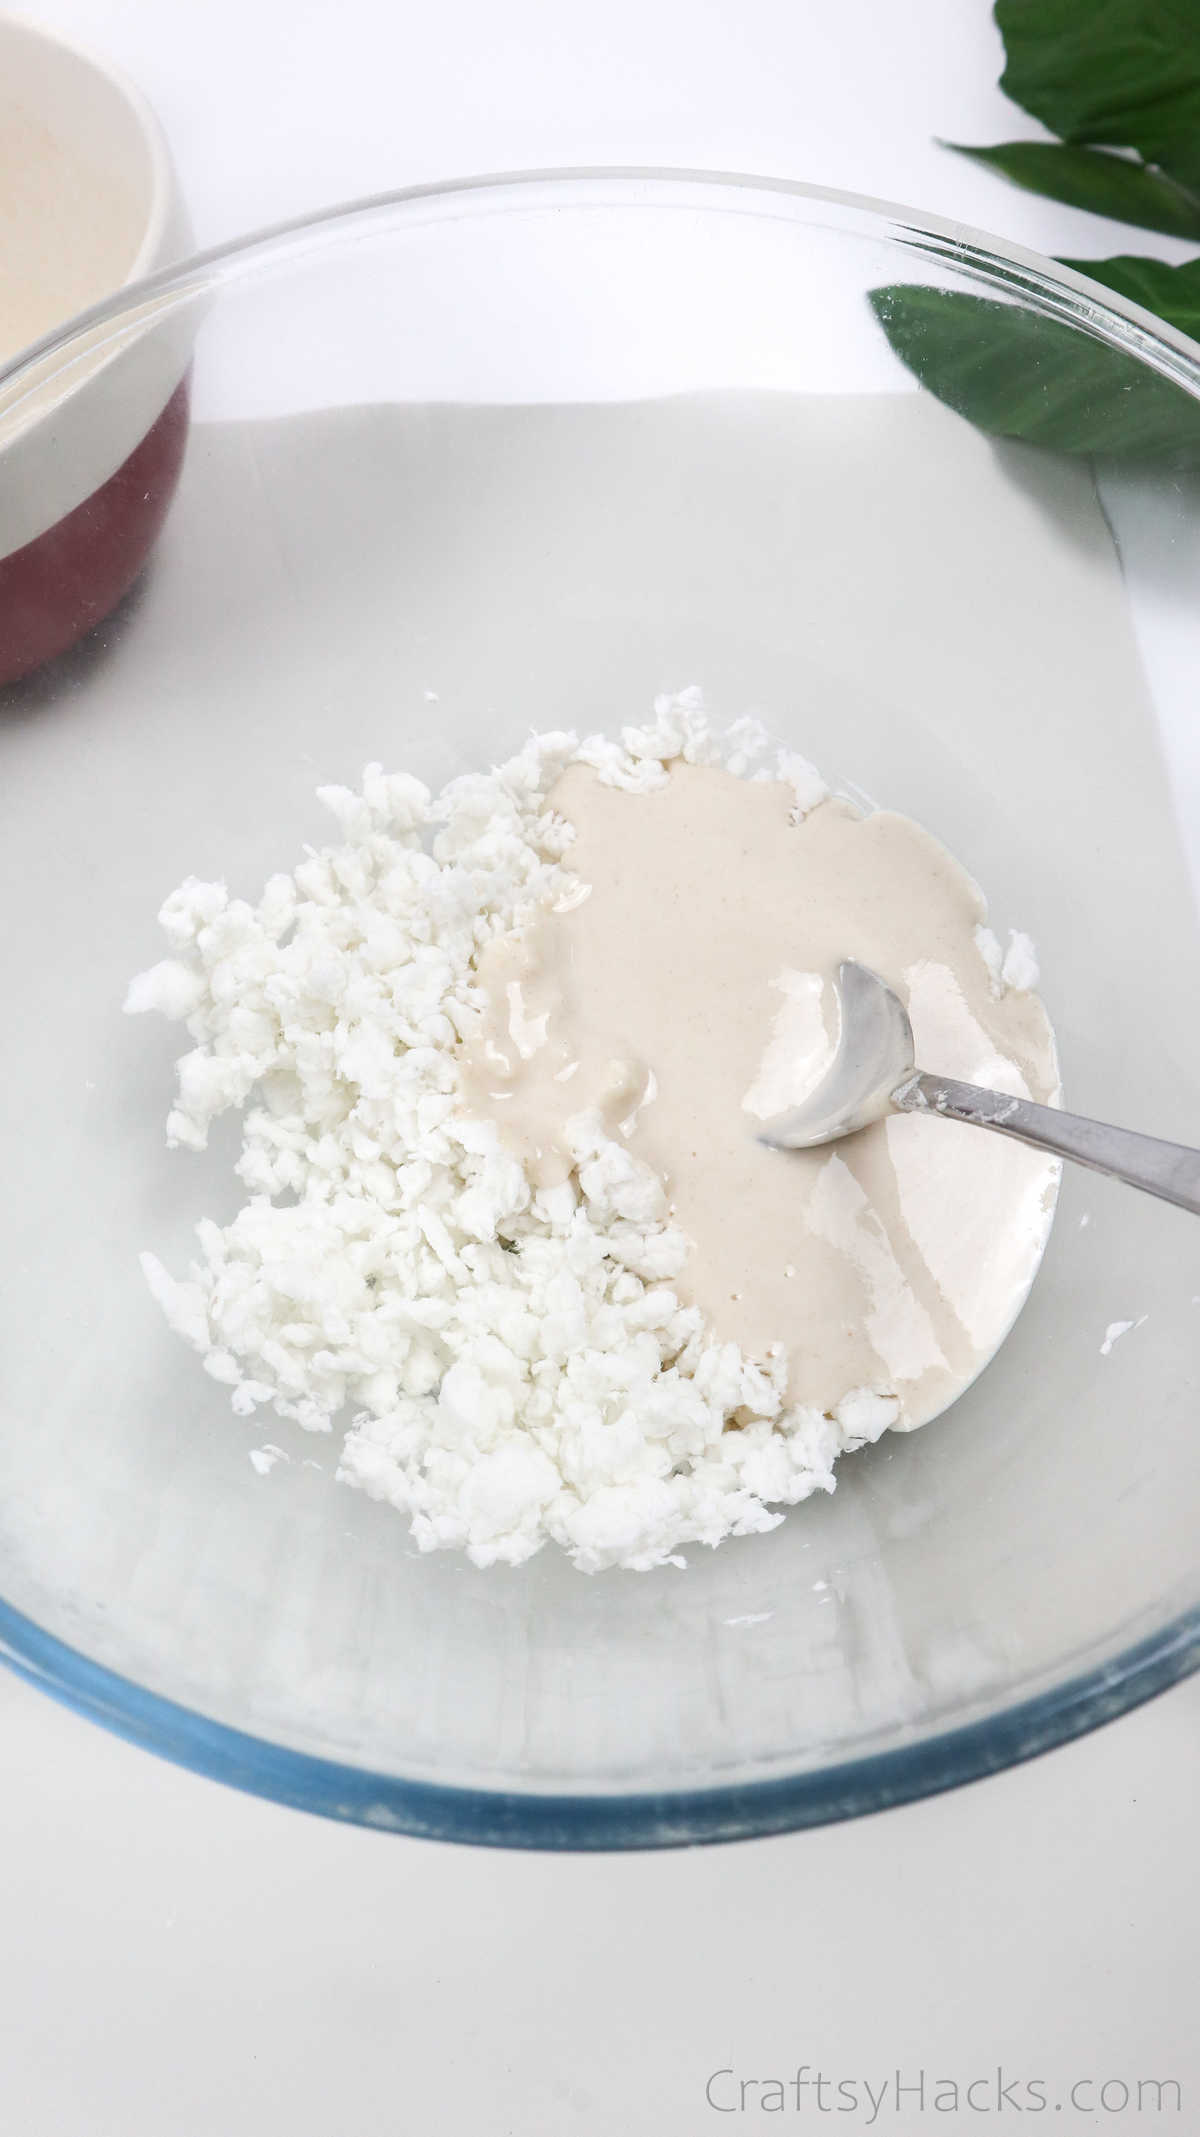
This part is my absolute favorite: rolling and kneading the dough. But first, roll up your sleeves; it’s going to get messy.
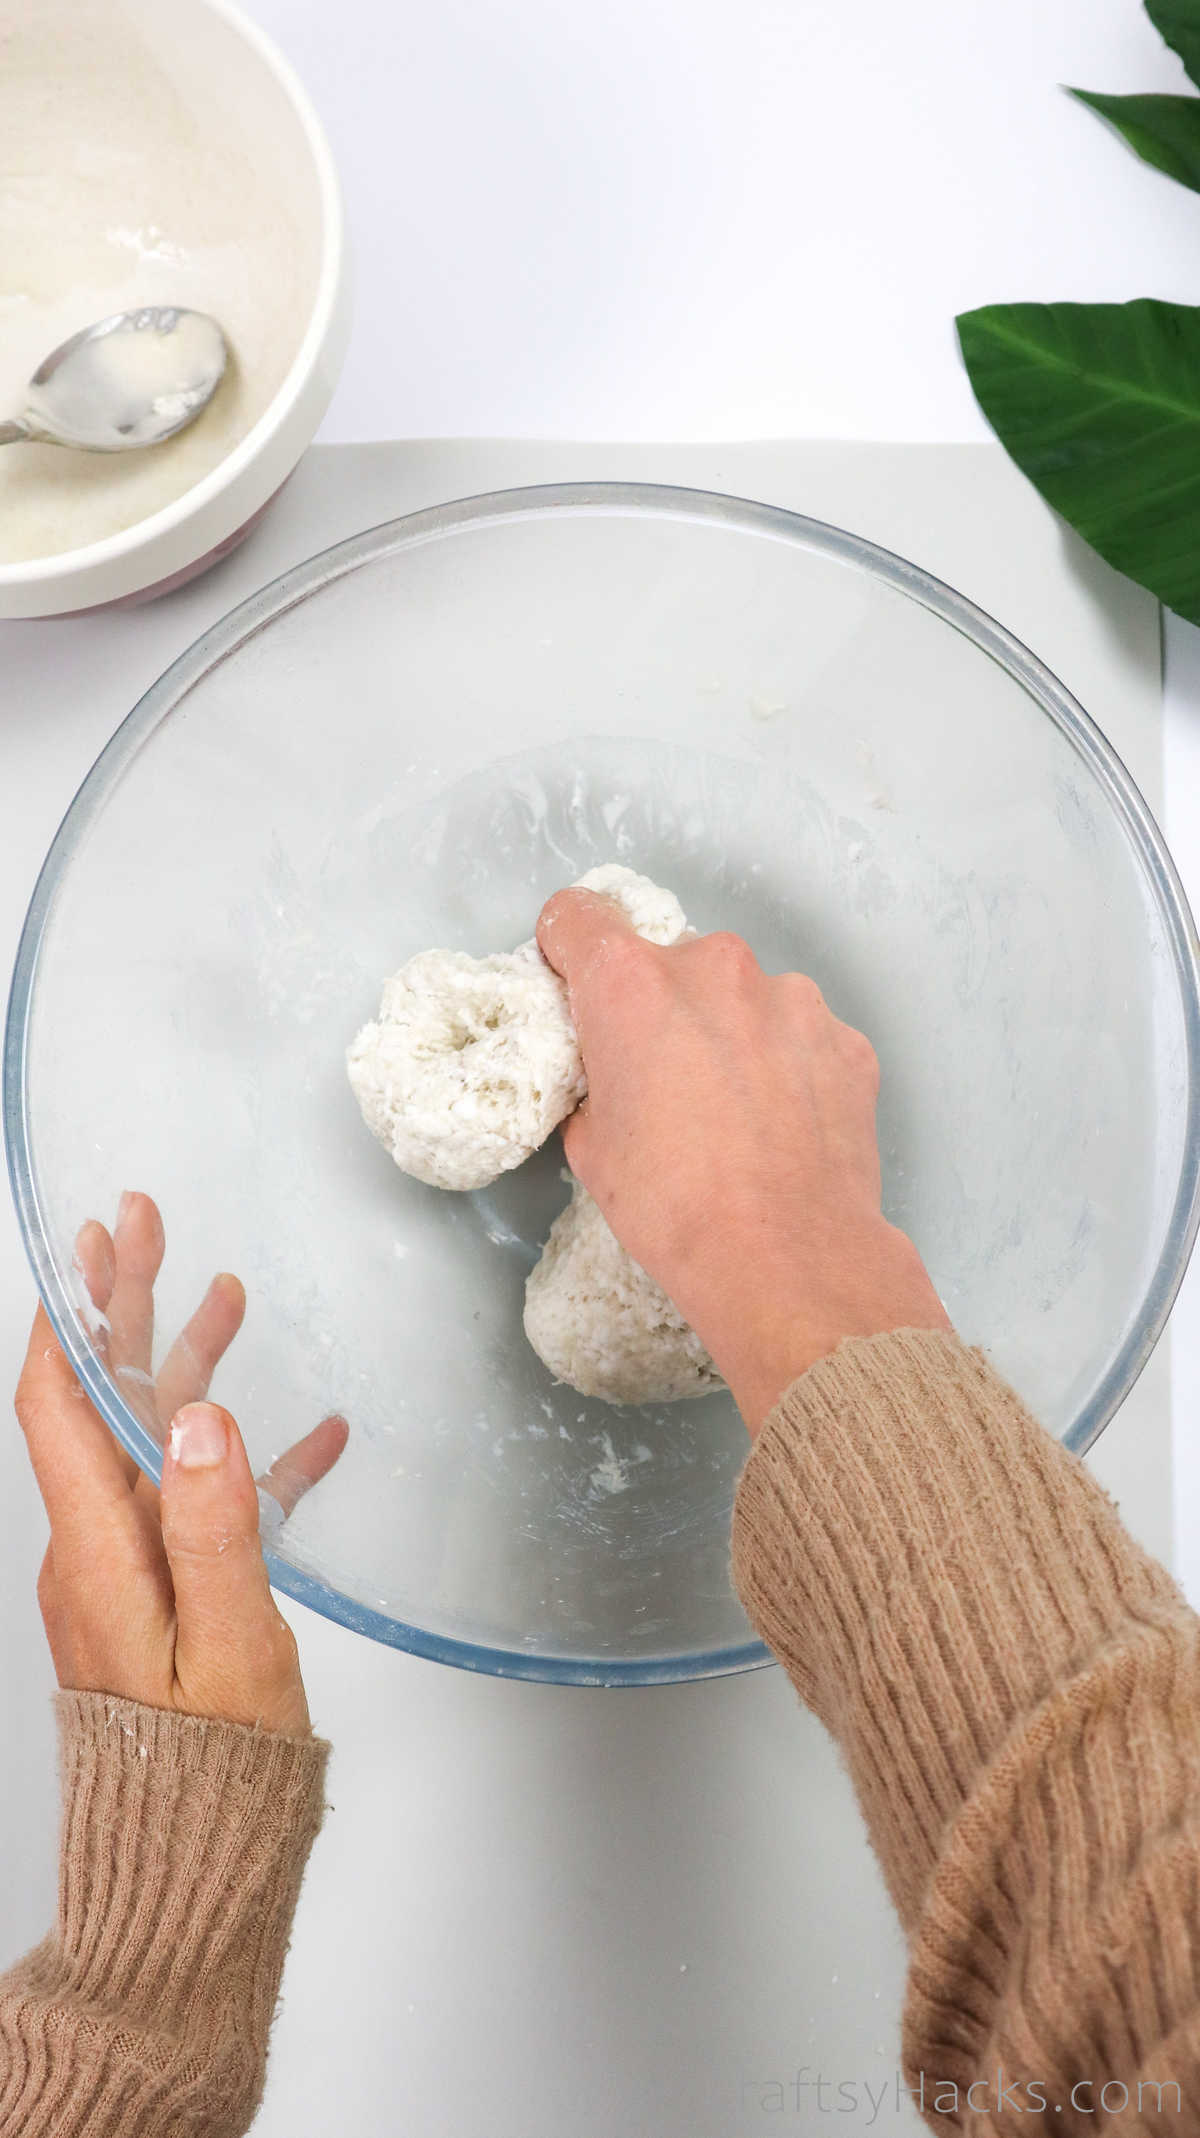
If your dough is wet, just sprinkle a little flour over, and keep rolling. If it’s too dry, just a few drops of water should help soften it. Kids, in particular, will love this part of the activity!
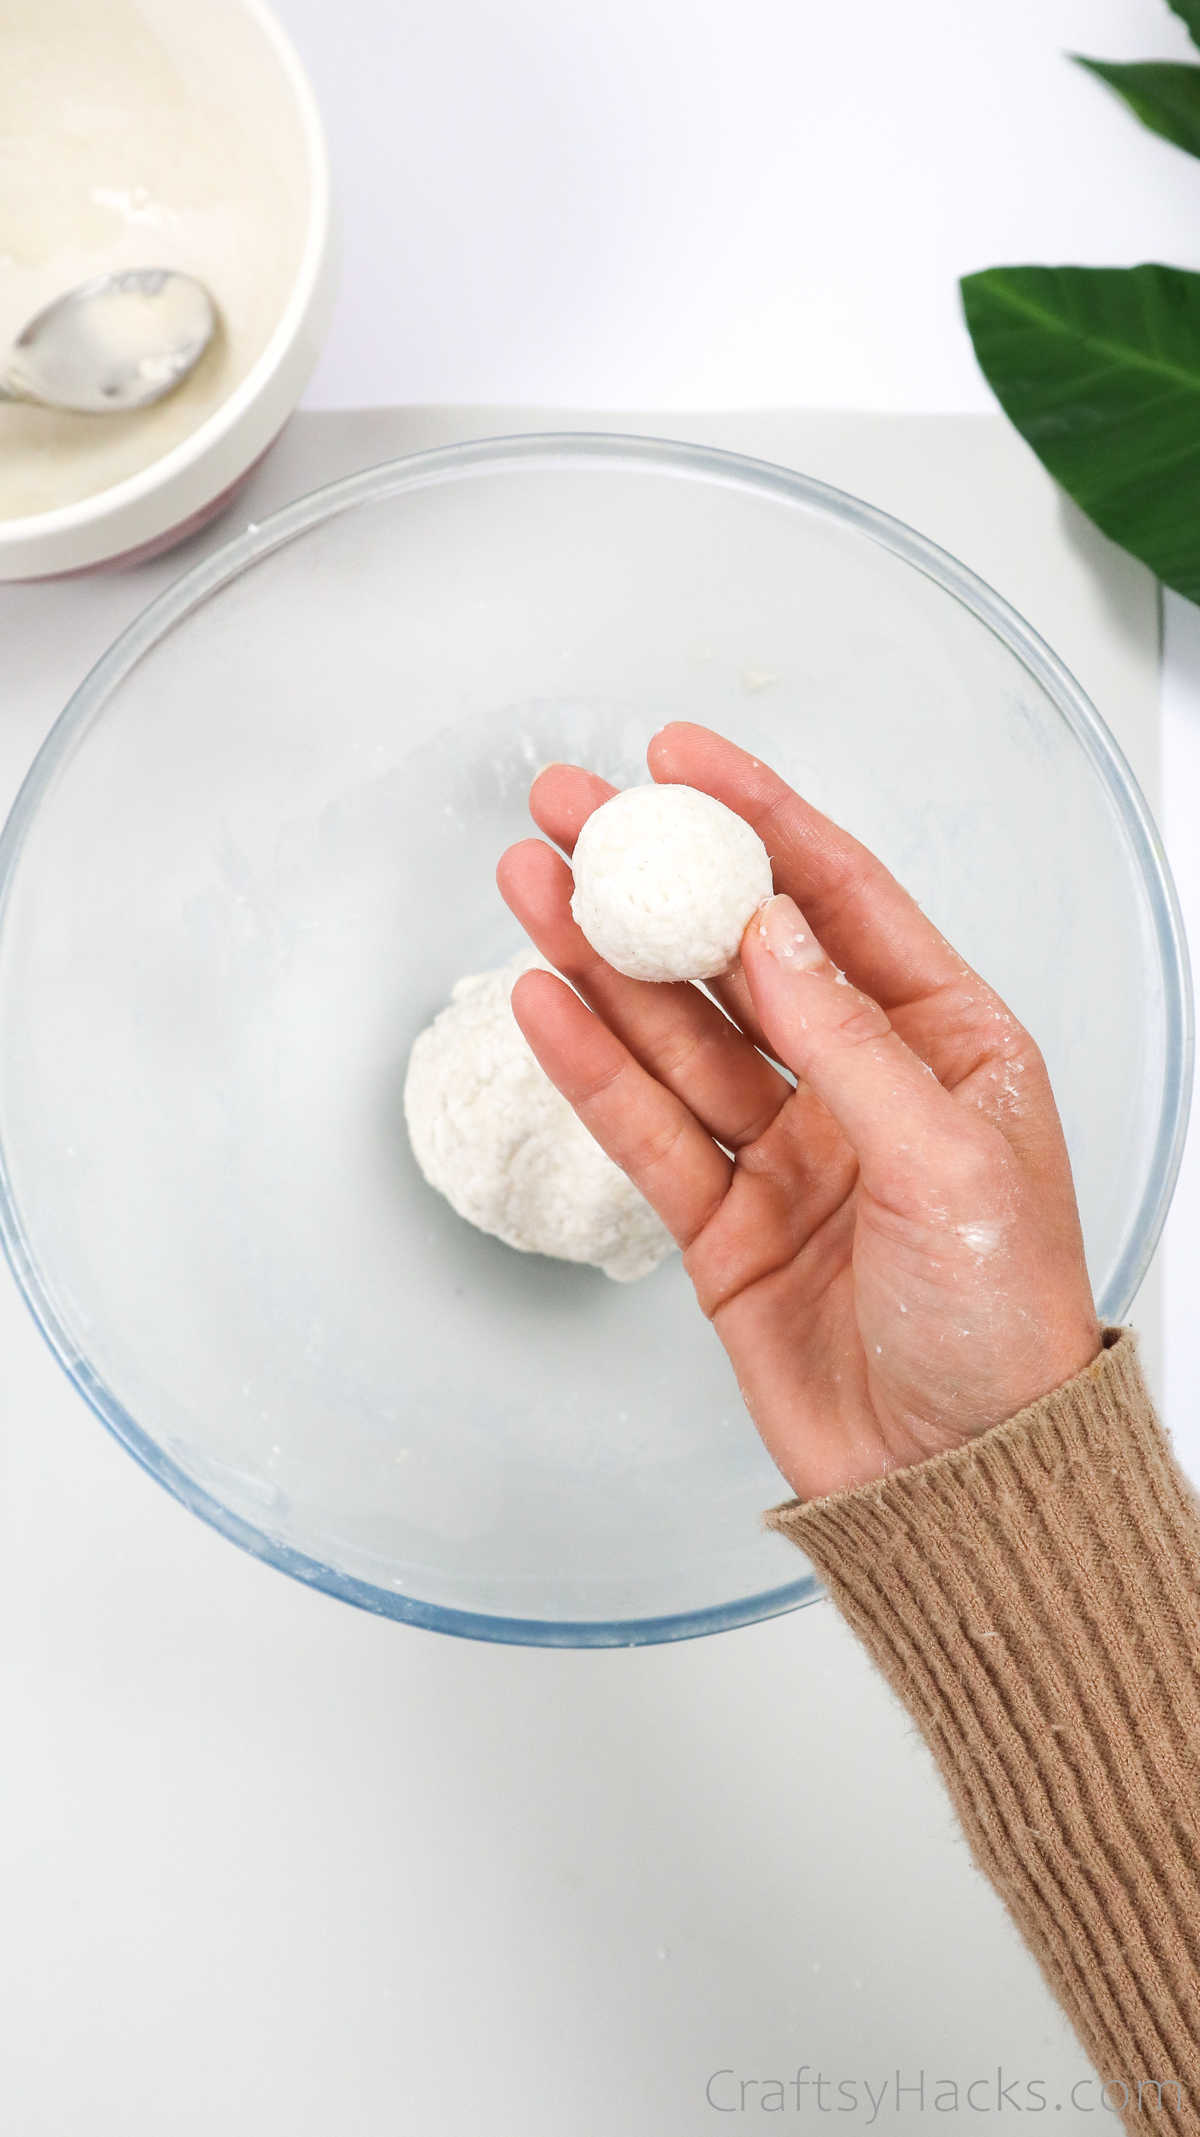
When you’re all done, your paper mache dough will look like this—good enough to eat and even better to start making your paper mache craft items.
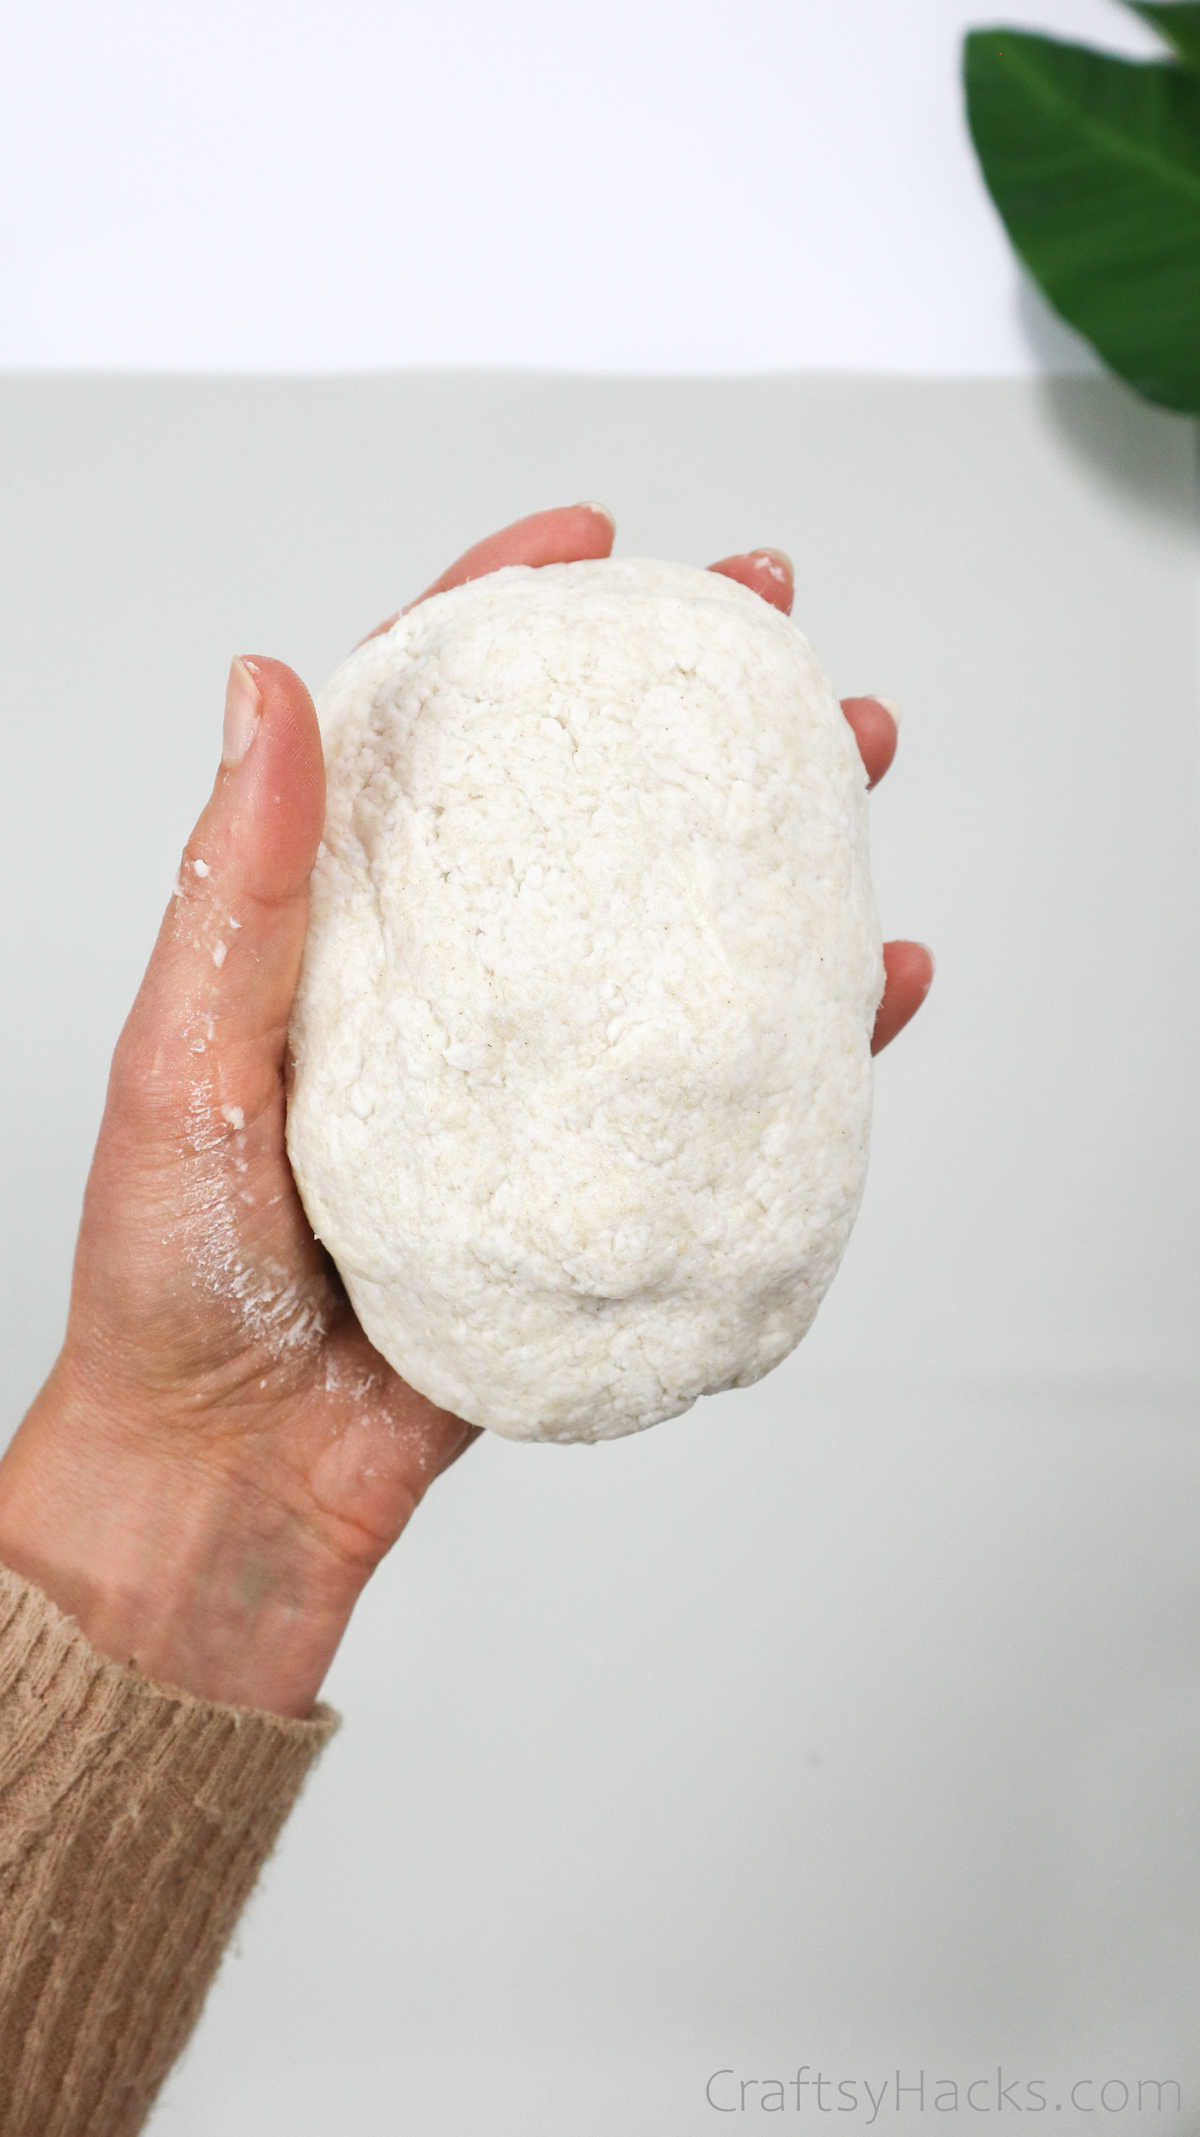
What Can I Make from Paper Mache?
There’s absolutely no limit to what you can do with paper mache. Just making the dough can be a great activity, but when you do have the dough ready, you can make a ton of things.
If you have a chocolate or candy molk just press the dough into it and flatten it out. When it’s dry, you can pop it out, paint it, and use it as ornaments and baubles.
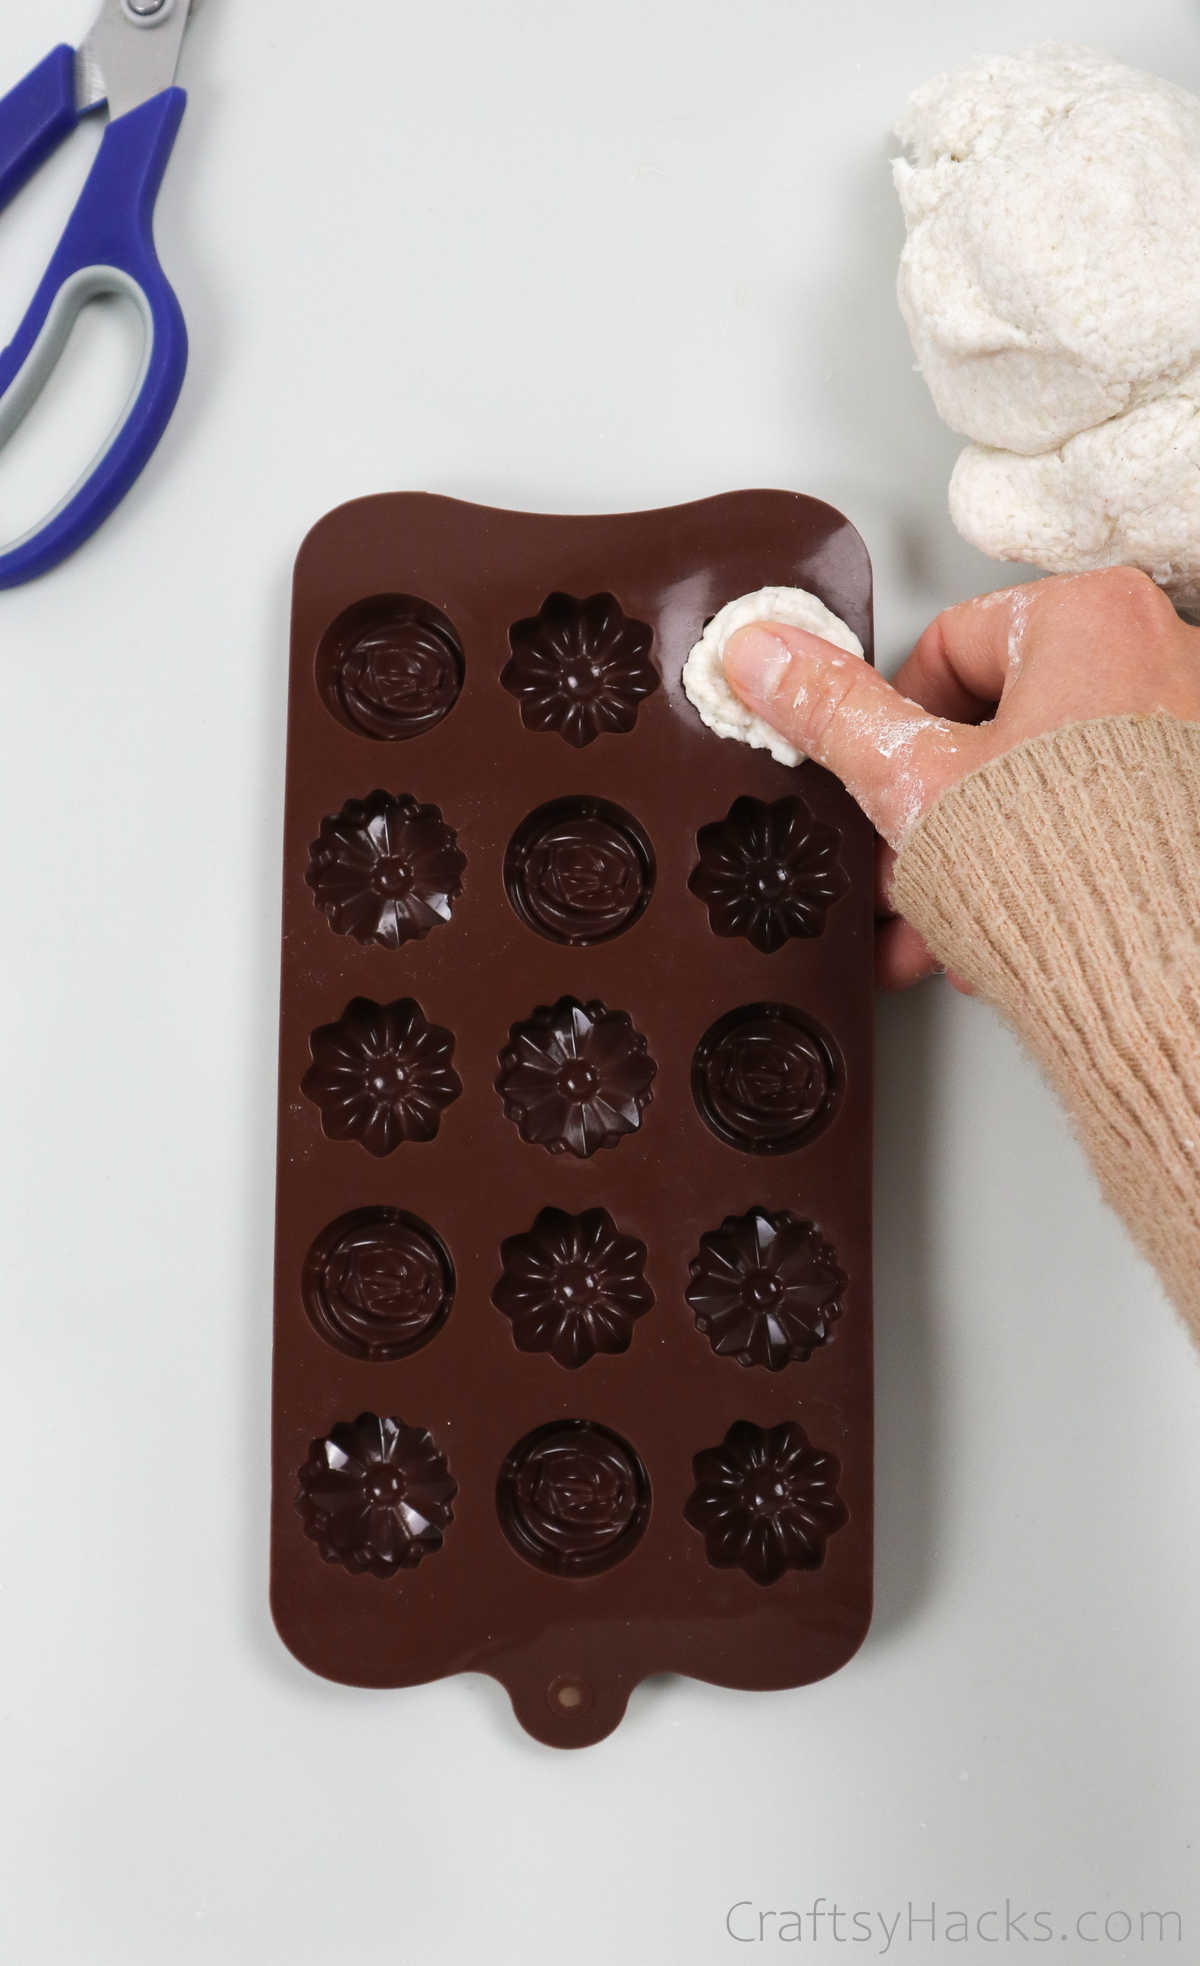
If you want to make lesson time more fun and creative for your little ones, then make a set of paper mache alphabets and use them to teach toddlers their ABCs.
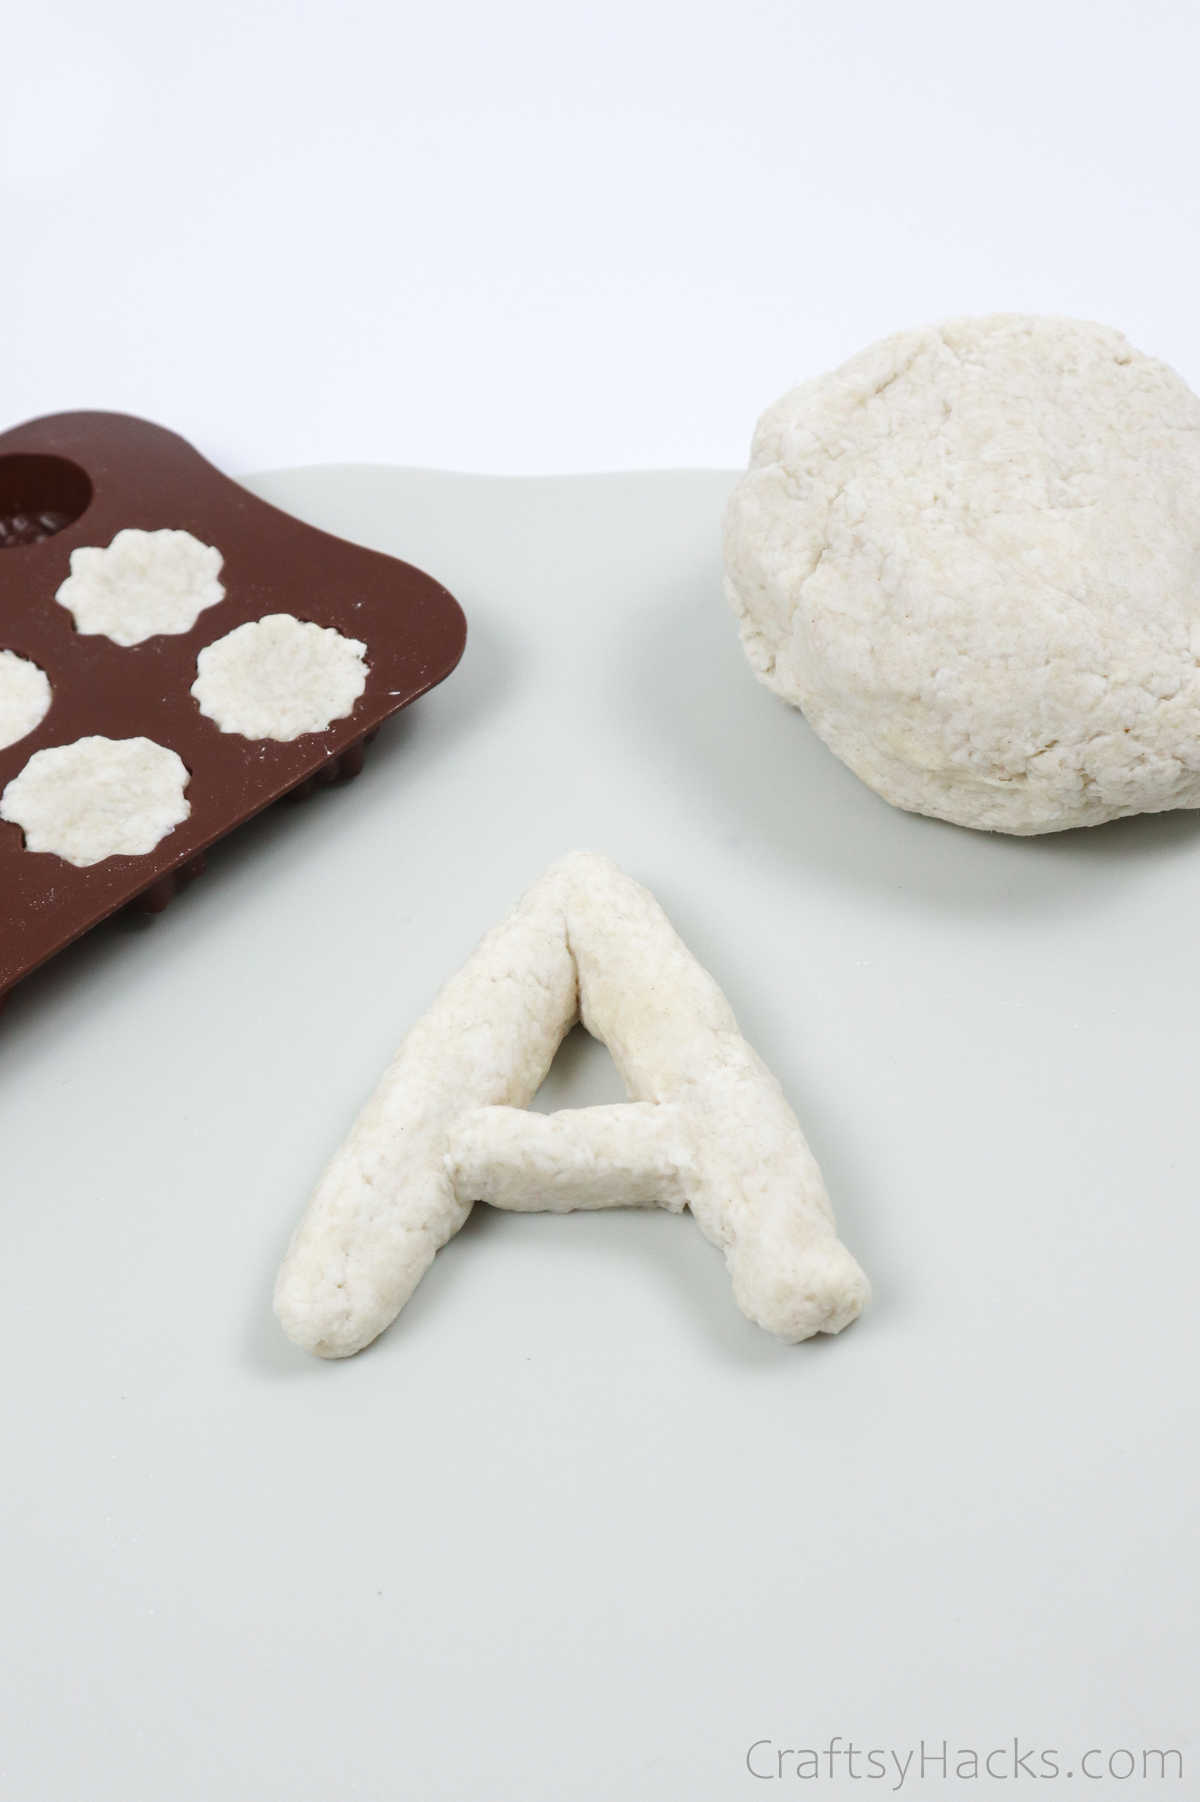
You can also make trinket trays, bowls, and small dishes, and use it to store, well, trinkets! Just cover the outside of a plastic or glass bowls with clear wrap or cling film, spread a drop of oil around it, turn it around, and stick paper mache dough around it, just so.
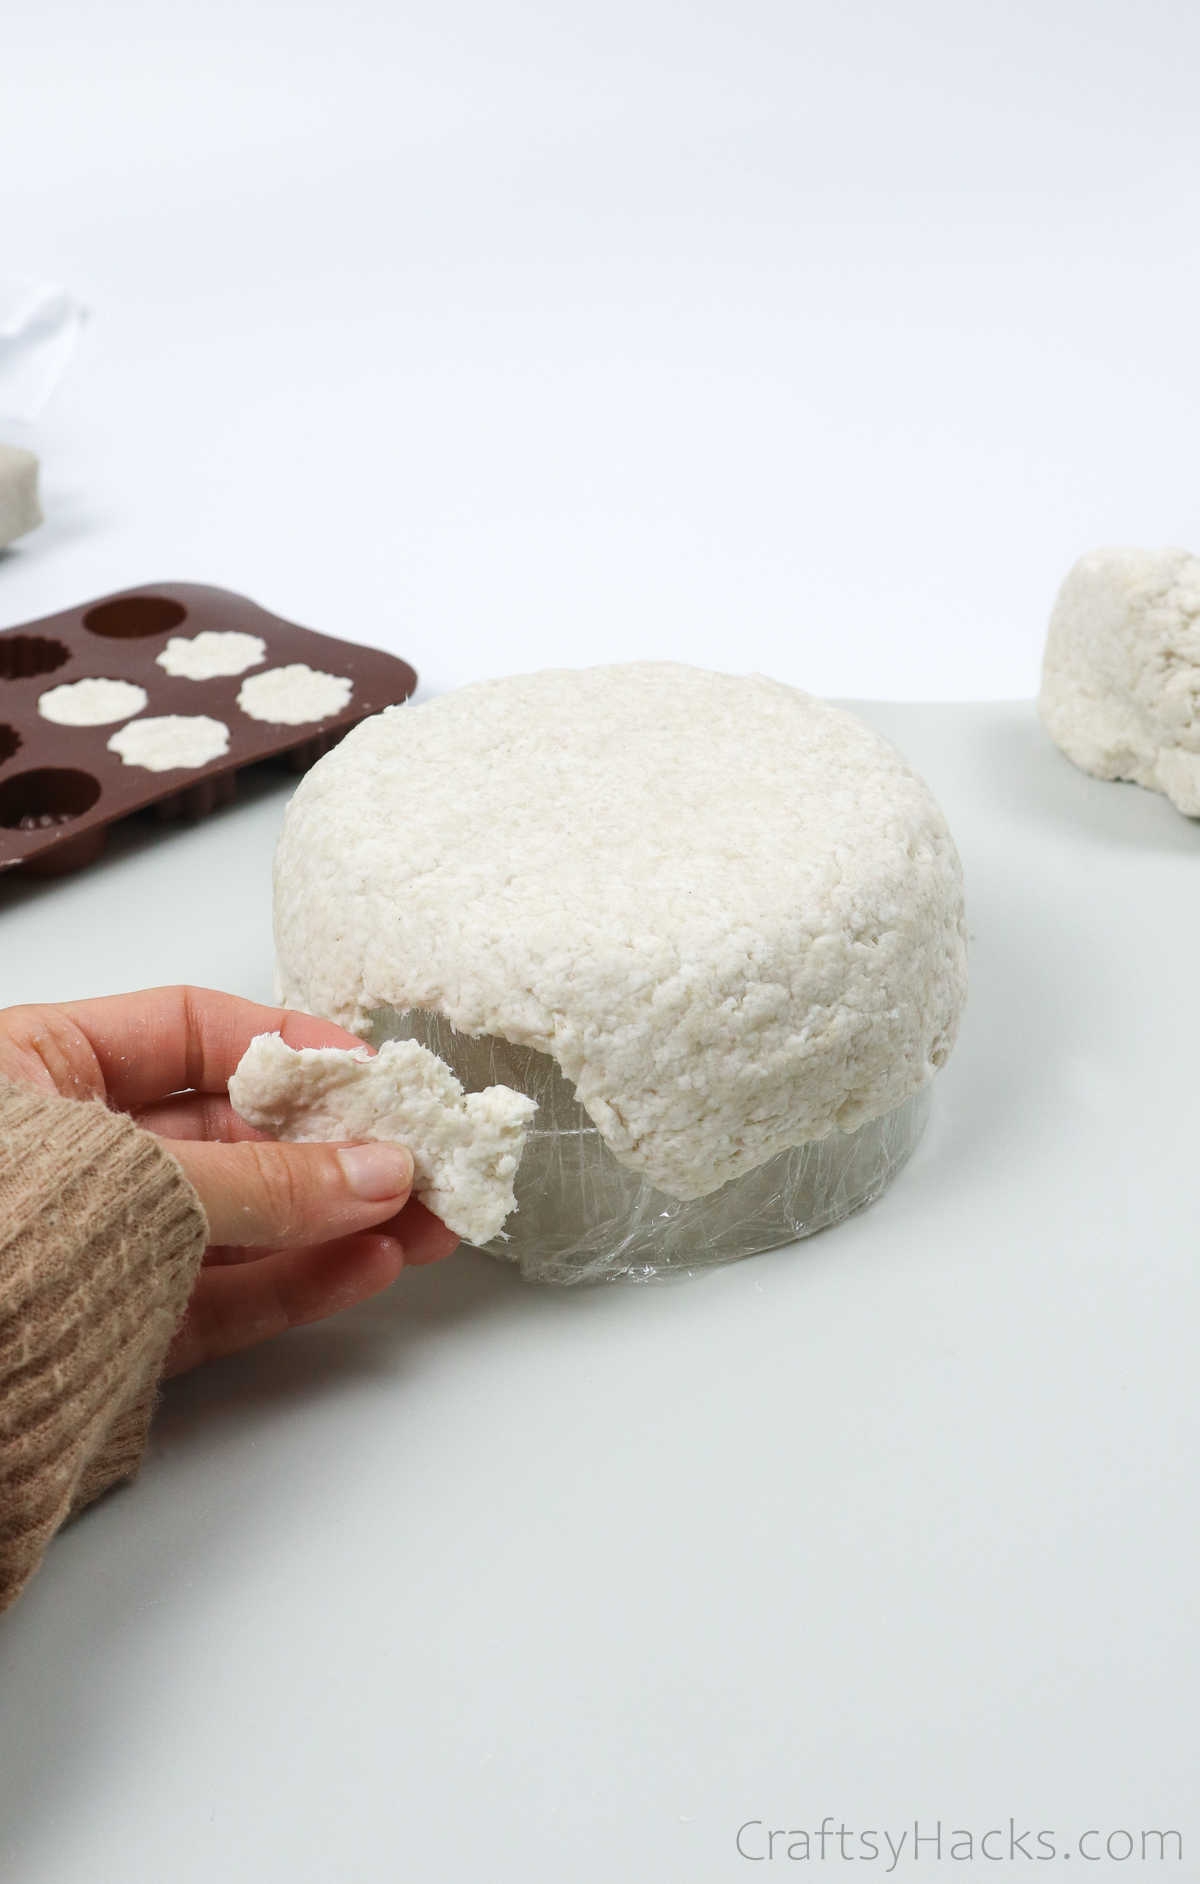
Can You Use Hairdryer to Dry Paper Mache?
Yes you can use a hairdryer to dry your paper mache. However, you should turn the heat setting down to low, or your mache will scorch. Remember, paper mache is pretty flammable! Besides, using a hairdryer might not dry the paper mache evenly, either.
Smaller pieces will dry up faster, while bigger ones will definitely take longer. Just allow whatever you end up making to air dry for at least 2-3 days—longer if the item in question is thicker. Once dry, you can go ahead and paint it.
Here’s a tip: if you want your paper mache to last longer, add a teaspoon of salt to the dough just before you start kneading. You can store the dough in the fridge for up to a week, as well!
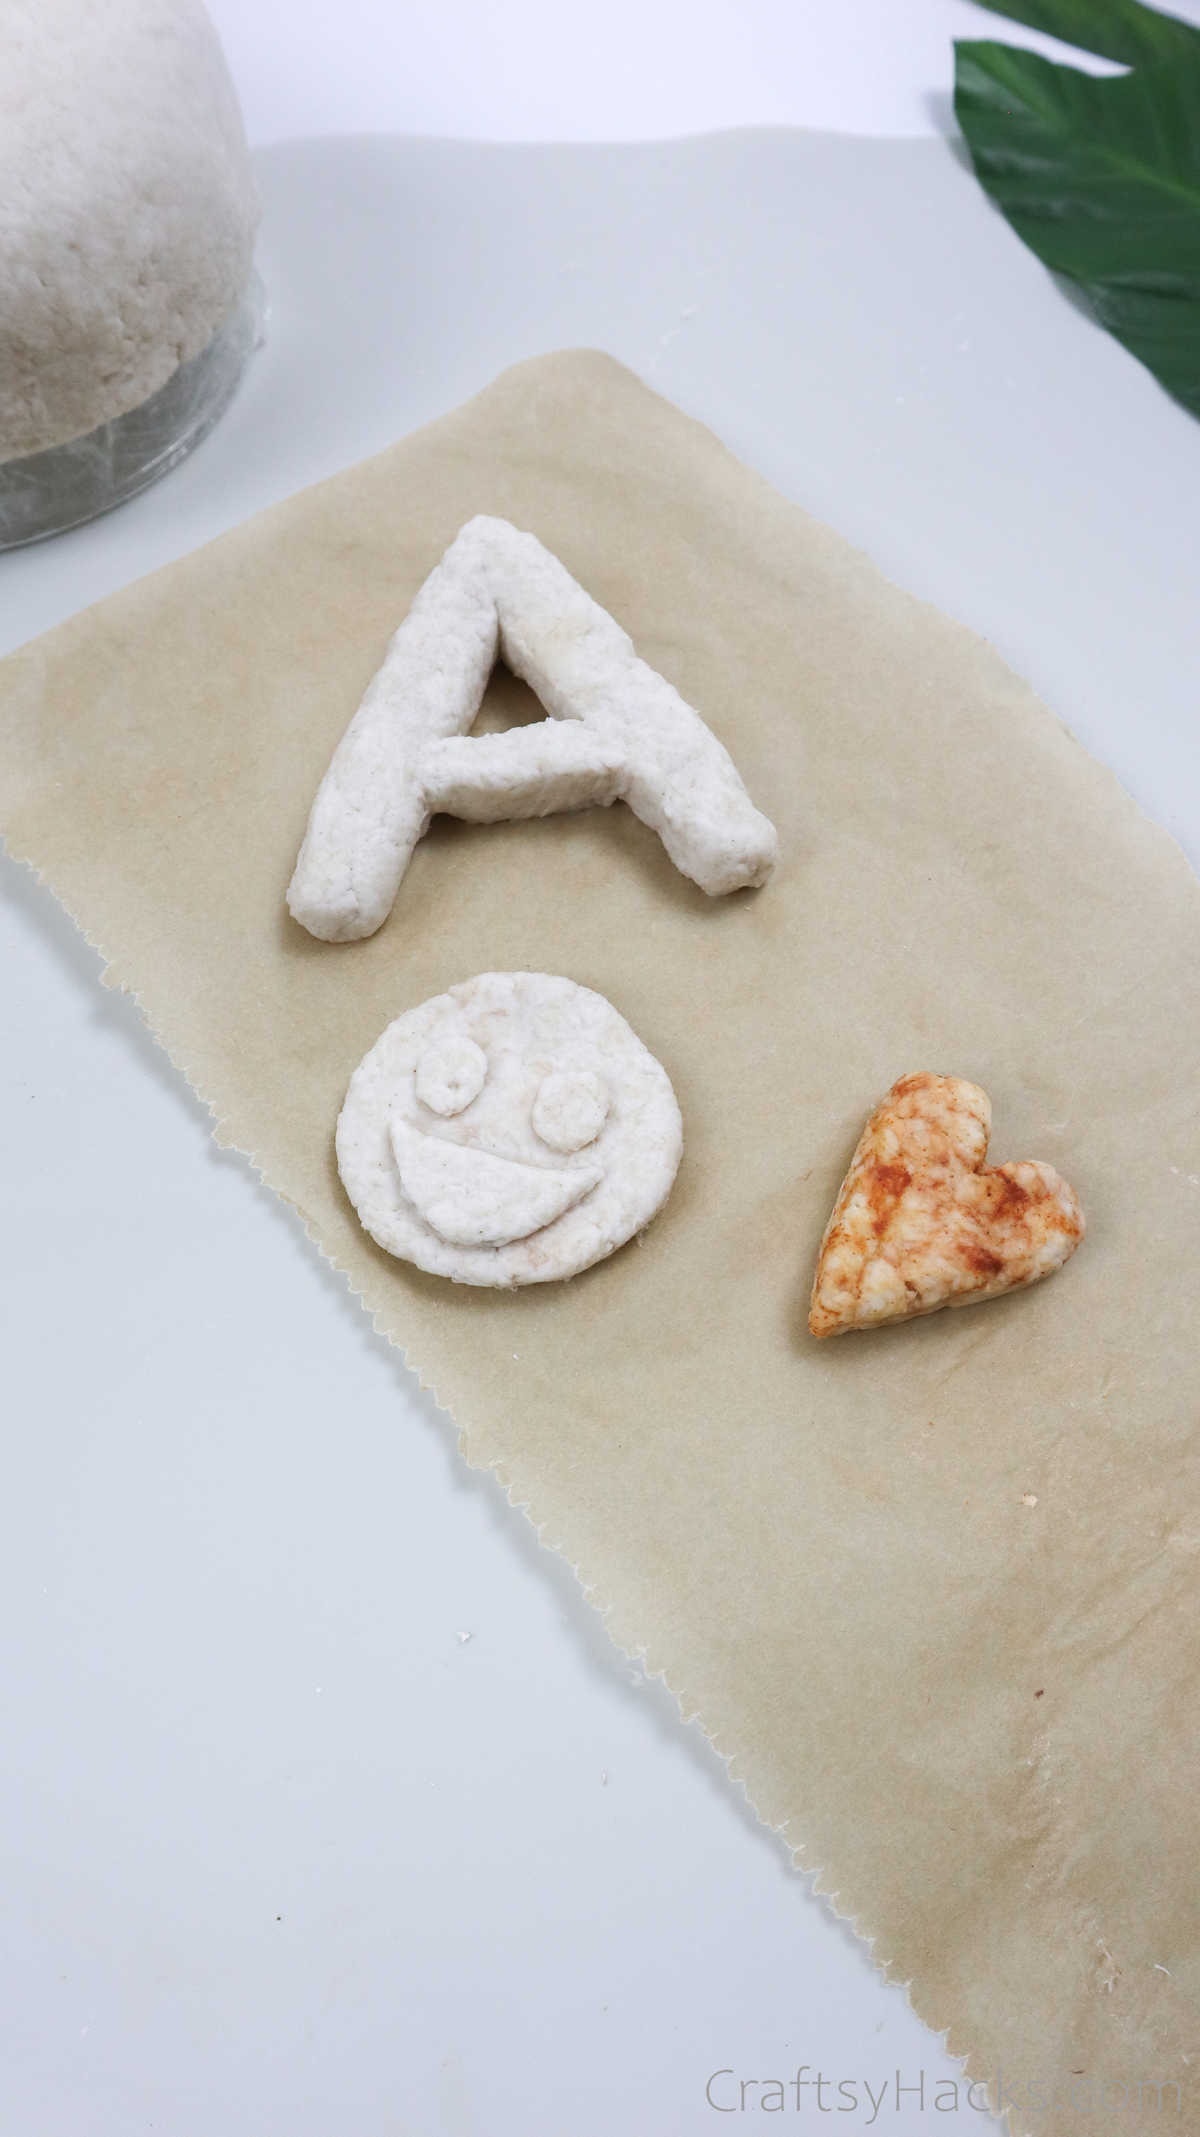
Other Crafts You Might Want to Make
- 41 Cardboard Crafts
- How to Make Paper Tissue Paper Flowers
- How to Make Paper Lanterns
- 27 Classroom Crafts
- How to Make Paper Squishies
- DIY Paper Flowers
- DIY Paper Rings
- 31 Summer Crafts for Kids
- 31 Paper Crafts for Kids
- 37 Tissue Paper Crafts
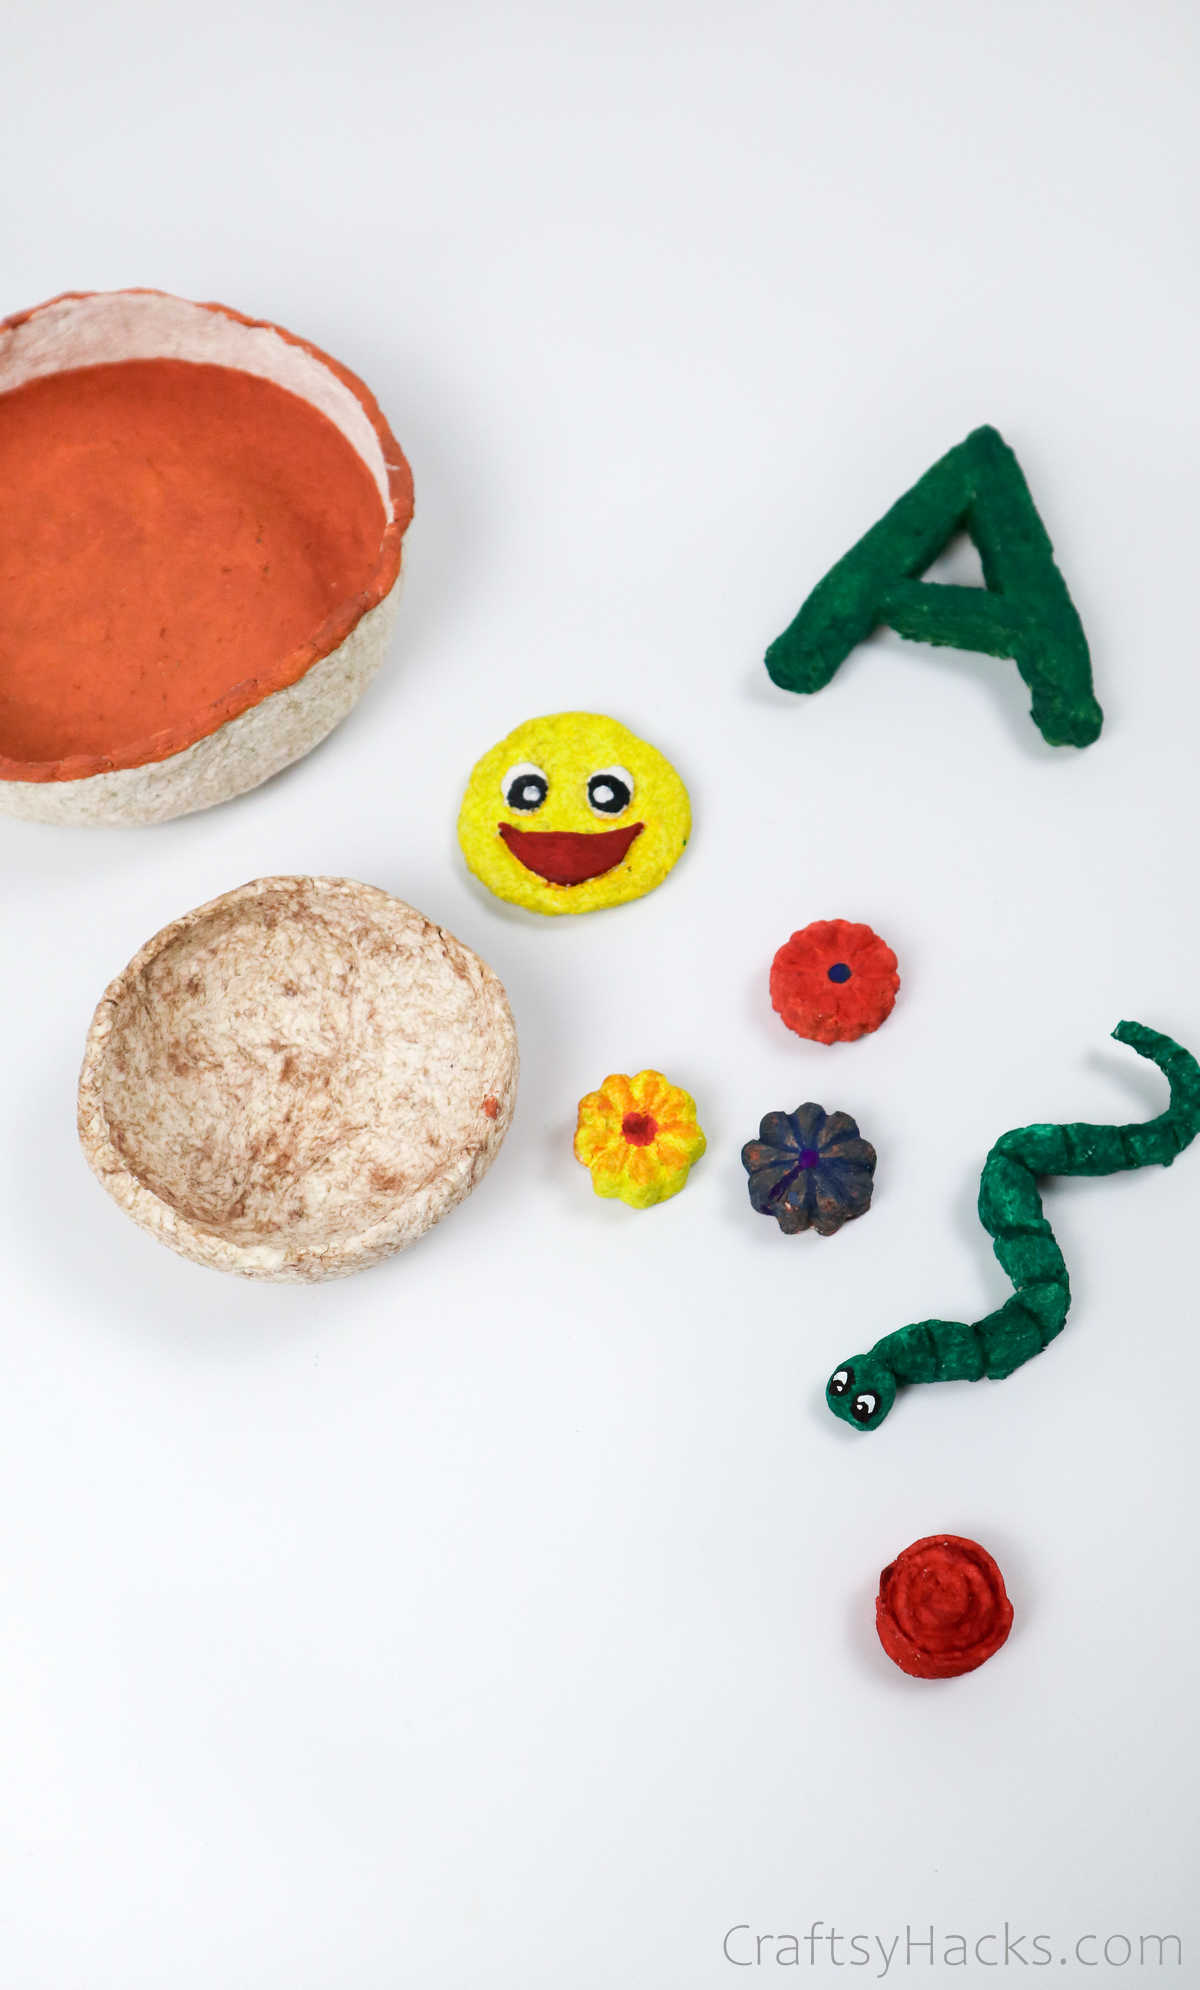
How to Make Paper Mache (Step-by-Step)
Materials .
- ▢ 1/2 toilet paper roll
- ▢ Cheesecloth
- ▢ 1/2 glass of water
- ▢ 1/2 glass of wheat flour
- ▢ Spoon
- ▢ Blender
- ▢ 2 x bowls
Instructions
- Gather all the materials listed out to begin.
- First, lay out plenty of paper towels over your work surface to control messes and spills.
- Now, tear paper or newspaper into tiny pieces and put them in a big bowl. You can also use a pair of scissors. Newspaper is thicker and so, tear it into much smaller pieces.
- Next, pour boiling water over the paper and let it sit for at least 2 hours(overnight if you used newspaper). The hot water will break down cellulose and turn your paper into pliable pulp.
- Drain the pulp into a cheesecloth and squeeze the excess water out. Squeeze until you’re sure you managed to get all the moisture out of the pulp.
- Remove the pulp from the cheesecloth and break it into tiny pieces and put everything in a bowl.
- To make the flour paste, add flour(or cornstarch) to another bowl and mix in some water. Then, place this paste over low heat and stir continuously as it ‘cooks’ for 4-5 minutes. When the excess water evaporates, your paste should be smooth and sticky.
- Alternatively, pop the paste into a microwave for 15-20 seconds, take it out, stir it, and pop it back in for another round. Repeat this 4-5 times and you’ll have your paste.
- Pour the paste onto the pulp and knead them into a pliant dough. You can store this dough for up to a week in the refrigerator.
- Go ahead and make a ton of paper mache craft items with your dough. Once you allow everything to air dry for a couple of days, you’re all done!
You May Also Like:
51 Christmas Basket Ideas for Friends and Family
17 Christmas Basket Ideas for Sister
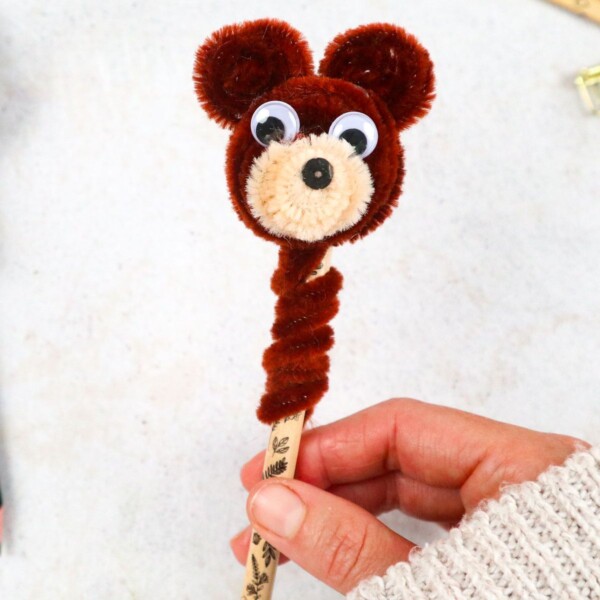
Pipe Cleaner Pencil Topper
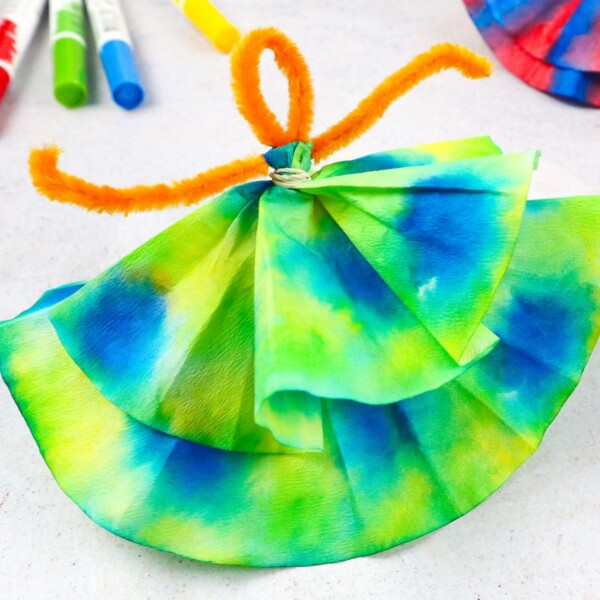
Coffee Filter Dancers
Leave a comment cancel reply.
Your email address will not be published. Required fields are marked *

- PRO Courses Guides New Tech Help Pro Expert Videos About wikiHow Pro Upgrade Sign In
- EDIT Edit this Article
- EXPLORE Tech Help Pro About Us Random Article Quizzes Request a New Article Community Dashboard This Or That Game Happiness Hub Popular Categories Arts and Entertainment Artwork Books Movies Computers and Electronics Computers Phone Skills Technology Hacks Health Men's Health Mental Health Women's Health Relationships Dating Love Relationship Issues Hobbies and Crafts Crafts Drawing Games Education & Communication Communication Skills Personal Development Studying Personal Care and Style Fashion Hair Care Personal Hygiene Youth Personal Care School Stuff Dating All Categories Arts and Entertainment Finance and Business Home and Garden Relationship Quizzes Cars & Other Vehicles Food and Entertaining Personal Care and Style Sports and Fitness Computers and Electronics Health Pets and Animals Travel Education & Communication Hobbies and Crafts Philosophy and Religion Work World Family Life Holidays and Traditions Relationships Youth
- Browse Articles
- Learn Something New
- Quizzes Hot
- Happiness Hub
- This Or That Game
- Train Your Brain
- Explore More
- Support wikiHow
- About wikiHow
- Log in / Sign up
- Hobbies and Crafts
- Paper Craft
- Papier Mache
How to Create Papier Mâché
Last Updated: August 15, 2024 Approved
This article was co-authored by Amy Guerrero . Amy Guerrero is an Arts and Crafts Specialist and the Owner of Sunshine Craft Co., a crafting studio based in Phoenix, Arizona. Amy specializes in macrame, DIY crafting, and teaching fiber arts. She offers monthly in-person and online workshops along with having developed a range of DIY craft kits for at-home projects. Amy holds a BS in Industrial Design from Philadelphia University. She worked as a graphic designer before starting her own business. Sunshine Craft Co. is a creative hub that offers a wide range of workshops, tools, and resources for any craft project to inspire creativity and community engagement. There are 7 references cited in this article, which can be found at the bottom of the page. wikiHow marks an article as reader-approved once it receives enough positive feedback. This article received 74 testimonials and 87% of readers who voted found it helpful, earning it our reader-approved status. This article has been viewed 3,302,530 times.
Looking to make your own paper mâché craft? Papier-mâché (pap-yay mash-ay) or paper mâché (paper mash-ay) is an easy to make, hard material that can be used to cover various surfaces. You can use it in arts and crafts to make various sculptures, fruit bowls, puppets, dolls, and much more. The surface is easy to paint, allowing you to add patterns, bright colors, and interesting designs to your finished product. We've put together a tutorial on how to make paper mâché that can be used for any project that you have in mind.
Making Papier Mâché

- A bowl or large container
- Flour, wallpaper powder/ paste , or white glue [1] X Research source
- Your base structure
- Newspaper (for your project -- not for clean-up duty)
- There is no wrong size your strips could be. In fact, if you want to add volume to your structure by molding the strips, you will need different sizes. So tear away freely.
- Glue mixture: Pour 2 parts white glue and one part water into a mixing bowl. These quantities can be changed to suit the size of your project. Or, if you have a stronger bonding glue, 1 part white glue and 1 part water will do the trick. [3] X Research source
- For super large and intense projects , you may want to substitute white glue for the water.
- Wallpaper powder : Pour 2 parts wallpaper powder and one part water into a mixing bowl. This method is good if you're thinking seriously long-term -- it can last years. [5] X Research source
- If it's too thin or thick, adjust accordingly. Add more adhesive base if it's too thin, water if it's too thick.

- If you're using a balloon, consider painting it with cooking oil beforehand -- that way, when it's dry, you can slide it out easily.
Creating Papier Mâché Crafts
- If you'd like to create a shape (a face, say), bunch the strip into the form you want, place it on your surface, and then layer another strip on top to smooth it out. This can create volume, texture, and detail quite easily.
- Put your first layer on horizontally, the second vertically, and so forth. It will help show you where you have been before and strengthen the piece. [10] X Research source

- Some schools of thought say to start with a white primer. If you're using a light color on the piece, you may want to use this method (otherwise some print may stick out). Make sure not to cover to top part in order to take the balloon out.
Community Q&A
Reader Videos
Share a quick video tip and help bring articles to life with your friendly advice. Your insights could make a real difference and help millions of people!
- The flour mixture is better for piñatas, as it breaks easier. If you're looking for a stronger hold (like for cosplay) use the glue one. Thanks Helpful 51 Not Helpful 9
- It will take more than 40 minutes to dry. Thanks Helpful 40 Not Helpful 7
- In addition, tearing the paper roughly, as opposed to cutting with scissors, will result in a smoother final appearance. Thanks Helpful 57 Not Helpful 13
Tips from our Readers
- Leave the paper mâché to dry overnight. Check on it in the morning to see if it's completely dry. Drying time depends on the size of your project, so just make sure it's dry before you paint or decorate it.
- Gather your materials before you start working, like newspaper, glue, paste, water, a paintbrush, and a structure as your base. Then, cover your work area with scrap paper.
- There are lots of adhesives to choose from, like flour paste, white glue, or wallpaper paste. Just mix either adhesive with water until it has a smooth consistency.
- Dip the strips into the adhesive mixture and smooth them onto your structure in layers. Aim for 3 layers of strips.
- Tear newspaper into long, 1 inch wide strips. Tearing creates a better edge than cutting.
- Use a hairdryer to speed up drying time. Just don't hold it too close or use high heat.
- Smooth any rough parts with sandpaper when the paper mâché is completely dry.

- The glue mixture may be hard to clean off your work surface once it is set. If you are worried about getting glue on your work surface, put some newspaper down before you get started. Thanks Helpful 96 Not Helpful 39
- If you're making a piñata using a balloon, make sure you use enough layers (at least 3 or more) or replace the newspaper with thicker paper (like normal white paper) and be sure to let it dry completely before removing the balloon. If not, the balloon may drag the paper inward and create dents when it's popped. Thanks Helpful 84 Not Helpful 37
Things You'll Need
- Glue/flour/wallpaper powder
- Mixing spoon/stick
- Newspaper (for surface and structure)
- Base structure
- Cooking oil (optional)
You Might Also Like

- ↑ https://medium.com/prikabylove/beginners-guide-to-paper-make-84ece70b6fce
- ↑ https://www.dltk-kids.com/type/how_to_paper_mache.htm
- ↑ http://www.papiermache.co.uk/tutorials/getting-started-with-papier-mache/
- ↑ https://www.kidspot.com.au/parenting/things-to-do/make-paper-mache-glue/news-story/ceb59e78216f566a15b75932462f274c
- ↑ https://blog.treasurie.com/paper-mache-balloon/
- ↑ https://www.goodtoknow.co.uk/family/things-to-do/how-to-make-paper-mache-288662
- ↑ https://www.ponderosahomes.com/2014/11/getting-crafty-thanksgiving/
About This Article

To make papier mâché, first add 2 cups (240 grams) of flour and 1 cup (240 milliliters) of water to a large bowl. Stir the flour and water together until a paste forms, then set the paste aside. Next, tear or cut enough 1-inch wide strips of newspaper to cover the object you’re papier mâchéing 3 times. When you’re done, dip the strips into the papier mâché paste, and press them onto your object. Continue dipping and pasting the strips until your object is completely covered. Then, let the first layer dry, which should take about 2 to 3 hours. Place a fan next to the object to help the papier mâché dry faster. Repeat the process 2 more times so you have 3 layers in total. Then, paint and decorate your papier mâché object. For other ways to papier mâché, including how to use a glue mixture or a wallpaper mixture as your base, read on! Did this summary help you? Yes No
- Send fan mail to authors
Reader Success Stories
Halha Begum
Aug 21, 2019
Did this article help you?
Dec 8, 2018
Alex Finlayson
Apr 5, 2016
Trudy Stevenson
Sep 29, 2016
Pam Cockrum
Nov 14, 2016

Featured Articles

Trending Articles

Watch Articles

- Terms of Use
- Privacy Policy
- Do Not Sell or Share My Info
- Not Selling Info
wikiHow Tech Help Pro:
Develop the tech skills you need for work and life

Paper Mache Recipe - Cheap, Quick, Easiest Glue
Modified: Jan 4, 2024 by Treasurie
Learn what paper mache recipe is best to ensure you accomplish your crafty projects efficiently. The glue is the most important material for paper mache because it holds your project together. It will also determine how long your project will last or what adjustments you can make once the paper gets exposed to the glue. This tutorial will show you how to make 3 types of paper mache glue including flour, PVA glue, and glue resin powder.

Topics Covered
Which is the Best Paper Mache Recipe
The purpose of a paper mache recipe is to have glue to bind layers of paper together. The best paper mache recipe depends on your purpose, how long you require your project to last, and what level of detail you need in your artwork. The two most common mache paste recipes are made from flour or white glue and water. Since paper mache is commonly used for kids crafts, most people make the flour mixture since it is easy to make, cheap and safe to use. Glue paper mache gives stronger results.

In this tutorial, I will show you 3 different methods of making a paper mache recipe.
- Paper mache recipe with flour (recommended for kids crafts).
- Paper mache recipe with flour and glue resin (stronger for adult crafts.)
- Paper mache recipe with PVA glue (strong glue for adult crafts.)
| Characteristics | Flour | Flour and Resin | PVA Glue |
|---|---|---|---|
| Flour and water | Flour, water, and resin glue | White glue (PVA) and water | |
| Smooth, can be lumpy | Smoother, less prone to lumps | Very smooth | |
| Longer | Moderate | Fastest | |
| Strong, can crack if thick | Very strong and slightly flexible | Strong and flexible, less cracking | |
| Good for less detailed projects | Suitable for moderate detail | Excellent for detailed work | |
| Very easy and economical | Easy, slightly more expensive | Easy but more expensive |
1. Paper Mache Recipe with Flour
You will often see paper mache recipes with flour called paper mache paste. It is an easy paper mache recipe to make for kids.

You can use this homemade adhesive as soon as you prepare it. However, it can last for a few days when refrigerated, so go ahead and make extra if you plan to do lots of projects within a short period. Below is the procedure recommended by most crafters.
For this paper mache recipe for a homemade adhesive, make sure you have the following ready:
- A Mixing Bowl
- Whisk or Hand Blender
- Salt (salt prevents mold and rot)
- Jar or Container With an Airtight Lid (for storage)
Best Type of Flour for Paper Mache Glue
The most recommended DIY paper mache glue is made of white flour. Not only is it safer because it’s food-grade, but also economical, especially for kids and those just starting to learn paper mache. If you have kids with any allergies, use gluten-free flour.
Plain Flour vs Self Raising Flour for Paper Mache
Plain flour is usually used to make paper mache glue. You can use self-raising flour, although it's not the most common choice. Self-raising flour contains baking powder in addition to flour, but this shouldn't significantly affect the paper mache mixture for most craft purposes.
Flour Paper Mache Recipe, Step by Step Instructions
Now that you have all the materials ready, you can start making your DIY adhesive. All you have to do is follow these paper mache recipe steps:
- In your mixing bowl, place one part of the flour with two parts of water. For example, mix a cup of flour with two cups of water.
- Mix the two ingredients using the whisk or hand blender until you no longer see any lumps.
- Check the mixture’s consistency, which is, ideally, should be the same as pancake batter. If it’s not, you can add flour or water little by little, depending on whether it’s too thin or thick. Remove any air bubbles.
- Once you achieved the right consistency, add at least two tablespoons of salt, and then mix using your whisk or hand blender.
- Transfer the paste to your airtight container, whether you’ll use it now or later.
- If you won’t use it or are done using it, cover it with the lid tightly and put it inside your refrigerator.
- To use the paper mache glue, tear strips of paper, cover them in glue and then apply them to your base.
Tips for Flour Paper Mache Recipe
This adhesive will have an odd smell that won’t work for anyone, but there’s a good hack for this issue. That is, to add a few pinches of cinnamon to the mixture.
Likewise, you can change the mixture’s color to the paste by adding a few drops of food coloring. Just note that it can stain your clothes or any fabric, so it’s best to wear your art or work clothes.
2. Flour and Glue Paper Mache Recipe
Another alternative to standard types of glue for paper mache is the flour-resin adhesive. The product made out of this paper mache recipe can last up to about a week when refrigerated. However, you’ll notice changes in the consistency after a few days, so it’s best to make just enough.
Like the first homemade adhesive, you should prepare a mixing bowl, a whisk or hand blender, a container with an airtight lid, water, and flour. In addition, you must have the following on hand:
- Saucepan: This paper mache recipe requires boiling, so you need a mid-sized pot to hold all the ingredients.
- Measuring Cups
- Resin Glue Powder: This ingredient helps the product have better texture and binding abilities. Glue powder is a powdered wood glue that is activated by adding water. It can be found at many craft stores and hardware stores.
Flour and Glue Paper Mache Recipe, Step by Step
The steps you need to take to succeed in preparing this paper mache recipe are as follows:
- Measure three cups of water, place it in your pot, and bring it to a boil on the stovetop.
- While waiting, start preparing your flour-glue mixture. Measure half a cup of powdered resin glue and put it in your mixing bowl. Add a cup of flour.
- Mix the two ingredients using your whisk or hand blender until you see no lumps.
- When the water starts to boil, slowly stir in your flour-resin mixture and mix.
- Allow it to boil until you see a smooth and clear mixture. This usually takes two to three minutes.
- Remove the pot from the heat and place it in a stable, safe place.
- Once it slightly cools, transfer the paste to your container, whether you’ll use it now or later.
- If you won’t use it or are done, cover it with the lid tightly and put it inside your refrigerator.
More Articles

3. Paper Mache Recipe with Glue (PVA)
Paper mache made with glue is stronger than the recipe made with flour. It is best suited to adults making paper mache projects rather than kids. As well as being stronger, glue paper mache recipes last longer and are less prone to rotting.
- White Glue: Many types of glue can be used, but the best is wood glue or white PVA glue. Ensure that the glue dries clear.
- Mixing Bowls
Glue Paper Mache Recipe, Step by Step
- Add white glue to your mixing bowl and mix with equal water. (Ratio 1:1)
- Mix thoroughly so there are no lumps.
PVA Paper Mache Glue Options
As mentioned, there is a wide selection of PVA glue that you’ll find in the market today. Let’s talk about two of your best options to make it easier for you to decide.
Types of Glue:
- White, Hobby, or School Glue
- Type 1 Carpenter’s or Regular Wood Glue
White, Hobby, or School Glue - The Best PVA Paper Mache Glue
The best glue for paper mache is white glue like Elmer's glue, which is the variety you usually use in school and the office. It’s affordable, readily available, and flexible, so even beginners won’t have difficulty accomplishing small and large projects.
However, you can’t sand the dried white glue, so don’t create bits or clumps while making your design. Nonetheless, the dried glue is durable, preventing cracks in case you accidentally knock off your paper mache. Additionally, this glue is water-soluble and requires dilution before use.
Type 1 Carpenter’s or Regular Wood Glue - The Alternative Option
Known to be the strongest type of PVA glue, the type 1 carpenter’s glue is another excellent option. You can also easily paint and sand your projects using this glue, giving your paper mache an attractive finish. Its sandable property also ensures you can fix chips and cracks with ease.
Paper Mache Glue Recipe FAQs
Is paper mache better with glue or flour.
A mache paste recipe with glue is superior to flour simply because it’s explicitly formulated to bond items, so it’s stronger. It’s also easier to achieve the right consistency needed for paper mache. It also dries more quickly than flour-based adhesive.
Although you can resolve the rotting and molding issues by adding salt, the flour-based adhesive can turn yellow after a while. Nonetheless, you might not need to paint your paper mache project when using flour-based glue. You can simply divide it into portions and add color to each one.
Can You Make Paper Mache Without Glue?
What if you don’t have PVA glue or don’t want to use any commercially available adhesive for paper mache? Don’t worry. Use the flour paper mache recipe. The materials you’ll need are readily available in your kitchen or a nearby store. Mix 1 part flour to 2 parts water and add 2 tablespoons of salt.
Paper Mache Recipe - In Conclusion
Preparing the best glue for your paper mache projects isn’t complicated. The best thing about them is that most materials are available at home. For the rest, you can buy them online or at your local store at an affordable price.
Although you can store them for a certain period, using freshly prepared paper mache glue is best. Doing so ensures they’re still at their best quality. You must also not forget to label the containers before placing them in the fridge. The label should include what they are and when their exact expiry dates, as mentioned in the specific paper mache recipe. Happy crafting!
More Paper Mache Basics
- How to Make Paper Mache
- Paper Mache with PVA Glue
- Paper Mache Glue
More Paper Crafts

Dever Sanderson says
June 22, 2023 at 10:27 am
Excellent article! Your post is essential today. Thanks for sharing, by the way.
Leave a Reply
Your email address will not be published. Required fields are marked *
Customise your experience
- Get suggested content
- Create personalised work boards
Free learning resources from arts, cultural and heritage organisations.
Teachers' Notes
Resource created by leeds museums and galleries: lotherton, curriculum links.
- KS1 Art & Design: Use a range of materials creatively to design and make products. Develop a wide range of art and design techniques using colour, pattern, texture, line, shape, form and space. Learn about the work of a range of artists, craft makers and designers.
- KS2 Art & Design: learn about the history of art, craft, design and architecture, including periods, styles and major movements from ancient times up to the present day
- KS1 Science: Performing simple tests and recording observations. Properties of materials.
- KS2 Science: Use of everyday materials.
- Arts Award: Discover and Explore
Discussion and Activity Ideas
Art and Design:
- What do you think we should do with all the old British banknotes which have just been replaced? If you could use this old to make papier mâché objects, what would you make?
- Experiment with papier mâché as a technique. Can you mould paper pulp and paste into a sculpture using only your hands and modelling tools? Can you use papier mâché to create a textured/sculpted pattern on another surface i.e. a piece of wood or cardboard? What is the difference between these techniques?
- Using clay, make a mould. Once the mould has dried, hand press papier mâche pulp into it and leave to dry.
- One group make a solid sheet of papier mâché material using pulped paper and glue. Another group make a sheet of the same thickness using layers of paper pasted together on top of each other. Which sheet creates the strongest material?
- Experiment using different types of glue or paste. Papier mâché furniture makers often added things like flour, plaster or sawdust to their adhesive to strengthen their product.
The History of Papier Mâché
This website uses cookies.
This website uses cookies to improve your browsing experience, We use aggregate data to report to our funders, the Arts Council England, about visitor numbers and pageviews. We don't share your data with any third party organisations for marketing purposes. By clicking on 'Agree', you accept the use of these cookies.
Cookie settings
Our website keeps three levels of cookies. You can adjust your preferences at any time. If you want more information about what cookies are and which cookies we collect, please read our cookie policy .
Are essential cookies that ensure that the website functions properly and that your preferences (e.g. language, region) are saved.
Allow us to analyse website use and to improve the visitor's experience.
How to Make Papier-Mache Bowls
:max_bytes(150000):strip_icc():format(webp)/IMG_20180624_160710_544-5b69ee6b46e0fb004ff36248.jpg)
Dave King / Getty Images
- Working Time: 3 hrs
- Total Time: 15 hrs
- Yield: 1 set nesting bowls
- Skill Level: Intermediate
An interior space often doesn't feel fully realized without a few careful accents. It can be tricky to source meaningful tchotchkes, so why not create a few decorative items yourself instead? Papier-mache gets an adult update with a chic set of nesting bowls.
The options are endless when it’s time to decorate your papier-mache nesting bowls, so consider how you’ll use them in your home to draw inspiration. If you plan to keep them in your kitchen as produce holders, go for vibrant, bold colors and designs. Considering adding your bowls to a foyer or side table? Opt for a chic pattern and a pop of metallic to complement your living area.
No matter how you decide to decorate your nesting bowls, acrylic paint and regular paint brushes work perfectly well. To create your own set of these budget-friendly accent bowls, gather your supplies and follow the easy steps below.
What You'll Need
Equipment / tools.
- Glass nesting bowls
- Mixing bowl
- Aluminum foil
- Paint brushes
- Drying racks
- 1 inch Strips of paper
- Cooking spray
- Acrylic paint (white plus decorative colors)
- Fine grain sandpaper (optional)
- Clear coat finish brush-on or spray
- Non-toxic clear coat finish (optional for food bowls)
Instructions
Mix the paste.
This recipe calls for a non-cooked paste , which can be easier to handle than cooked glue.
- Pour two parts water to one part flour into the mixing bowl and combine well using a wire whisk. The consistency of the mixture should be similar to a pancake batter.
- Whisk until all lumps are gone.
Flour Paste Aroma
If the smell of the flour paste is too unpleasant (or your crafting area is small and enclosed), add a few drops of essential oil to the paste for a more enjoyable creative experience.
Cover Glass Bowls With Aluminum Foil
To help remove your papier-mache from the bowls easily, cover them first with aluminum foil.
- If you’re looking for a smoother texture in your final product, cover carefully and smooth the foil down with your fingers as much as possible.
- Or, embrace a bit of the natural roughness in papier-mache and don’t worry about the small crinkles.
- For easier papier-mache removal later, hit the foil-covered bowls with a quick coating of cooking spray.
Adhere Newspaper Strips to Bowls With Paste
- Dip one strip of newspaper at a time into the flour mixture.
- Remove the excess glue by sliding the strip of paper between your fingers, then paste it on the foil-covered bowl.
- Criss-cross the strips until most of the bowl is covered.
- Then reinforce the strips by encircling the bowl with horizontal pieces.
- Smooth things over with your fingertips once the entire bowl is covered.
- Repeat these steps for each bowl you are making.
Let Dry Overnight
- Carefully shift the newspaper-covered bowls to wire drying racks.
- Place racks in a cool, out-of-the-way area to set.
- Leave them undisturbed overnight to dry.
Drying Time
It may seem your papier-mache has dried and set after a few hours, but to ensure a sturdy project, leave the bowls unmoved for at least 12 hours.
Remove Papier-Mache From Foil Bowls and Trim Excess
- Once the papier-mache has dried, carefully remove it from the aluminum foil.
- Trim any excess newspaper from the edges of each bowl with a sharp pair of scissors for a nice, clean edge.
- Decide if you want to finish or change the texture of your bowl (see Tips box).
Choose the Finish of Your Bowl
If you’re looking for a smooth, refined finish, sand your papier-mache gently with a fine grain sandpaper. Or, embrace the natural texture and unfinished edges of your bowls for a more rustic finish.
Prime the Papier-Mache Bowls
- Give each bowl a quick coat of white acrylic paint to ensure your colors really pop later on.
- Let it dry.
- Apply a another coat of paint.
- Allow to dry completely.
Paint and Decorate the Papier-Mache Bowls
- Paint the inside and outside of your bowl.
- Seal everything with brush-on or spray clear coat finish.
Be sure to use a food-safe, non-toxic clear coat finish option if you’ll use your bowls to hold fresh fruits and veggies.
Display Your Papier-Mache Nesting Bowls
Find the perfect space in your home for your DIY nesting bowls. They can be practical (think: a place to drop keys or jewelry) or purely decorative, so it's worth trying a few different spots to see where they work best.
More from The Spruce Crafts

COMMENTS
Papier mâché or paper mache is a popular crafting technique that uses paper and a paste to create a variety of objects. The method is named after the French term for "chewed paper," which makes sense given the steps needed for any paper mache project. Paper mache is the layering of moistened paper and other materials onto a blank surface ...
Mardi Gras papier-mâché masks, Haiti. Papier-mâché (UK: / ˌ p æ p i eɪ ˈ m æ ʃ eɪ / PAP-ee-ay MASH-ay, US: / ˌ p eɪ p ər m ə ˈ ʃ eɪ / PAY-pər mə-SHAY, French: [papje mɑʃe]; lit. ' chewed paper '), frequently written as paper mache, is a composite material consisting of paper pieces or pulp, sometimes reinforced with textiles, and bound with an adhesive, such as glue ...
Definition. Paper mache is made of pulped or torn paper strips mixed with adhesive and pressed together. The shapes are molded when moist, then become strong and hard when dry. Its name originates from the French 'Papier Mache ', which is translated as 'chewed up paper'. Learn how to make paper mache for beginners.
February 8, 2022 by Robert. Paper mache, or papier-mâché as you'll sometimes see it spelled, is a technique used to sculpt and decorate that uses layers of paper and adhesive. You might remember it from your elementary school art class, but paper mache has a rich history and many beautiful, practical uses. So, what is paper mache, anyway?
What Is Papier-Mâché?
The term paper mache is derived from the French words Papier-mâché, meaning of all things "chewed paper." Paper mache is a method of crafting in which paper is combined with a 'paste' to create a wide variety of objects. Don't forget to Pin and save this post for later!
Step 4: Add a layer of paper mache to the bowl. Dip a strip of newspaper into the paper mache mixture, saturating it completely. Slide the paper through your fingers to remove the excess paste. Place the paper strip on the covered bowl, smoothing it down with your fingers. Continue adding coated strips of newspaper to the bowl, overlapping them ...
4. Let it dry: Allow your creation to dry completely. This may take a few hours or even a couple of days, depending on the size and thickness of your project. 5. Decorate and finish: Once your papier mache is fully dry, you can paint, varnish, or decorate it as you wish. Get creative and let your imagination run wild!
Dip one piece of newspaper at a time into the paper mache paste. You want the newspaper strip to be saturated. Hold the saturated strip over the paste bowl and run it through your fingers to squeeze off any excess paste. Stick the newspaper strip over your form and smooth it down with your fingers. Then, completely cover your form with a layer ...
Combine flour/glue and water into the bowl and mix until desired consistency. When you begin to make your paper mache mixture, you will combine your two ingredients in a bowl until it reaches the desired consistency. If the mixture is thick, you add water. If the mixture is thin, you add flour or glue.
Papier-mâché is a versatile and inexpensive art form that involves the use of paper, adhesive, and water to create sculptures, masks, and other decorative objects. The term "papier-mâché" is French for "chewed paper," which refers to the process of soaking paper in water and adhesive to create a moldable material.
Step 2: Make Your Paper Mache. Paper mache clay: Paper mache paste: Paste with no flour (and no mold!): Make paper mache with glue: Step 3: Apply the paste or paper mache clay to your form. Applying paper mache clay: Applying paper strips and paste: Step 4: Let your paper mache get dry all the way through.
Paper Mache is derived from the French term "Papier-mâché", the literal translation of which is "chewed paper". Despite its French name, the technique originated in China During the Han Dynasty. Today we are going to explore paper mache, its history, materials, and how it is being used by contemporary artists.
Newspaper is thicker and so, tear it into much smaller pieces. Next, pour boiling water over the paper and let it sit for at least 2 hours (overnight if you used newspaper). The hot water will break down cellulose and turn your paper into pliable pulp. Drain the pulp into a cheesecloth and squeeze the excess water out.
For this paper mache recipe, place the adhesive and water in your container, following these recommended adhesive to water ratios:. PVA, Modge Podge, School Glue: 2:1 or 1:1 (Using the 1:1 ratio will give a stronger glue but you may need to experiment to get the right consistency.) Homemade: 1:1 (1 cup of flour to 1 cup water, or 1 part flour to 1 part water)
The meaning of PAPIER-MÂCHÉ is a light strong molding material of wastepaper pulped with glue and other additives. How to use papier-mâché in a sentence.
'Papier mâché' is a term used to describe lots of objects made in slightly different ways, but all using mashed up paper and some sort of paste. Sometimes, the paper would be moulded around a solid form, for example a wooden board. Other times, the paper would be pressed into a cast to mould it into the desired shape. In the late 1700s, a ...
Blend until it forms a smooth consistency. If it's too thin or thick, adjust accordingly. Add more adhesive base if it's too thin, water if it's too thick. 5. Find a surface you want to papier-mâché. Examples include a balloon, cardboard or a molded figure. [6]
Papier Mache Hot Air Balloons. Martha Stewart (marthastewart.com) These cute hot air balloons are surprisingly simple to make, using just a balloon, paper mache, and a few embellishments. They would make a great way to add some decoration to a party or celebration. Go to Project Page.
Paper mache made with glue is stronger than the recipe made with flour. It is best suited to adults making paper mache projects rather than kids. As well as being stronger, glue paper mache recipes last longer and are less prone to rotting. Supplies. White Glue: Many types of glue can be used, but the best is wood glue or white PVA glue. Ensure ...
Using clay, make a mould. Once the mould has dried, hand press papier mâche pulp into it and leave to dry. Science: One group make a solid sheet of papier mâché material using pulped paper and glue. Another group make a sheet of the same thickness using layers of paper pasted together on top of each other.
Adhere Newspaper Strips to Bowls With Paste. Dip one strip of newspaper at a time into the flour mixture. Remove the excess glue by sliding the strip of paper between your fingers, then paste it on the foil-covered bowl. Criss-cross the strips until most of the bowl is covered. Then reinforce the strips by encircling the bowl with horizontal ...
Papier mâché. French for "chewed-up paper," a technique for creating three-dimensional objects, such as sculpture, from pulped or pasted paper and binders such as glue or plaster.