
An official website of the United States government
The .gov means it’s official. Federal government websites often end in .gov or .mil. Before sharing sensitive information, make sure you’re on a federal government site.
The site is secure. The https:// ensures that you are connecting to the official website and that any information you provide is encrypted and transmitted securely.
- Publications
- Account settings
Preview improvements coming to the PMC website in October 2024. Learn More or Try it out now .
- Advanced Search
- Journal List
- PLoS Comput Biol
- v.17(12); 2021 Dec

Ten simple rules for effective presentation slides
Kristen m. naegle.
Biomedical Engineering and the Center for Public Health Genomics, University of Virginia, Charlottesville, Virginia, United States of America
Introduction
The “presentation slide” is the building block of all academic presentations, whether they are journal clubs, thesis committee meetings, short conference talks, or hour-long seminars. A slide is a single page projected on a screen, usually built on the premise of a title, body, and figures or tables and includes both what is shown and what is spoken about that slide. Multiple slides are strung together to tell the larger story of the presentation. While there have been excellent 10 simple rules on giving entire presentations [ 1 , 2 ], there was an absence in the fine details of how to design a slide for optimal effect—such as the design elements that allow slides to convey meaningful information, to keep the audience engaged and informed, and to deliver the information intended and in the time frame allowed. As all research presentations seek to teach, effective slide design borrows from the same principles as effective teaching, including the consideration of cognitive processing your audience is relying on to organize, process, and retain information. This is written for anyone who needs to prepare slides from any length scale and for most purposes of conveying research to broad audiences. The rules are broken into 3 primary areas. Rules 1 to 5 are about optimizing the scope of each slide. Rules 6 to 8 are about principles around designing elements of the slide. Rules 9 to 10 are about preparing for your presentation, with the slides as the central focus of that preparation.
Rule 1: Include only one idea per slide
Each slide should have one central objective to deliver—the main idea or question [ 3 – 5 ]. Often, this means breaking complex ideas down into manageable pieces (see Fig 1 , where “background” information has been split into 2 key concepts). In another example, if you are presenting a complex computational approach in a large flow diagram, introduce it in smaller units, building it up until you finish with the entire diagram. The progressive buildup of complex information means that audiences are prepared to understand the whole picture, once you have dedicated time to each of the parts. You can accomplish the buildup of components in several ways—for example, using presentation software to cover/uncover information. Personally, I choose to create separate slides for each piece of information content I introduce—where the final slide has the entire diagram, and I use cropping or a cover on duplicated slides that come before to hide what I’m not yet ready to include. I use this method in order to ensure that each slide in my deck truly presents one specific idea (the new content) and the amount of the new information on that slide can be described in 1 minute (Rule 2), but it comes with the trade-off—a change to the format of one of the slides in the series often means changes to all slides.

Top left: A background slide that describes the background material on a project from my lab. The slide was created using a PowerPoint Design Template, which had to be modified to increase default text sizes for this figure (i.e., the default text sizes are even worse than shown here). Bottom row: The 2 new slides that break up the content into 2 explicit ideas about the background, using a central graphic. In the first slide, the graphic is an explicit example of the SH2 domain of PI3-kinase interacting with a phosphorylation site (Y754) on the PDGFR to describe the important details of what an SH2 domain and phosphotyrosine ligand are and how they interact. I use that same graphic in the second slide to generalize all binding events and include redundant text to drive home the central message (a lot of possible interactions might occur in the human proteome, more than we can currently measure). Top right highlights which rules were used to move from the original slide to the new slide. Specific changes as highlighted by Rule 7 include increasing contrast by changing the background color, increasing font size, changing to sans serif fonts, and removing all capital text and underlining (using bold to draw attention). PDGFR, platelet-derived growth factor receptor.
Rule 2: Spend only 1 minute per slide
When you present your slide in the talk, it should take 1 minute or less to discuss. This rule is really helpful for planning purposes—a 20-minute presentation should have somewhere around 20 slides. Also, frequently giving your audience new information to feast on helps keep them engaged. During practice, if you find yourself spending more than a minute on a slide, there’s too much for that one slide—it’s time to break up the content into multiple slides or even remove information that is not wholly central to the story you are trying to tell. Reduce, reduce, reduce, until you get to a single message, clearly described, which takes less than 1 minute to present.
Rule 3: Make use of your heading
When each slide conveys only one message, use the heading of that slide to write exactly the message you are trying to deliver. Instead of titling the slide “Results,” try “CTNND1 is central to metastasis” or “False-positive rates are highly sample specific.” Use this landmark signpost to ensure that all the content on that slide is related exactly to the heading and only the heading. Think of the slide heading as the introductory or concluding sentence of a paragraph and the slide content the rest of the paragraph that supports the main point of the paragraph. An audience member should be able to follow along with you in the “paragraph” and come to the same conclusion sentence as your header at the end of the slide.
Rule 4: Include only essential points
While you are speaking, audience members’ eyes and minds will be wandering over your slide. If you have a comment, detail, or figure on a slide, have a plan to explicitly identify and talk about it. If you don’t think it’s important enough to spend time on, then don’t have it on your slide. This is especially important when faculty are present. I often tell students that thesis committee members are like cats: If you put a shiny bauble in front of them, they’ll go after it. Be sure to only put the shiny baubles on slides that you want them to focus on. Putting together a thesis meeting for only faculty is really an exercise in herding cats (if you have cats, you know this is no easy feat). Clear and concise slide design will go a long way in helping you corral those easily distracted faculty members.
Rule 5: Give credit, where credit is due
An exception to Rule 4 is to include proper citations or references to work on your slide. When adding citations, names of other researchers, or other types of credit, use a consistent style and method for adding this information to your slides. Your audience will then be able to easily partition this information from the other content. A common mistake people make is to think “I’ll add that reference later,” but I highly recommend you put the proper reference on the slide at the time you make it, before you forget where it came from. Finally, in certain kinds of presentations, credits can make it clear who did the work. For the faculty members heading labs, it is an effective way to connect your audience with the personnel in the lab who did the work, which is a great career booster for that person. For graduate students, it is an effective way to delineate your contribution to the work, especially in meetings where the goal is to establish your credentials for meeting the rigors of a PhD checkpoint.
Rule 6: Use graphics effectively
As a rule, you should almost never have slides that only contain text. Build your slides around good visualizations. It is a visual presentation after all, and as they say, a picture is worth a thousand words. However, on the flip side, don’t muddy the point of the slide by putting too many complex graphics on a single slide. A multipanel figure that you might include in a manuscript should often be broken into 1 panel per slide (see Rule 1 ). One way to ensure that you use the graphics effectively is to make a point to introduce the figure and its elements to the audience verbally, especially for data figures. For example, you might say the following: “This graph here shows the measured false-positive rate for an experiment and each point is a replicate of the experiment, the graph demonstrates …” If you have put too much on one slide to present in 1 minute (see Rule 2 ), then the complexity or number of the visualizations is too much for just one slide.
Rule 7: Design to avoid cognitive overload
The type of slide elements, the number of them, and how you present them all impact the ability for the audience to intake, organize, and remember the content. For example, a frequent mistake in slide design is to include full sentences, but reading and verbal processing use the same cognitive channels—therefore, an audience member can either read the slide, listen to you, or do some part of both (each poorly), as a result of cognitive overload [ 4 ]. The visual channel is separate, allowing images/videos to be processed with auditory information without cognitive overload [ 6 ] (Rule 6). As presentations are an exercise in listening, and not reading, do what you can to optimize the ability of the audience to listen. Use words sparingly as “guide posts” to you and the audience about major points of the slide. In fact, you can add short text fragments, redundant with the verbal component of the presentation, which has been shown to improve retention [ 7 ] (see Fig 1 for an example of redundant text that avoids cognitive overload). Be careful in the selection of a slide template to minimize accidentally adding elements that the audience must process, but are unimportant. David JP Phillips argues (and effectively demonstrates in his TEDx talk [ 5 ]) that the human brain can easily interpret 6 elements and more than that requires a 500% increase in human cognition load—so keep the total number of elements on the slide to 6 or less. Finally, in addition to the use of short text, white space, and the effective use of graphics/images, you can improve ease of cognitive processing further by considering color choices and font type and size. Here are a few suggestions for improving the experience for your audience, highlighting the importance of these elements for some specific groups:
- Use high contrast colors and simple backgrounds with low to no color—for persons with dyslexia or visual impairment.
- Use sans serif fonts and large font sizes (including figure legends), avoid italics, underlining (use bold font instead for emphasis), and all capital letters—for persons with dyslexia or visual impairment [ 8 ].
- Use color combinations and palettes that can be understood by those with different forms of color blindness [ 9 ]. There are excellent tools available to identify colors to use and ways to simulate your presentation or figures as they might be seen by a person with color blindness (easily found by a web search).
- In this increasing world of virtual presentation tools, consider practicing your talk with a closed captioning system capture your words. Use this to identify how to improve your speaking pace, volume, and annunciation to improve understanding by all members of your audience, but especially those with a hearing impairment.
Rule 8: Design the slide so that a distracted person gets the main takeaway
It is very difficult to stay focused on a presentation, especially if it is long or if it is part of a longer series of talks at a conference. Audience members may get distracted by an important email, or they may start dreaming of lunch. So, it’s important to look at your slide and ask “If they heard nothing I said, will they understand the key concept of this slide?” The other rules are set up to help with this, including clarity of the single point of the slide (Rule 1), titling it with a major conclusion (Rule 3), and the use of figures (Rule 6) and short text redundant to your verbal description (Rule 7). However, with each slide, step back and ask whether its main conclusion is conveyed, even if someone didn’t hear your accompanying dialog. Importantly, ask if the information on the slide is at the right level of abstraction. For example, do you have too many details about the experiment, which hides the conclusion of the experiment (i.e., breaking Rule 1)? If you are worried about not having enough details, keep a slide at the end of your slide deck (after your conclusions and acknowledgments) with the more detailed information that you can refer to during a question and answer period.
Rule 9: Iteratively improve slide design through practice
Well-designed slides that follow the first 8 rules are intended to help you deliver the message you intend and in the amount of time you intend to deliver it in. The best way to ensure that you nailed slide design for your presentation is to practice, typically a lot. The most important aspects of practicing a new presentation, with an eye toward slide design, are the following 2 key points: (1) practice to ensure that you hit, each time through, the most important points (for example, the text guide posts you left yourself and the title of the slide); and (2) practice to ensure that as you conclude the end of one slide, it leads directly to the next slide. Slide transitions, what you say as you end one slide and begin the next, are important to keeping the flow of the “story.” Practice is when I discover that the order of my presentation is poor or that I left myself too few guideposts to remember what was coming next. Additionally, during practice, the most frequent things I have to improve relate to Rule 2 (the slide takes too long to present, usually because I broke Rule 1, and I’m delivering too much information for one slide), Rule 4 (I have a nonessential detail on the slide), and Rule 5 (I forgot to give a key reference). The very best type of practice is in front of an audience (for example, your lab or peers), where, with fresh perspectives, they can help you identify places for improving slide content, design, and connections across the entirety of your talk.
Rule 10: Design to mitigate the impact of technical disasters
The real presentation almost never goes as we planned in our heads or during our practice. Maybe the speaker before you went over time and now you need to adjust. Maybe the computer the organizer is having you use won’t show your video. Maybe your internet is poor on the day you are giving a virtual presentation at a conference. Technical problems are routinely part of the practice of sharing your work through presentations. Hence, you can design your slides to limit the impact certain kinds of technical disasters create and also prepare alternate approaches. Here are just a few examples of the preparation you can do that will take you a long way toward avoiding a complete fiasco:
- Save your presentation as a PDF—if the version of Keynote or PowerPoint on a host computer cause issues, you still have a functional copy that has a higher guarantee of compatibility.
- In using videos, create a backup slide with screen shots of key results. For example, if I have a video of cell migration, I’ll be sure to have a copy of the start and end of the video, in case the video doesn’t play. Even if the video worked, you can pause on this backup slide and take the time to highlight the key results in words if someone could not see or understand the video.
- Avoid animations, such as figures or text that flash/fly-in/etc. Surveys suggest that no one likes movement in presentations [ 3 , 4 ]. There is likely a cognitive underpinning to the almost universal distaste of pointless animations that relates to the idea proposed by Kosslyn and colleagues that animations are salient perceptual units that captures direct attention [ 4 ]. Although perceptual salience can be used to draw attention to and improve retention of specific points, if you use this approach for unnecessary/unimportant things (like animation of your bullet point text, fly-ins of figures, etc.), then you will distract your audience from the important content. Finally, animations cause additional processing burdens for people with visual impairments [ 10 ] and create opportunities for technical disasters if the software on the host system is not compatible with your planned animation.
Conclusions
These rules are just a start in creating more engaging presentations that increase audience retention of your material. However, there are wonderful resources on continuing on the journey of becoming an amazing public speaker, which includes understanding the psychology and neuroscience behind human perception and learning. For example, as highlighted in Rule 7, David JP Phillips has a wonderful TEDx talk on the subject [ 5 ], and “PowerPoint presentation flaws and failures: A psychological analysis,” by Kosslyn and colleagues is deeply detailed about a number of aspects of human cognition and presentation style [ 4 ]. There are many books on the topic, including the popular “Presentation Zen” by Garr Reynolds [ 11 ]. Finally, although briefly touched on here, the visualization of data is an entire topic of its own that is worth perfecting for both written and oral presentations of work, with fantastic resources like Edward Tufte’s “The Visual Display of Quantitative Information” [ 12 ] or the article “Visualization of Biomedical Data” by O’Donoghue and colleagues [ 13 ].
Acknowledgments
I would like to thank the countless presenters, colleagues, students, and mentors from which I have learned a great deal from on effective presentations. Also, a thank you to the wonderful resources published by organizations on how to increase inclusivity. A special thanks to Dr. Jason Papin and Dr. Michael Guertin on early feedback of this editorial.
Funding Statement
The author received no specific funding for this work.
Want to create or adapt books like this? Learn more about how Pressbooks supports open publishing practices.
14.2 Incorporating Effective Visuals into a Presentation
Learning objectives.
- Recognize the characteristics of effective visual aids.
- Analyze different types of visual aids and appropriate ways to use them.
- Determine how to create original visual aids and how to locate visual aids created by others.
Good communication is a multisensory experience. Children first learning how to read often gravitate toward books with engaging pictures. As adults, we graduate to denser books without pictures, yet we still visualize ideas to help us understand the text. Advertisers favor visual media—television, magazines, and billboards—because they are the best way to hook an audience. Websites rely on color, graphics, icons, and a clear system of visual organization to engage Internet surfers.
Bringing visuals into a presentation adds color, literally and figuratively. There is an art to doing it well. This section covers how to use different kinds of visual aids effectively.
Using Visual Aids: The Basics
Good writers make conscious choices. They understand their purpose and audience. Every decision they make on the page, from organizing an essay to choosing a word with just the right connotations, is made with their purpose and audience in mind.
The same principle applies to visual communication. As a presenter, you choose the following:
- When to show images or video for maximum impact
- Which images will best produce the effect you want
- When to present information using a table, chart, or other graphic
- How much text to include in slides or informational graphics
- How to organize graphics so they present information clearly
Your goal is to use visual media to support and enhance your presentation. At the same time, you must make sure these media do not distract your audience or interfere with getting your point across. Your ideas, not your visuals, should be the focus.
As you develop the visual side of your presentation, you will follow a process much like the process you follow when you write. You will brainstorm ideas, form an organizational plan, develop drafts, and then refine and edit your work. The following sections provide guidelines to help you make good decisions throughout the process.
What Makes Visual Aids Effective?
To help you get a sense of what makes visual media work, think about what does not work. Try to recall occasions when you have witnessed the following visual media failures:
- Websites crammed with so many images, flashing phrases, and clashing colors that they are almost unreadable
- Assembly instructions with illustrations or diagrams that are impossible to follow
- Photographs that are obviously (and badly) altered with photo-editing software
- Distracting typos or other errors in signs, advertisements, or headlines
- Tables, charts, or graphs with tiny, dense text or missing labels
In each case, the problem is that the media creator did not think carefully enough about the purpose and audience. The purpose of images, color, or flashing text on a website is to attract attention. Overusing these elements defeats the purpose because the viewer may become overwhelmed or distracted. Tables, charts, and graphs are intended to simplify complex information, but without clear labels and legible text, they will confuse the audience.
In contrast, effective visual elements are chosen or created with the purpose and audience in mind. Although a photo shoot for a magazine article might result in dozens of images, editors choose those few that work best with the article. Web designers and video game creators have an audience test their products before they are released, to ensure that people will understand how to use them. Understanding the function of different visual aids will help you use them with purpose.
Types of Visual Aids
Visual aids fall into two main categories—images and informational graphics. Images include photographs, illustrations and clip art, and video footage. Informational graphics include tables, charts, bar graphs, and line graphs.
These visual aids serve two purposes: to add emotional impact to your presentation and to organize information more clearly. With that in mind, read to find out how specific types of visual aids achieve those purposes.
Photographs
A striking photograph can capture your audience’s attention far more successfully than words can. Consider including photographs at the beginning or end of your presentation to emphasize your main ideas or to accompany a particularly important point in the body of your presentation. Remember that, as with other types of graphics, less is often more. Two or three well-chosen photographs are more effective than a dozen mediocre ones.
When you choose photographs, ask yourself these questions:
- What purpose does this image serve? Will it surprise the audience? Will it provoke a strong emotional response? Does it support an important point?
- Will this photograph be more effective if shown with only a caption, or does it need additional text?
- Will the audience understand what is happening in the photograph? Is the meaning immediately evident, or does the photo need some context?
- Would editing the image make it more effective? Consider using image-editing software to crop the photo, change the brightness, or make other cosmetic changes. (Do not go overboard, though. A slightly imperfect but authentic image is preferable to one that has been obviously altered.)
To illustrate the sense of helplessness people felt in the midst of tragedy, a student could use a photograph that shows fear, weariness, or defeat on the face of the photograph’s subject.
Figure 14.3

Neil Moralee – On The Scrap Heap . – CC BY-NC-ND 2.0.
Illustrations
Illustrations, such as editorial or political cartoons, serve much the same purpose as photographs. Because an illustration does not capture a moment in time the way a photo does, it may have less impact. However, depending on your topic and the effect you want to achieve, illustrations can still be very useful. Use the same criteria for choosing photographs to help you choose illustrations.
Figure 14.4

Humor Blog – Political Cartoon about Budget Cuts – CC BY 2.0.
The style of an illustration or photograph affects viewers just as the content does. Keep this in mind if you are working with the stock images available in office software programs. Many of these images have a comical tone. This may be fine for some topics—for instance, a presentation on television shows for children. However, if you need to project a more serious tone, make sure you choose images to suit that purpose. Many free (or reasonably priced) image banks are available online.
Video Footage
Even more than photographs, video footage can create a sense of immediacy, especially if your video includes sound. Showing a brief video clip can help your audience feel as if they are present at an important event, connect with a person being interviewed, or better understand a process. Again, ask yourself the following questions to ensure you are using the footage well:
- What purpose does this video serve? (Never rely on video clips just to fill time.)
- How much footage should be shown to achieve your purpose?
- What will need to be explained, before or after showing the video, to ensure that your audience understands its significance?
- Will it be necessary to edit the video to stay within time requirements or to focus on the most important parts?
Informational graphics, such as tables, charts, and graphs, do not provoke the same response that images do. Nevertheless, these graphics can have a powerful impact. Their primary purpose is to organize and simplify information.
Tables are effective when you must classify information and organize it in categories. Tables are an especially good choice when you are presenting qualitative data that are not strictly numerical. Table 14.1 “Example of Qualitative Data Table” was created for a presentation discussing the subprime mortgage crisis. It presents information about people who have held powerful positions both in the government and at one of the investment banking firms involved in the subprime mortgage market.
Table 14.1 Example of Qualitative Data Table
| Name | Role(s) at Goldman Sachs | Years Active | Government Role(s) | Years Active |
|---|---|---|---|---|
| Henry Paulson | Chief operating officer | 1994–98 | US secretary of the treasury | 2006–9 |
| Chief executive officer | 1998–2006 | |||
| Robert Rubin | Vice chairman and co-chief operating officer | 1987–90 | Assistant to the president for economic policy and director, National Economic Council | 1993–95 |
| Co-chairman and co-senior partner | 1990–92 | US secretary of the treasury | 1995–99 | |
| Stephen Friedman | Co-chief operating officer | 1987–90 | Assistant to the president for economic policy and director, National Economic Council | 2002–5 |
| Co-chairman | 1990–92 | |||
| Chairman | 1992–94 |
Sources: http://www.rollingstone.com/politics/news/%3Bkw=%5B3351,11459%5D ; http://www.nytimes.com/2008/10/19/business/19gold.html ; http://topics.nytimes.com/top/reference/timestopics/people/p/henry_m_jr_paulson/index.html?inline=nyt-per ; http://topics.nytimes.com/top/reference/timestopics/people/r/robert_e_rubin/index.html?inline=nyt-per , http://www.nytimes.com/2002/12/13/us/man-in-the-news-economic-adviser-from-other-side-of-the-deficit-stephen-friedman.html ; http://news.bbc.co.uk/2/hi/business/342086.stm .
If you are working with numerical information, consider whether a pie chart, bar graph, or line graph might be an effective way to present the content. A table can help you organize numerical information, but it is not the most effective way to emphasize contrasting data or to show changes over time.
Pie charts are useful for showing numerical information in percentages. For example, you can use a pie chart to represent presidential election results by showing what percentage of voters voted for the Democratic presidential candidate, the Republican candidate, and candidates from other political parties.
Figure 14.5

Source: http://www.fec.gov/pubrec/fe2008/2008presgeresults.pdf
Bar graphs work well when you want to show similarities and differences in numerical data. Horizontal or vertical bars help viewers compare data from different groups, different time periods, and so forth. For instance, the bar graph in Figure 14.6 allows the viewer to compare data on the five countries that have won the most Olympic medals since the modern games began in 1924: Norway, the United States, the former Soviet Union, Germany, and Austria. Bar graphs can effectively show trends or patterns in data as well.
Figure 14.6

Source: http://www.nbcolympics.com/medals/all-time-standings/index.html
Line Graphs
Like bar graphs, line graphs show trends in data. Line graphs are usually used to show trends in data over time. For example, the line graph in Figure 14.7 shows changes in the Dow Jones Industrial Average—an economic index based on trading information about thirty large, US-based public companies. This graph shows where the Dow closed at the end of each business day over a period of five days.
Figure 14.7

Source: http://www.google.com/finance/historical?cid=983582&startdate=May+17%2C+2010&enddate=May+21%2C+2010
In this exercise, you will begin to refine your ideas for incorporating media into your presentation. Complete the following steps on your own sheet of paper.
- Revisit the list you brainstormed for Note 14.12 “Exercise 3” in Chapter 14 “Creating Presentations: Sharing Your Ideas” , Section 14.1 “Organizing a Visual Presentation” and the annotated outline you developed for Note 14.17 “Exercise 4” .
- Analyze the two different types of visual aids: images and informational graphics. Identify at least two places in your presentation where you might incorporate visual aids.
- Evaluate the purpose of the visual aid. Does it create emotional impact, or does it organize information? Is the visual effective?
- Determine whether you will be able to create the visual aid yourself or will need to find it.
Creating Original Visual Aids
You will include original visual aids in your presentation to add interest, present complex information or data more clearly, or appeal to your audience’s emotions. You may wish to create some visual aids by hand—for instance, by mounting photographs on poster board for display. More likely, however, you will use computer-generated graphics.
Computer-generated visual aids are easy to create once you learn how to use certain office software. They also offer greater versatility. You can print hard copies and display them large or include them in a handout for your audience. Or, if you are working with presentation software, you can simply insert the graphics in your slides.
Regardless of how you proceed, keep the following guidelines in mind:
- Create visual aids with purpose. Think carefully about how they will enhance your message, and choose a form that is appropriate for your content.
- Strive for quality. You do not need the skills of a professional photographer or designer, but do take time to make sure your visual aids are neat, attractive, and legible. Proofread for errors, too.
Using Software to Create Visual Aids
You can use standard office software to create simple graphics easily. The following guidelines describe how to work with word-processing software and presentation software.
Working with Photographs
Most personal computers come equipped with some basic image-editing software, and many people choose to purchase more advanced programs as well. You can upload photographs from a digital camera (or in some cases, a cell phone) or scan and upload printed photographs. The images can then be edited and incorporated into your presentation. Be sure to save all of your images in one folder for easy access.
Creating Tables
To create a table within a word-processing document consult your software program’s help feature or an online tutorial. Once you have created the table, you can edit and make any additional changes. Be sure that the table has no more than six to seven rows or columns because you do not want to compromise the size of the text or the readability. Aligning with precision will help your table look less crowded. Also, the row and column titles should spell out their contents.
Creating Graphs
Figure 14.8

Pie charts and bar and line graphs can also be created using standard office software. Although you can create these graphics within a document, you will need to work with both your word-processing application and your spreadsheet application to do so. The graph should visually explain the data using colors, titles, and labels. The use of color will help the audience distinguish information; however, avoid colors that are hard on the eyes, such as lime green or hot pink. The title should clearly state what the graph explains. Lastly, avoid using acronyms in the titles and other labels.
Creating Graphics in an Electronic Presentation
If you plan to work only with hard copy graphics during your presentation, you may choose to create them as word-processing documents. However, if you are using presentation software, you will need to choose one of the following options:
- Create your graphics using the presentation software program.
- Create your graphics within another program and import them.
Standard office presentation software allows you to create informational graphics in much the same way you would create them within a word-processing application. Keep the formatting palette, a menu option that allows you to customize the graphic, open while you use the software. The formatting menu provides options for inserting other types of graphics, such as pictures and video. You may insert pictures from an image bank available within the program, or insert images or video from your own desktop files. Shape your use of multimedia in accordance with the message your presentation is trying to convey, the purpose, and your audience.
Creating Visual Aids by Hand
Most of the time, using computer-generated graphics is more efficient than creating them by hand. Using office software programs helps give your graphics a polished appearance while also teaching you skills that are useful in a variety of jobs. However, it may make sense to use hand-created visual aids in some cases—for instance, when showing a 3-D model would be effective. If you follow this route, be sure to devote extra time to making sure your visual aids are neat, legible, and professional.
Flip charts are inexpensive and quick visual aids used during face-to-face presentations. The flip chart can be prepared before, as well as during, the presentation. Each sheet of paper should contain one theme, idea, or sketch and must be penned in large letters to be seen by audience members farthest away from the speaker.
Writing Captions
Any media you incorporate should include a caption or other explanatory text. A caption is a brief, one- to two-sentence description or explanation of a visual image. Make sure your captions are clear, accurate, and to the point. Use full sentences when you write them.
Captions should always be used with photographs, and in some cases, they can be useful for clarifying informational graphics, which represent qualitative data visually. However, informational graphics may not require a caption if the title and labels are sufficiently clear. For other visual media, such as video footage, providing explanatory text before or after the footage will suffice. The important thing is to make sure you always include some explanation of the media.
In this exercise, you will begin to develop visual aids for your presentation. Complete the steps in this exercise—and enjoy the chance to be creative. Working with visuals can be a pleasant way to take a break from the demands of writing.
- Revisit the ideas you developed in Note 14.24 “Exercise 1” . Choose at least two ideas that you can create. ( Note: If you are using software to develop a slideshow presentation, count this as one of your self-created visual aids. Include at least one other self-created visual aid, such as an original photograph, within your slideshow.)
- Get creative! Take your photographs, construct a 3-D model, create informational graphics, or work on your presentation slides. Develop good working drafts.
- After you have completed drafts of your visual aids, set them aside for a while. Then revisit them with a critical eye. First, check any text included with the graphic. Make sure your facts are correct, your words are clear and concise, and your language is free of errors.
- Next, evaluate how well your aids work visually. Are they large enough to be seen and read from a distance? Are captions and labels easy to find? Are photographs of reasonably high quality? Ask someone else for feedback, too.
- Begin making any needed changes. As you proceed through the rest of this section, continue to revisit your work to improve it as needed.
Collaboration
Please share the first version of your visual aids with a classmate. Examine what they have produced. On a separate piece of paper, note both the elements that catch your attention and those that would benefit from clarification. Return and compare notes.
Testing and Evaluating Visual Aids
Regardless of how you create your visual aids, be sure to test-drive them before you deliver your presentation. Edit and proofread them, and if possible, show them to someone who can give you objective feedback. Use the following checklist.
Checklist 14.1
Visual Aid Evaluation Checklist
- Visual aids are clearly integrated with the content of the presentation
- Photographs and illustrations suit the overall tone of the presentation
- Images and text are large and clear enough for the viewer to see or read
- Images are shown with explanatory text or a caption
- Informational graphics include clear, easy-to-read labels and headings
- Text within informational graphics is easy to read (Watch out for wordiness and crowded text or a font that is too small and hard to read.)
- Formatting choices (color, different fonts, etc.) organize information effectively
- Any text within graphics is free of errors
- Hyperlinks within slides function properly
- Display text for hyperlinks is concise and informative (Never paste a link into a slide without modifying the display text.)
Writing at Work
Office software includes many options for personalizing a presentation. For instance, you can choose or create a theme and color scheme, modify how one slide transitions to the next, or even include sound effects. With so many options, students and employees sometimes get carried away. The result can seem amateurish and detract from, rather than enhance, your presentation.
Remember, you are delivering a presentation, not producing a movie. Use the customization options to help give your presentations a consistent, polished, appearance. However, do not let these special effects detract from the substance of your slides.
Using Existing Visual Media
Depending on your topic, you may be able to find images and other graphics you can use instead of creating your own. For instance, you might use photographs from a reputable news source or informational graphics created by a government agency. If you plan to use visual aids created by others, keep the following guidelines in mind:
- Set a purpose before you begin your search. You will search more efficiently if you start with a general idea of what you are looking for—a line graph of unemployment rates for the past twelve months, for example, or a video clip of the most recent State of the Union address.
- Filter out visual aids that are not relevant. You may come across eye-catching graphics and be tempted to use them even if they are only loosely related to your topic, simply because they are attention getting. Resist the temptation. If the graphic is not clearly connected to your point, it does not belong in your presentation.
- Read carefully. In addition to reading labels, headings, and captions, read any text that accompanies the visual. Make sure you understand the visual in its original context. For informational graphics, make sure you understand exactly what information is being represented. (This may seem obvious, but it is easy to misread graphic information. Take the time to examine it carefully.)
- Evaluate sources carefully and record source information. When you look for visual media to complement your presentation, you are conducting research. Apply the same standards you used for your research paper. Choose reliable sources, such as reputable news organizations, government and nonprofit organizations, and educational institutions. Verify data in additional sources. Finally, be sure to document all source information as you proceed.
Searching Efficiently for Visual Media
You will probably find it most efficient to use the Internet to search for visual aids. Many students begin by typing keywords into a search engine to locate related images. However, this search technique is not necessarily efficient, for several reasons:
- It often pulls up hundreds or even thousands of images, which may be only loosely related to your search terms.
- It can sometimes be difficult to understand the image in its original context.
- It can be hard to find copyright information about how you may use the image.
A more efficient strategy is to identify a few sources that are likely to have what you are looking for, and then search within those sites. For instance, if you need a table showing average life expectancy in different countries, you might begin with the website of the World Health Organization. If you hope to find images related to current events, news publications are an obvious choice. The Library of Congress website includes many media related to American history, culture, and politics.
Searching this way has the following advantages:
- You will often find what you are looking for faster because you are not wasting time scrolling through many irrelevant results.
- If you have chosen your sources well, you can be reasonably certain that you are getting accurate, up-to-date information.
- Images and informational graphics produced by reputable sources are likely to be high quality—easy to read and well designed.
If you do choose to use a search engine to help you locate visual media, make sure you use it wisely. Begin with a clear idea of what you are looking for. Use the advanced search settings to narrow your search. When you locate a relevant image, do not download it immediately. Read the page or site to make sure you understand the image in context. Finally, read the site’s copyright or terms of use policy—usually found at the bottom of the home page—to make sure you may use the material.
If you are unable to find what you are looking for on the Internet consider using print sources of visual media. You may choose to mount these for display or scan them and incorporate the files into an electronic presentation. (Scanning printed pages may lower the quality of the image. However, if you are skilled at using photo-editing software, you may be able to improve the quality of the scanned image.)
Inserting Hyperlinks in an Electronic Presentation
If you are working with images, audio, or video footage available online, you may wish to insert a link within your presentation. Then, during your presentation, you can simply click the link to open the website in a separate window and toggle between windows to return to your presentation slides.
To insert a hyperlink within your presentation, click on insert in the toolbar and then select hyperlink from the menu. Doing so will open a dialogue box where you can paste your link and modify the accompanying display text shown on your slide.
Copyright and Fair Use
Before you download (or scan) any visual media, make sure you have the right to use it. Most websites state their copyright and terms of use policy on their home page. In general, you may not use other people’s visual media for any commercial purpose without contacting the copyright holder to obtain permission and pay any specified fees.
Copyright restrictions are somewhat more ambiguous when you wish to download visual media for educational uses. Some educational uses of copyrighted materials are generally considered fair use —meaning that it is legally and ethically acceptable to use the material in your work. However, do not assume that because you are using the media for an educational purpose, you are automatically in the clear. Make sure your work meets the guidelines in the following checklist. If it does, you can be reasonably confident that it would be considered fair use in a court of law and always give credit to the source.
Checklist 14.2
Media Fair Use Checklist
- You are using the media for educational purposes only.
- You will make the work available only for a short period and to a limited audience. For instance, showing a copyrighted image in a classroom presentation is acceptable. Posting a presentation with copyrighted images online is problematic. In addition, avoid any uses that would allow other people to easily access and reproduce the work.
- You have used only as much of the work as needed for your purposes. For video and audio footage, limit your use to no more than 10 percent of the media—five minutes of an hour-long television show, for example. Image use is harder to quantify, but you should avoid using many images from the same source.
- You are using the media to support your own ideas, not replace them. Your use should include some commentary or place the media in context. It should be a supporting player in your presentation—not the star of the show.
- You have obtained the material legally. Purchase the media if necessary rather than using illegally pirated material.
- Your use of the media will not affect the copyright holder or benefit you financially.
By following these guidelines, you are respecting the copyright holder’s right to control the distribution of the work and to profit from it.
In some fields, such as teaching, job applicants often submit a professional portfolio to a prospective employer. Recent college graduates may include relevant course work in their portfolios or in applications to graduate school. What should you do if your course work uses copyrighted visual media?
This use of media is acceptable according to fair use guidelines. Even though you are using the work for your personal professional advancement, it is not considered an infringement on copyright as long as you follow the additional guidelines listed in the previous checklist.
Crediting Sources
As you conduct your research, make sure you document sources as you proceed. Follow the guidelines when you download images, video, or other media from the Internet or capture media from other sources. Keep track of where you accessed the media and where you can find additional information about it. You may also provide a references page at the end of the presentation to cite not only media and images but also the information in the text of your presentation. See Chapter 13 “APA and MLA Documentation and Formatting” for more information on creating a reference page.
Write captions or other explanatory text for visual media created by others, just as you would for media you created. Doing so helps keep your audience informed. It also helps ensure that you are following fair use guidelines by presenting the media with your commentary, interpretation, or analysis. In your caption or elsewhere in your presentation, note the source of any media you did not create yourself. You do not need to provide a full bibliographical citation, but do give credit where it is due.
In this exercise, you will locate visual aids created by others and continue developing the work you began earlier. Complete these steps.
1. Revisit the ideas you developed in Note 14.24 “Exercise 1” . Choose at least two ideas for which it would make more sense to find the visual aid than to create it yourself. 2. Use the search tips provided in this section to locate at least two visual aids from reputable sources that you can use. Prepare them for your presentation by adding clarifying text as needed. Be sure to credit your source. 3. Incorporate the visual aids you created in Note 14.26 “Exercise 2” and Note 14.32 “Exercise 3” into your presentation. This may involve preparing physical copies for display or inserting graphic files into an electronic presentation.
4. Take some time now to review how you will integrate the visual and verbal components of your presentation.
- If you are working with presentation software, refine your slides. Make sure the visual approach is consistent and suits your topic. Give your text a final proofread.
- If you are not using presentation software, review the annotated outline you created in Note 14.24 “Exercise 1” . Update it as needed to reflect your current plan. Also, determine how you will physically set up your visual aids.
Key Takeaways
- Visual aids are most effective when they are chosen with the purpose and audience in mind. They serve to add emotional impact to a presentation and to organize information more clearly.
- Visual aids should always be clearly related to the presenter’s ideas. Captions, labels, and other explanatory text help make the connection clear for the audience.
- Like writing, developing the visual components of a presentation is a process. It involves generating ideas, working with them in a draft format, and then revising and editing one’s work.
- Visual aids can be divided into two broad categories—image-based media and informational graphics.
- Widely available software programs make it relatively easy to create visual aids electronically, such as photo images, charts, and graphs.
- When using visual aids created by others, it is important to apply good research skills, follow guidelines for fair use, and credit sources appropriately.
Writing for Success Copyright © 2015 by University of Minnesota is licensed under a Creative Commons Attribution-NonCommercial-ShareAlike 4.0 International License , except where otherwise noted.

Engage your audience with powerful visual presentations.
Visual tools are critical to have in any presentation as they’re one of the key presentation aids that will help enhance your overall presentation .
We’ll give you tips on how to develop a sense of good presentation design whether you’re using PowerPoint, Prezi, Google Slides or any presentation software under the sun. The secret to creating a great presentation does not lie in a superior software, but understanding a few universal design concepts that can applied for all types of visual presentations.
Don’t be afraid to use a few presentation templates – there are ways to make the presentation ideas in those templates your own ideas and advance it in several different ways. Let’s make your next presentation on point and designed beautifully.
Presentations Are The Visual Communication Tool To Your Story

In the age of information, people remember facts faster through stories. Keep your bullet points and information short. You can use a rule of thumb to not put more than a paragraph and 3 points per slide to start.
Make your presentation the visual component of your story, but not something your audience has to read. Something that is short and succinct on screen will capture your audience’s attention and make sure they retain the main points of your message.
This does not mean incomplete slides. A common mistake presenters make is putting too little information on a slide in the name of simplicity when in fact they’re leaving out the main context.
A well designed visual presentation has a great story behind it and a well rehearsed voice telling it as well. Engaging the audience is also a great way to associate meaning or connection to the content of your slide decks. Ask questions and tell stories while showing off a great visual presentation! Think of writing the copy like writing for social media – you only have a certain amount of characters to use and a short audience attention span.
General Tips For Visual Presentations
Before you begin creating your presentation, you first need to know what makes effective presentations – storytelling. Such presentations target the audience’s emotions leading to a stronger connection to the audience member and the main point of the presentation.
Below are some storytelling tips for your slides, but remember to keep the presentation itself simple and practice makes perfect. And again, these are more for your spoken component that accompanies the visual component. These tips can be useful because they can be applied to all your presentations in general.
Step 1 is to ask yourself who your audience is and how to convey the key message you have in mind to them. Once you settle on your message, you can start designing your slides with that direction in mind.
You may wonder how to connect with an audience with your slides. Look to your own experiences, your own speaking style and tailor your message to what you know. Not many people want to hear others recite facts with no real meaning driving the story. Ask yourself, “Why does this matter to the audience and why should they care?”.
There is a lot of trust that can be built when the audience has a genuine connection to the presenter. Overall, if you have something that can solve a problem or teach someone complex things, that is enough to form a connection with your audience.
Think of the last app you used, the last email you read or perhaps the last business you purchased from. What was the content or visual elements that pulled you in?
Are you making a PowerPoint, Prezi or other form of visual presentation but it’s taking too much of your time? Enlist the help of Presentation Geeks and consider outsourcing your presentation design . Outsourcing your presentation slides allows you to free more of your time while still getting the results of an interesting presentation. You’ll have the support of expert slide designers who know what presentation visuals work and don’t work thanks to years of presentation feedback and background knowledge.
Color Design Tips For Presentation Slides
When designing your presentation, make sure you take into consideration the colors you’re using. We’ve listed a few background color combinations you might want to consider when developing the overall slide deck and the font to use.
Color Wheel Alignments:
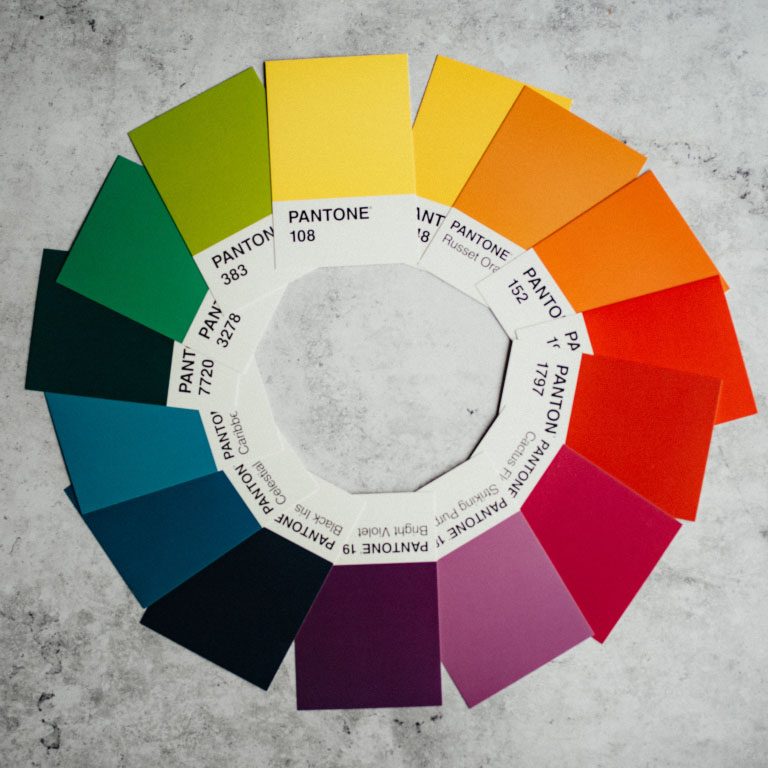
Primary Colors: Red, yellow, blue
Secondary Colors: Green, orange, purple
Tertiary Colors: Yellow-orange, red-orange, red-purple, blue-purple, blue-green & yellow-green
Analogous Colors: These are any three colors which are side by side on a color wheel. (Think green, lime green, yellow)
Complementary Colors: These are colors that are directly opposite of a color wheel. (Think green vs. purple, red vs. blue)
Monochromatic Colors: This is when you use one color and various shades or hues of it. It works well for minimal looks.
Color moods:
Red/Orange/Yellow: Generally these convey a sense of energy, are warm colors and catch your attention. Yellow is a happy warm color on one end and red is very striking and can warn of danger, and symbolizes importance, passion and sometimes violence.
Blue/Purple/Green: These colors are calming, reserved, elegant and often used for corporate slides. Think of how indigo blue is used for many large corporate entities. Green often is branded with earth or medical brands. Purple often conveys a sense of royalty, money and creativity.
Use The Power Of Photography Or Video

Pictures and videos are great visuals to incorporate into any presentation. Remember the saying, “A picture is worth a thousand words”? Well, it’s true! Photos help visualize complex information. You’ll often come across a lot of photos in research presentations as they help the audience understand examples better.
They can also save you from having to put a thousand thoughts into the PowerPoint presentation slide!
The first tip we can give to make a great visual presentation is to choose all your photos before you start. This way you can keep the consistency of the images across your slide deck and make sure they’re somewhat alike in terms of composition, mood and brand.
Use free stock photos
You don’t have to take the photos or videos yourself.
There are plenty of free resources and web pages for stock photos online – Unsplash , Pexels , Pixabay , Free Range , Creative Commons and some photos from Freepik are free to use with some accreditation.
Effective photo use
Make sure you pick an image that will focus on the main theme of the slide. One image is usually enough if the image choice is very relevant to the slide. If you have multiple photos, avoid poor or loose placement of photos all over the slide. Try to use a grid or gallery placement and it will immediately enhance the layout of the slide.
If you pick great images, making presentations can be faster. Instead of having to create an elaborate template with multiple elements, a photo with a couple of bullet points can go a long way in terms of capturing attention and making your presentation slides look professional. This is true on any presentation design platform – whether its PowerPoint, Google Slides, etc.

You can also embed videos whether they’re located on your computer, YouTube, Vimeo or other major video streaming sites. If you’re feeling nervous about your presentation or have a complex message that would be hard to condense in one slide, a video is a dynamic way of conveying your message in any type of presentation.
The Typography You Use Matters

Typography is how you will arrange and present the words in your presentation. An audience can engage when text is readable, functional and works well with the other elements in the presentation. Fonts and sizing are a good place to start establishing the tone of your presentation.
Overview of Font Choices
Elegant fonts often denote a sense of luxury or lifestyle tone. Use script fonts sparingly, but as titles they immediately give this polished and high-end look. This should not be used as body text or something lengthy to read. Think about if you sent an email in that text – it would be tedious to read. However, maybe if it were a title or a way to name email, the choice may be more correct.
Corporate fonts often are traditional, serif fonts or clean sans serif fonts that evoke a sense of trust and a clear message. Think of the fonts Lato, Helvetica or Arial – they’re go-to fonts that are easy to read, and work across many systems. This is especially helpful if you are working across teams when creating content or having to approve the content, idea or visuals.
Of course, you can incorporate more stylistic or playful fonts if you want to give your presentation a personal feel. Much like the scripted font, when used sparingly but in large titles, this choice of font can be very effective at conveying a certain personality.
Adding Symbols & Icons To Your Presentation

You can consolidate information by using symbols or icons to direct your eye to information such as an arrow symbol. What if you used a symbol instead of a bullet point? Think of symbols as anchors for the eye to quickly find information. You can collect symbols off free stock sites or use the built-in ones in PowerPoint that are free to use!
Depending on if your presentation is formal or informal , you may also want to consider adding emojis! Emojis are fun ways to express different emotions and can help connect with a younger demographic.
Overall Branding, Tone of Voice & Consistency
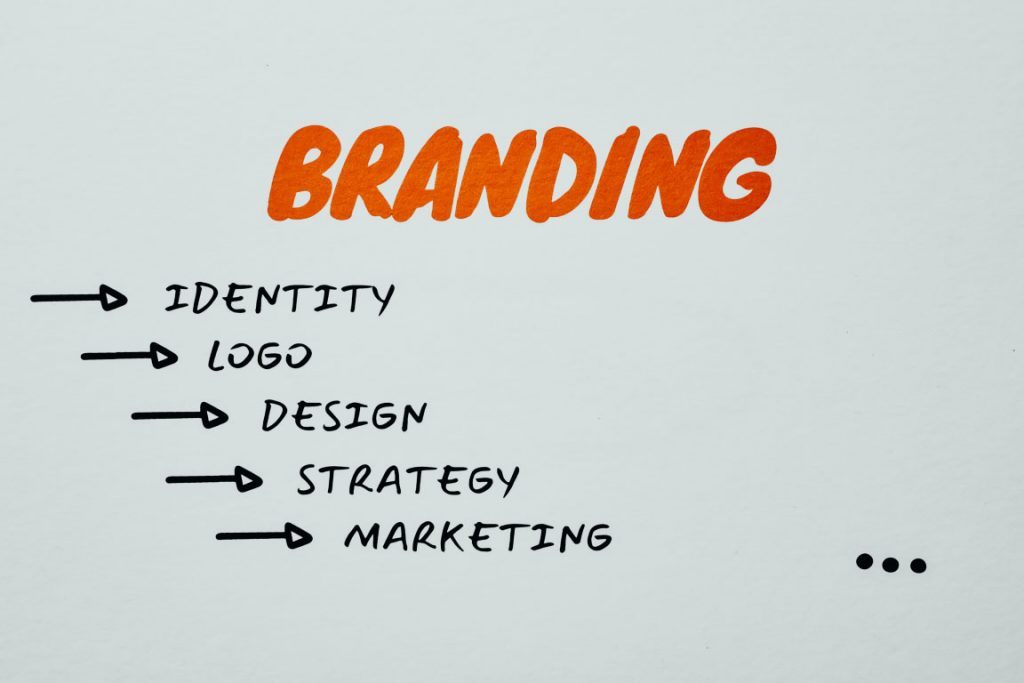
Another tool you may have at your disposal is if your brand, business or company has brand guidelines. It will be the guide and compass to your presentation’s information that goes within it. By keeping consistent you can achieve a polished look even if it looks very simple.
Use your business voice to communicate ideas and set the tone for your presentation. Are you in an investment banking business and want people to rely on the information given to you? That would inform perhaps using blues and purples, which are calmer colors and a cleaner look. Are you an influencer who’s buying power and spending choices matter to your audience? Maybe choosing bright colors with personal touches will make the connection. Are you designing an innovative app? Maybe more interactive slides would do the trick.
Use these questions to make sure your text and tone is consistent as this is a foundation of a well articulated brand or personal identity.
Consistent Hierarchy
Visual hierarchy is how you will arrange objects and text in relation to one another to guide your user and not confuse the objects and how they should read them in your slides. Setting rules helps differentiate and prioritize what’s important in order.
Look at the difference between these two.
Snoop Dogg just launched a wine and it’s coming to Canada
Daily hive branded content | aug 11 2020, 6:30 am.
Australian winery 19 Crimes recently announced that its new Cali Red wine, created in collaboration with Entertainment Icon, entrepreneur, and hip-hop artist Snoop Dogg, will be hitting shelves across Canada later this summer.
The collaboration offers a refreshing take on celebrity partnerships as the apparent shared values and history between the brand and famous rapper make for a perfectly organic pairing.
Comment Name:
By browsing the site, you agree to the use of cookies on this website. see our user agreement for the use of cookies..
You can see a clear distinction in the example below:
Think of hierarchy of a form of narration or story structure. Your eye goes to the title, then to the subtitle, then to the body copy in a logical manner. Where the eye travels is one of those things we don’t think about often. But you can also utilize eye lines in photos. Is your subject in the photo looking left or right? Consider placing text to where your subject is looking and see how effectively your eye travels to that text.
We’ll look at hierarchy strictly as sizing of words for now, but note you can establish hierarchy with type, white space, alignment, etc. As a general rule of thumb, you should have consistent sizing for your Header (or title slide / slide title), your subtitles and your body text. That’s it! If the sizing in your PowerPoint is consistent, your words will look uniform and clean. Everything will be much easier to read and the eye will be trained to move each slide.
Don’t Forget Your Own Style
Also don’t forget to incorporate your own style and what kind of visuals you like. Even if your early visuals may seem simple, build up that design muscle with the basics and design techniques that look clean and consistent.
You’ll find as you design these basics, you’ll probably start noticing other visuals and things you like in other mediums and presentations. Keep a note or screenshot the presentation that inspired you. Create a mood-board that you can refer to in the future for quick idea inspiration. Copying gets a bad rap, but learning how to design something you like even if it’s a clone copy will teach you many things about design. Build a collection of images that informs everything you do: for your color scheme, your designs, the cadence of images, etc.
That being said, you can also use free stock websites like Freepik for some design layouts inspiration. Creative Market is a paid website but the site offers a ton of design inspiration. This site has design templates for what’s currently in and trending. You can subscribe to an email newsletter on either site to get bite sized design influence each day that goes straight to your inbox.
However, don’t be afraid to try something new!
Once you get to a level of comfortable designing, these new ideas will be much easier to execute with the technical knowledge you amassed when you started. You could even try using a new app to design your ideas to keep your knowledge fresh! (Keep in mind that most online apps like SlideShare use cookies to improve functionality and performance.)
Ask your friends or people at your organization to give you feedback and critique, as that’s also crucial to honing your design skills. The people around you also represent different audiences!

The above image looks boring, right?
That’s because there are no visual elements!
Powerful visual presentations can engage audiences psychologically with both the presentation itself and the energy of the presenter. By understanding a few universal design concepts, you can begin your journey creating wonderful visual presentations and becoming a better presenter ! Thanks for reading this blog post, tell us your tips in the comments below.

Author: Content Team
Related posts.

FREE PROFESSIONAL RESOURCES DELIVERED TO YOUR INBOX.
Subscribe for free tips, resources, templates, ideas and more from our professional team of presentation designers.
.css-1qrtm5m{display:block;margin-bottom:8px;text-transform:uppercase;font-size:14px;line-height:1.5714285714285714;-webkit-letter-spacing:-0.35px;-moz-letter-spacing:-0.35px;-ms-letter-spacing:-0.35px;letter-spacing:-0.35px;font-weight:300;color:#606F7B;}@media (min-width:600px){.css-1qrtm5m{font-size:16px;line-height:1.625;-webkit-letter-spacing:-0.5px;-moz-letter-spacing:-0.5px;-ms-letter-spacing:-0.5px;letter-spacing:-0.5px;}} Best Practices 5 essential preparation steps for a successful presentation
by Tom Rielly • June 15, 2020

Keeping your presentation visuals minimalistic, simple, and clear is just one important step to remember when designing a hit presentation. Leaving nothing to chance, great presenters prove quite methodical as they prepare. Here’s a checklist for everything you need to keep in mind before your next presentation:
1. Choose the right software for your needs

The easiest way to select the right presentation software for you is to simply find the one that is native to your device. For example, if you have a Mac, use Apple Keynote, if you work on Windows, use PowerPoint. Google Slides is recommended if you’re working with someone, as it makes collaboration very easy. Another software option is Prezi: a specialty tool called Prezi that creates a presentation using motion, zoom, and panning across one giant visual space.
2. Organize your files
As you develop your script and visuals, you will need to start assembling all the assets for your slides. Create a unique folder on your computer to hold these items. Keep the folder organized by media type (presentation drafts, photos, videos, scripts) and back them up frequently to the Cloud or external disk. Label each file with a specific descriptive name, e.g. “Susan Johnson singing magpie 2020”, as opposed to “IMG_4043.jpg”, which can make it confusing to find your assets. The more organized you are up front, the easier preparing for your presentation will be.
3. Prepare your presentation materials
Make sure your presentation materials (script, graphics, actual slides) are saved in at least two safe spots (for example, your computer and an external USB drive) and are backed-up frequently. If you are using an online presentation software, such as Google Slides, be sure to also download a copy of your presentation in case the internet connection is unreliable. Having all the individual assets on hand in addition to your presentation slides can be helpful if you experience tech issues before presenting, or if you need to make any last minute changes. Make sure to label your final presentation with the title and your name so it’s easy to find.
4. Practice, practice, practice!
Remember, practice makes perfect. People often run out of time making their presentations and have no time to practice. Most TED speakers practice at least ten times. Neuroscientist Jill-Bolte Taylor gave one of the most successful Talks in TED history with nearly 27 million views. How did she do it? She practiced her Talk over 40 times! By rehearsing multiple times you will naturally memorize your Talk, which means you won’t need note cards when you give your final presentation.
5. Do a final test run
Before presenting, make sure the equipment you need is working properly. It’s generally good practice to rehearse standing on the exact stage with the exact lighting using the exact computer that you will be using in your final presentation.
Here’s a quick checklist of what to look for when testing your equipment:
- If you're not using your own computer, the one provided might be slower and have trouble playing media. If you have videos or other media, make sure they play correctly
- Test the projector to make sure it’s HD
- Make sure images are clear
- Test the sound of any clips you use, as this is what goes wrong most frequently
- If you’re using a mic, test the volume
Don’t let technical issues or other blunders overshadow your presentation. By following these guidelines, and with a little preparation, you can engineer out the problems BEFORE they happen.
Ready to learn more about how to make your presentation even better? Get TED Masterclass and develop your ideas into TED-style talks
© 2024 TED Conferences, LLC. All rights reserved. Please note that the TED Talks Usage policy does not apply to this content and is not subject to our creative commons license.
System Status:
- Faculty Resources
- Instructional Resources
- Instructional Technology Guide
- Instructional Videos
- Best Practices for Video
Research-Based Presentation Design Guidelines
Effective multimedia design is based on what we know about cognitive psychology. If you use visual aids like PowerPoint in your course videos, read the tips below.

This guide leverages relevant cognitive psychology research (discussed in our other article " Multimedia Learning Principles ") to provide specific, evidence-based recommendations for designing and delivering effective presentations. But your PowerPoint deck is only one part of your "educational performance," which, broadly speaking, is a fusion of pictures, text, and spoken words. To maximize learners' engagement, retention, and transfer of the material, all three elements must be strategically deployed.
This guide relies heavily on Richard Mayer's Multimedia Learning and Stephen Kosslyn's Clear and to the Point: 8 Psychological Principles for Compelling PowerPoint Presentations . Both authors apply similar foundations in cognitive psychology to generate best practices for designing effective multimedia learning materials.
We hope this guide will be particularly helpful to instructors creating lecture videos but should prove useful to those delivering synchronous or in-person presentations.
The Short Version
Use images instead of text when possible., use high-resolution, royalty-free images., use no more than 4 bullets per slide., make objects appear only when mentioned., dim objects after they're discussed., draw attention to salient information., avoid using decorative images., when distributing, add alt text to images..

Based on his experiments investigating the efficacy of multimedia messages, Richard Mayer defines what he calls the Redundancy Principle: "People learn better from graphics and narration than from graphics, narration, and printed text" (118). Duplicative images and onscreen text lead to extraneous cognitive processing by learners both because they have more to look at onscreen and because they'll spend unconscious effort trying to compare what they're hearing and what they're seeing.
So what comes from Mayer appears to be a suggestion to use either an image OR words, but not both (though labels are fine if they're important). But we also know from neurological research that images and words end up getting encoded in different places in the brain, and that encoding imagery uses less cognitive effort than encoding words (Grady et al, 2706). (This is probably an evolutionary phenomenon, given the importance of retaining visual information in one's immediate environment.) So in some ways, research has proved that a picture really can be worth a thousand words.
What this boils down to is if you have an image that can represent your material, use that image exclusively on your slide and remove any text that might accompany it unless it's necessary for your students' understanding. It'll be "stickier" in the students' minds.
The bottom line: If an image can represent your slide content, use it exclusively on your slide without any onscreen text.

When using images, try to find the highest resolution you can. "Resolution" refers to the number of pixels that comprise the image. The more pixels there are, the more quality - and the greater the file size.
You can always shrink an image without reducing its quality, but don't increase its size over 100% or the original. If you do, the quality of the image will visibly decrease as it pixelates, which can either make it more difficult to understand or even unconsciously communicate "low quality" to your viewers!
In addition, when recording videos you should be particularly careful about using copyrighted images in your visual aids. While most course materials aren't public, Fair Use doesn't provide instructors with blanket protection from infringement and it's possible your video could get out. Try to use royalty-free image sites (such as Pixabay) to find an image that could work for you. You could also leverage the surprisingly robust features of your presentation software to design your own images, even by piecing together shapes. (Note that all of the imagery in this article was created using royalty-free images and PowerPoint.)
If it's truly necessary to use a copyrighted image in your slide, you should attempt to contact the publisher to obtain the appropriate permissions. If you find images under a Creative Commons license, be sure to abide by the license and cite appropriately.
The bottom line : Use high-resolution images if possible, and don't enlarge them above 100% of their original size. Use royalty-free imagery, attribute appropriately, or create your own images if needed.

If you've ever suffered from "Death by PowerPoint," you've probably experienced slides crammed full of text: sub-sub-bullets, complete sentences, entire paragraphs, or worse. This is most often the result of instructors using visual presentations as memory aids rather than as instructional tools for learners. We've all heard about the value of taking a student-centered approach to pedagogy; presentation design can embody that methodology.
With respect to determining how much text is appropriate, there are several cognitive psychology principles at work. As we discussed in our Multimedia Learning Principles article, we have two channels for processing a multimedia message. When presented with a large amount of text, the visual channel is oversaturated, and learners' verbal channels struggle to attend effectively to your words as they try to read what's on screen. They also spend cognitive effort comparing the printed and spoken words.
Also in our article on Multimedia Learning Principles, we discussed what occurs during active processing as well as the various types of cognitive load that learners experience. Given that active learning first necessitates the selection of relevant information from an instructional message, providing succinct text will help reduce students' germane load since you're doing some of the selection work for them.
So now that we know why less text is important, is it possible to quantify a recommendation?
A variety of studies have shown that humans can reliably retain 4 concepts in working memory - the so-called "rule of four." The brain can "chunk" information to improve retention, however, so each of these 4 concepts can have up to 4 component pieces of information.
To see the rule of four and chunking principles in effect, check out the video below.
So - we can retain information better when there are four or fewer units, and using recognizable groupings of more than four units helps to improve retention. With all of this in mind, a good rule of thumb is to try to restrict yourself to four or fewer bullets per slide, with four or fewer units of information contained within each bullet.
One way to quantify these "units" of information is to count the number of verbs and nouns (Kosslyn, 77). For example, the phrase "Use four bullets per slide" has 3 units of information: "use," "bullets," and "slide."
Another way to think about this: just use less text in your slides. It may not always be possible, but can be an important goal for which to strive, especially if it helps you break your presentation into more slides. Ultimately, though, remember that your visual aid is intended for your students - not to help you remember what you need to discuss. If possible (or if necessary), use your presentation software's "notes" feature to make sure you don't forget to discuss anything.
Remember what we discussed earlier, though: images tend to be "stickier" than words in long-term memory. If you can find a meaningful image that can replace some or all of the text on your slide, use that instead (using labels as needed, of course).
The bottom line : Try to use four or fewer bullets on a slide, each with four or fewer concepts. Favor images over text whenever appropriate.

Mayer's multimedia messaging experiments led him to what he termed the Temporal Contiguity Principle: "Students learn better when corresponding words and pictures are presented simultaneously rather than successively" (153). Mayer discusses this principle largely in the context of whether to present narration after or during a corresponding animation. While common sense might suggest that encountering the information twice in succession (in two different forms) would lead to better transfer and retention, it was instead when the narration and animation were presented simultaneously.
Now, chances are that you're not planning on narrating over a series of silent animated movies as your presentation - but it's important to remember that presentation software is, in and of itself, a kind of animation tool. Moving to a new slide is essentially a simple animation.
But in the context of the Temporal Contiguity Principle, think about a learner arriving on a slide that already has all of its visual content present at the start. With so much information for your learners to look at, you risk cognitive overload as they read the entire slide - including all the parts that may not yet be relevant or comprehensible - while also trying to process your spoken words.
Building your bullets and images one at a time provides visual cues to your learners about where you are in the presentation and what's relevant to the current moment of knowledge construction. Making clear what specific visual elements are related to what's being discussed maximizes your learners' ability to integrate what they see and what they hear simultaneously.
So, add simple animations to your slides. Leverage build-ins or entrance effects to have objects appear on your slide only when you mention them - bullets, images, graphs, shapes - anything. Stick to subtle effects like fade-ins or even just appearing unless a particular animation offers additional impact to your message.
The bottom line : Make objects appear only when you discuss them.

As we discussed earlier, Mayer's Temporal Contiguity Principle implies that we should make information appear only when mentioned. Well, the converse is true as well: information that's already been discussed should be visually de-emphasized. In reinforcing where exactly you are within the visual information on your slide, you're reducing your learners' cognitive load by encouraging them to focus their efforts on a smaller set of visual information while also maintaining the conceptual connection with the previous information.
In his book providing detailed presentation design guidelines based on a similar set of cognitive psychology principles as Mayer, Stephen Kosslyn identifies seven high-level principles, one of which is the Principle of Salience: "Attention is drawn to large perceptible differences" (7). Given that our brains are wired to notice strong differences in contrast (such as this bold text ), de-emphasizing past information provides a cue to learners that you're moving on to other visual information on the slide and helps direct their attention appropriately.
You can de-emphasize objects onscreen by adding an "emphasis" (PowerPoint) or "action" (Keynote) animation to a bullet, such as reducing the opacity of the object to 25% (or increasing its transparency to 75%). Add the animation at the same time a new object appears.
The bottom line : Visually de-emphasize items that have already been discussed.

The Signaling Principle indicates that "People learn better when cues that highlight the organization of the essential material are added" (Mayer, 108). These cues, Mayer writes, "are intended to guide learners' attention to essential material and to guide learners' organization of the essential material into a coherent structure" (117). Leveraging what we discussed in our article about multimedia learning , signaling can reduce extraneous load, foster germane load, and assist with the selection and organization of materials that must occur during active learning.
While these cues can be verbal (such as explicitly stating where you are in your presentation based on an outline you presented at the start) the visual cues within your presentation play an extremely strong role in facilitating your students' understanding. For example, if you present a complex graph, do something either when designing your presentation (e.g. add arrows, labels, zoom in, etc.) or during your presentation (e.g. use your mouse as a pointer) to draw your learners' attention to the most important or relevant pieces of information.
While making objects appear and dim at the appropriate times highlights salient information as well, for more complex images it's important to draw learners' attention to the most relevant parts. As is often the case in effective presentation design, this helps reduce learners' extraneous load when presented with a surfeit of visual information.
The bottom line : design your slides with arrows, circles, or other visual cues that draw viewers' attention to particularly important details. Failing that, leverage pointers or other indicators during your recording.

Richard Mayer identifies three main categories of images that are helpful to learners: representational images, which portray an individual object; organizational images, which illustrate relationships between objects (or between parts of an object); and explanative images, which illustrate how a system works (236).
Decorative images, on the other hand, are "illustrations that are intended to interest the reader but that do not enhance the message of the passage" (Mayer, 236). They distract students from learning goals, add to their extraneous load, and squander their limited cognitive resources.
Now, on the surface, it may seem like adding some decorative imagery to your more text-heavy slides might be a good thing, to give them some visual interest and foster a little more engagement with your presentation. As Mayer points out, this is arousal theory: "the idea that students learn better when they are emotionally aroused by the material" (93). Unfortunately, decorative images end up becoming "seductive illustrations": images added solely to add some visual interest. Unfortunately research has confirmed that these details are retained better than the presentation's central points (Mayer, 97).
So, if an image - indeed, if any content - doesn't directly support the completion of your students' learning objectives, don't include it. While we do recommend using images instead of text when possible as well as using less text overall, don't include imagery for imagery's sake.
Remember - an effective multimedia message should be designed to create the conditions for maximal learning. Some of your slides may end up being less visually interesting, but especially when paired with our other tips, you'll be helping your learners spend their cognitive resources more effectively.
The bottom line : Don't add images that don't directly support your students' learning.

Given how deleterious decorative imagery can be to our cognitive resources, all the images you've included in your presentation should support your students' learning. If there are students who can't perceive that visual content, however, their learning is compromised compared to their classmates.
If you intend to distribute your presentation file digitally (for example, uploading it to your LMS for students to download), you should ensure that all the images included in the presentation have what's called "alt text": text-based metadata embedded into the image that displays onscreen when the image fails to load and that describes it for screen reader software. These image descriptions are essential in ensuring that your materials are accessible to learners with visual disabilities.
Adding alt text within many applications is often just a matter of right-clicking an image, clicking the appropriate menu option, and typing in a description. A good alt tag should be specific and concise. And while it should communicate the relevant part(s) of the image, it shouldn't require the learner to listen to a lengthy description.
The bottom line : Add alt tags to all images in presentations you intend to distribute digitally.
PowerPoint shouldn't be vilified or glorified. Presentation software is just a tool, and it could be used effectively or poorly to communicate a message. Kosslyn sums it up well in his book Clear and to the Point : "PowerPoint presentations can help people understand by making both memory and processing easier for them" (12).
It is true that presentations designed this way require more effort to produce. If you're struggling to devote the time needed in pre-production to make your slides more pedagogically effective, some low-hanging fruit you can bite off (so to speak) is to use tools during your presentation to draw your students' attention, such as turning your mouse cursor into a laser pointer. Let Kosslyn's principles of Salience and Discriminability remind you that "attention is drawn to large perceptible differences," and those differences "must differ by a large enough proportion or they will not be distinguished" (7-8).
It's important to note that if you abide by these research-based best practices, it's likely that your presentation won't work as effectively as a standalone artifact. It's not meant to. Your slide deck is part of a larger presentation that includes pictures, text, and spoken words, all employed strategically to maximize learning. If it's important that your presentation be legible on its own, consider developing an alternate version.
Fiorella, L., Stull, A. T., Kuhlmann, S., & Mayer, R. E. (2019). Instructor presence in video lectures: The role of dynamic drawings, eye contact, and instructor visibility. Journal of Educational Psychology , 111(7), 1162–1171. https://doi.org/10.1037/edu0000325
Grady, C. L., McIntosh, A. R., Rajah, M. N., & Craik, F. I. M. (1998). Neural correlates of the episodic encoding of pictures and words. Proc. Natl. Acad. Sci . USA, 95, 2703–2708.
Kosslyn, S. (2007). Clear and to the point: 8 psychological principles for compelling PowerPoint presentations . New York: Oxford University Press.
Mayer, R. E. (2009). Multimedia learning (2nd ed.). Cambridge, England: Cambridge University Press.
Interested in consulting with a member of the Multimedia Services team? Contact us at [email protected] .
The Visual Communication Guy
Learn Visually. Communicate Powerfully.

- About The VCG
- Contact Curtis
- Five Paragraph Essay
- IMRaD (Science)
- Indirect Method (Bad News)
- Inverted Pyramid (News)
- Martini Glass
- Narrative Format
- Rogerian Method
- Toulmin Method
- Apostrophes
- Exclamation Marks (Points)
- Parentheses
- Periods (Full Stops)
- Question Marks
- Quotation Marks
- Plain Language
- APPEALS: ETHOS, PATHOS, LOGOS
- CLUSTER ANALYSIS
- FANTASY-THEME
- GENERIC CRITICISM
- IDEOLOGICAL CRITICISM
- NEO-ARISTOTELIAN
- O.P.T.I.C. (VISUAL ANALSYIS)
- S.O.A.P.S.T.O.N.E. (WRITTEN ANALYSIS)
- S.P.A.C.E.C.A.T. (RHETORICAL ANALYSIS)
- BRANCHES OF ORATORY
- FIGURES OF SPEECH
- FIVE CANONS
- LOGICAL FALLACIES
- Information Design Rules
- Arrangement
- Organization
- Negative Space
- Iconography
- Photography
- Which Chart Should I Use?
- “P” is for PREPARE
- "O" is for OPEN
- "W" is for WEAVE
- “E” is for ENGAGE
- PRESENTATION EVALUTION RUBRIC
- POWERPOINT DESIGN
- ADVENTURE APPEAL
- BRAND APPEAL
- ENDORSEMENT APPEAL
- HUMOR APPEAL
- LESS-THAN-PERFECT APPEAL
- MASCULINE & FEMININE APPEAL
- MUSIC APPEAL
- PERSONAL/EMOTIONAL APPEAL
- PLAIN APPEAL
- PLAY-ON-WORDS APPEAL
- RATIONAL APPEAL
- ROMANCE APPEAL
- SCARCITY APPEAL
- SNOB APPEAL
- SOCIAL APPEAL
- STATISTICS APPEAL
- YOUTH APPEAL
- The Six Types of Résumés You Should Know About
- Why Designing Your Résumé Matters
- The Anatomy of a Really Good Résumé: A Good Résumé Example
- What a Bad Résumé Says When It Speaks
- How to Write an Amazing Cover Letter: Five Easy Steps to Get You an Interview
- Make Your Boring Documents Look Professional in 5 Easy Steps
- Business Letters
- CONSUMER PROFILES
- ETHNOGRAPHY RESEARCH
- FOCUS GROUPS
- OBSERVATIONS
- SURVEYS & QUESTIONNAIRES
- S.W.O.T. ANALYSES
- USABILITY TESTS
- CITING SOURCES: MLA FORMAT
- MLA FORMAT: WORKS CITED PAGE
- MLA FORMAT: IN-TEXT CITATIONS
- MLA FORMAT: BOOKS & PAMPHLETS
- MLA FORMAT: WEBSITES AND ONLINE SOURCES
- MLA FORMAT: PERIODICALS
- MLA FORMAT: OTHER MEDIA SOURCES
- Course Syllabi
- Checklists and Peer Reviews (Downloads)
- Communication
- Poster Prints
- Poster Downloads
- Handout & Worksheet Downloads
- QuickGuide Downloads
- Downloads License Agreements

How to Design a PowerPoint: A Visual Guide to Making Slides with Impact
Home > Speaking > How to Design a PowerPoint
A quick Google Images search for “worst PowerPoint slides” proves two very clear realities: 1) anybody can create a PowerPoint; and 2) many don’t know how to do them well.
That’s understandable, though. Unless you’ve recently taken courses or training in design, data visualization, and public speaking, you likely haven’t had any more education on how to create an effective slide deck than a ten-year-old.
And you’re not alone.
Bad PowerPoints are everywhere: professor lectures, science conferences, human resources trainings, team meetings, sales review gatherings, thesis and dissertation defenses, product pitches, job interviews, you name it. Some of the brightest people in the world have created some of the most awful PowerPoints. For most, it’s just not a natural skill.
That’s unfortunate, too, because a well-designed slide deck can make a tremendous difference in the reception of the message you’re trying to convey.
To start designing excellent slide decks right away, follow my quick guide to designing better PowerPoints right after this paragraph. To get a whole workshop’s worth of information about how to design better slides, scroll below. 🙂
Click image to enlarge.

The question is, does designing a nice PowerPoint actually matter?
Well, if you’ve made it this far, you already know my opinion. But the short answer is, YES! Effective slide decks can make a HUGE difference in the outcome of your presentation. Why? Because slides—which should be used to supplement and enhance your well-prepared script (not be the presentation, as we often see in slides that are nothing more than bulleted lists)—significantly improve engagement during the presentation and recall after the presentation.
Basically, if you want people to both pay attention AND remember what you said, good slides can make all the difference. Plus, research has shown that people trust information more when it’s well-designed. In sum, good slides will cause your audience to:
- Pay attention more and stay more engaged;
- Remember the key messages from your presentation better;
- Trust you and your information more; and
- Believe you are super smart and awesome. (I mean, you already are, but good slides will seal the deal.)
Bad slides, on the other hand, are not only distracting, but they can actually damage a person’s ability to understand and follow your message.
At best, poorly designed slides will make you look less professional. At worst, they’ll encourage people to not listen to anything you have to say. Bad slides (which are caused by a whole range of things, including being too text-heavy, too busy, too inconsistent, or too color crazy, etc. [see my article on 40 Ways to Screw Up a PowerPoint Slide ]), overwhelmingly distract from your presentation.
If a slide has too much text, people try to read it and listen to you at the same time—which damages their ability to do either well. If your slides are too busy, your audience won’t be able to understand the information quick enough. If it’s ugly, well…people just tune out and ignore (and judge you, to boot).
Okay, so enough of the why . Let’s get to making better slides!
The 9 Steps to Designing a Better PowerPoint Slide
Step 1: empathize with your audience.

The term “empathy” in this context comes from a relatively new theory called “design thinking,” in which you can apply the mindset of a designer to a variety of contexts. So, whether you’re creating a toothbrush, a video game, an automobile, or…a PowerPoint, you need to be thinking a like a designer—which starts with empathy.
Empathizing with an audience is like applying the Golden Rule: present unto them as you would like to be presented to. Of course, the content of presentation itself comes first and foremost, but the design of your slides should support and enhance your content, so you’ll be thinking of your script and your slides at the same time. To begin, it’s best to start with a few concrete questions about your audience:
- Why are they there? Are they at your presentation because they want to be, or because they have to be? Is your presentation the only one of the day, or is it one of many (like at a conference)? Are they expecting to learn, be entertained, be inspired, be trained? In essence, you want to know their state of mind before coming so you can plan to accommodate that as best you can.
- Why would they care? Dig deep here. Does your audience actually care about the topic as much as you do? And…if you don’t care, why don’t you? If the topic isn’t meaningful and you can’t make it feel that way, then why even present? But…if they do care, know why they do. What will they hope for and expect out of it? What can you do to meet and exceed their expectations?
- What do they need to know? And what DON’T they? How much about your subject do they already know? Are they novices, experts, or a blend of both? Does it make more sense to break your topic into separate presentations on separate days, rather than giving it all at once? Is it focused and narrow enough to make an impact? Can you leave anything that is irrelevant out?
- What will keep them engaged? Consider your content and your big takeaways. Consider the personalities and knowledge base of the audience? What can you do to keep them engaged? Now…remember that “engaged” doesn’t mean “entertained” (though it can). If you’re a scientist presenting on bacterial infections in the liver, entertainment is obviously not appropriate. But…if you don’t engage them, they may not appreciate your research, no matter how valuable it is. What will they want to see, hear, and know and how can you display that to them in a way that will keep them interested?
Once you have clear idea about your audience’s needs and desires, you can begin to develop slides (along with the content of your script) that will give them exactly what they’re looking for rather than wasting their time (and yours).
Step 2: Define the Story

Think of your presentation as a story and you, the presenter, as an author in real time. As you deliver a presentation, you are creating the tone, setting, and plot for what happens. Your execution of the presentation will, if done right, create a climax/conflict and an important resolution. Consider how your slide development functions like the five components of a story, then write down how you plan to control (define) that story:
- The Setting. You create a mood and presence by the way you enter the room, interact with the audience, and display your title. While you may not have full control over who comes and what the room looks like, you do have relative control over the tone and ambiance and how they will react to your message. Consider the title of your presentation. Does it capture your message while also creating a buzz about your topic? Can you add a photo on the title slide that will intrigue your audience? What colors will you use? How do you plan to interact with the slides and how will you keep the audience involved?
- The Characters. You may not know all the people in the room, but you should know as much about them as possible (start with Step 1). Still, you have a way to shape their interest and engagement in this topic. Characters in this story are stakeholders. Your ultimate goal for giving should be one of three things: help them think about something in a new, meaningful way; learn something valuable they didn’t know before; and/or act as a result of what they learned. If you can’t get them to one of those three points, you’ve never really developed the characters.
- The Plot . A plot in storytelling is a series of events that build towards a conclusion. A plot needs to have direction, with clear and meaningful series of events. As you develop your script, you should be thinking about your rhetorical progression of ideas—your building towards a final outcome or conclusion. The development of slides can help you with this and they can help your audience stay on track. The key is, you need to make sure your audience is following the plot. If the plot starts to feel loose, disconnected, fragmented, or…all over the place, you’ll lose them faster than a 0-star rated movie.
- The Conflict. There must be some reason why everyone is there to see you presentation. It’s possible they don’t fully understand it themselves, but you, as the presenter, must make their purpose evidently clear. You must make them care. The more and more you pull them into your subject matter, the more you have effectively built a climax, which is the key to any successful story.
- The Resolution . The resolution is the takeaway—it’s what resolves the conflict. If you’ve built a strong climax, you now need to make sure your audience leaves with something valuable. If they leave thinking in a new, meaningful way; if they have learned something valuable that they can apply today; or if they are ready and knowledgeable about how to act, then the resolution is there and you, the author, have done your job.
Step 3: Brand Your Message

Jeff Bezos is famous for having said, “Brand is what others say about you when you’re not in the room.” You might think similarly about your presentation. How will your audience feel about your presentation afterwards, when you’re not around?
That can be an intimidating question to ask. And, it may seem a little odd to think about your message as a “brand.” But…applying brand theory to messaging makes a lot of sense. You want people to get on board with what you have to say. To do that, you have to establish what they value, what motivates them, and what you’ll have to do meet or exceed their expectations.
Brand experts use a lot of terms to describe and define brands. Let’s address a few, and apply them to slide design:
- Differentiation. How yours is different from the rest. What can you do to make your message stand out from a world of clutter and information? What makes yours unique? Is it your approach, the stories you tell, your language, your humor, your ideas, something else?
- Authenticity . How much you genuinely care. Audiences can tell if you’re passionate or not. They know if you care about both your topic and them learning it. If you fake it, the message gets diluted. Use your slides to help showcase how much you care.
- History . What people already know about you, your topic, or your experience. Do you need to establish credibility, or do you already have it? Do you have experience you can lean into? Does your audience already like/agree with this topic? Is it totally new and unfamiliar to them? How can you bring the history of your topic and yourself into the presentation? Will you audience need a primer on the history or does it matter?
- Simplicity. Making the most important things stick. Good brands almost always have simple logos, simple taglines, and simple brand positioning statements. Many also focus on limited products—they focus on what they do well. Your message can work the same way. Can you simplify your entire message into 2 – 5 key points? Can you reduce the amount of information that has to be taken in all at once? Can you help organize and chunk information to be clearer and simpler to follow? People generally have a hard time remembering complex information all at once—determine what the real purpose of your presentation is and what your audience can reasonably get out of it, then simplify to make sure that happens.
- Visual Identity . Your message, like a brand, can be enhanced if people resonate with the overall look and feel. Just like with buying a brand of shoes, people will be drawn to the design of your information. If it looks static, cliche, poorly design, or just plain ugly, you’ve created an undesirable visual identity and people will have a harder time buying into it. But if you can take your message and harmonize with strong design and imagery, people will be more likely to be attracted by, latch onto, and “buy in” to what you have to say. What should your visual identity look like, considering your topic?
Step 4: Select Your Fonts

The choice of your font may seem a small thing, but it can make the difference between a sleek, professional presentation and one that is static, boring, or, worse, painfully obnoxious.
If you’re not a professional designer, being font savvy may not come natural. Fortunately, there just a few rules you can follow to help you make your choices:
- Avoid the Defaults . In PowerPoint (as in MS Word), the default font is Calibri. Before 2010, the default was Times New Roman. Other programs use Arial or Myriad Pro as the default. What’s wrong with defaults? The fonts themselves are actually fine fonts—that’s why Microsoft went with them. BUT…because they’re the defaults, they are so widely used that they’ve become dull. If you just leave the defaults, your audience will subconsciously feel that you didn’t design your PowerPoint (because you probably didn’t). Just changing the font can bolster your PowerPoint’s professionalism quickly.
- Stick to Simple, Modern Fonts. Okay, so you don’t want to use the defaults, but what DO you use? Something simple. Don’t go crazy. Find something that is similar to the default, with just a little variation. Find something that is super easy to read and looks clean, simple, and sleek. Nothing distracting. Remember: you want people to focus on your story and message, not the lettering. Look at the graphic above for a list of some good, simple, modern fonts. Avoid, at all costs, the notoriously ugly or cliched fonts: Comic Sans; Chiller; Papyrus; Algerian; Curlz MT; and so forth.
- Make Sure Your Fonts Are on the Computer(s) You’re Presenting On. Remember: fonts are installed on individual computers, not attached to a program. A misunderstanding that many people have is that a font comes with PowerPoint (or any other program you’re working on). That’s NOT accurate. Fonts are installed on your computer. So…if you use a cool font that was on your desktop PC, but you are presenting your slides on a MacBook laptop, you’ll want to check that both computers have the font you’re using. Some fonts are pretty standard and you’ll find them on pretty much all computers: Palatino Linotype, Century Gothic, Segoe UI, Garamond. Others, however, are proprietary and may not be on other computers: Acumin Pro, Raleway, Helvetica. If you know you’ll be presenting on multiple different computers, find a standard font. One I’ve always liked to use is Century Gothic.
- Consider Using Two Fonts . The “two-font rule” suggests that designs will be more attractive if they use two fonts—one for headings and titles, the other for body text. You can get away with just one font if you make your headings stand out in some way—by size, weight, or color—but it’s often a nice aesthetic to use two. Just be sure that the two fonts are obviously different from each other (don’t use both Arial AND Century Gothic—they’re too similar, which will look like an accident) and that they harmonize well together. It’s often good to use a serif font (the type with little “feet” like in Palatino Linotype) paired with a sans serif font (the kind without “feet,” like Century Gothic).
Step 5: Narrow Your Colors

A hallmark of any good design is a simple, consistent color scheme. Keep your slide designs to fewer than four colors. Often, it’s good to use black, white, gray, and then one or two accent colors. Years ago, when I was new to design, I had someone tell me that a brochure I created looked like a clown exploded on the page. You DON’T want your slides to look like a clown exploded! To avoid that, find your color scheme in advance and stick to it.
Color can be tricky. If you work for a company that already has a pre-established style guide and color scheme, definitely use it! Not only is that important for your company’s brand, it makes your life a whole lot easier. If you do have to choose colors yourself, though, consider going to this website first: color.adobe.com . You can type things into the “explore” bar and you’ll be led to color schemes that look nice.
What you want to look for are colors that are a bit muted and won’t overwhelm the eyes of your viewers. Remember that you want to keep a high contrast so it doesn’t strain your audience members’ eyes. So…stick to black or really dark gray for text. Keep a white or very light background. Use the accent color for headings or important pieces of content. And…just make sure the colors match your topic or industry.
Step 6: Divide into Sections

Good presentations are well organized. Your slides should visually reflect your organization by using different slide “types” for different parts of your presentation or content.
All presentations should have at least three slide types: a title slide, a body slide, and a closing slide. Most presentations will have a fourth: a section slide. Section slides are used to transition your presentation from one major topic to the next. Many presentations can also benefit from callout slides, which are used to designate unique types of content that show up periodically—like for direct quotes or polling questions to audience members.
If you’ve ever taken a college course on public speaking, you probably remember your professor telling you to use “signposts.” A signpost is a metaphor for visual or oral cues that let your reader know where they’re at in the journey. Signposts keep your audience oriented. Sectioning your slides provides a visual signifier to your audience that you are shifting gears—plus, it just makes your slides feel cohesive, professional, and organized.
Take the time to design your slide types first. Then, fill in the content from your presentation script.
A quick note about body slides, though. These are going to be the most frequently used slides, the ones that you put the majority of your content on. Note that body slides don’t all have to look identical. They need to be consistent in design—repeating the same fonts, colors, photography style, highlights, etc.—but the layouts can change. Providing some visual variation is good for your audience.
Step 7: Visualize Every Slide

One of the biggest errors inexperienced presenters make is believing that audience members need to be able to read a lot of text to understand the message.
The reality is, when you put a lot of text on the screen—even if it’s in a bulleted list—you end up creating more difficulty for your audience. They’ll try to read while also trying to listen to you, creating a conflict of noise that will eventually cause them to only catch about half of what you wanted them to. Plus, a lot of text is boring and not efficient for the human brain.
Research has actually shown (and there is significant evidence to prove this) that making information visual is good for humans for four reasons: engagement, cognition, trust, and recall.
- Visual information is more engaging . Most all people will tell you that they are “visual learners.” The reality is that pretty much all humans are. We pay attention to visual information because our brains are designed to process visual information faster. When you provide visuals—photographs, charts, diagrams, icons, etc.—people will pay far more attention than if you just have text. In fact, if you just have text on a screen, people will likely zone out.
- Visual information is easier to understand. If designed well and related to the topic, people will understand visual information faster than they will from reading. Even as you read this article (assuming you’re still here!), the information that is really going to help you are the visual examples and explanations I’ve added for each section. That’s the stuff where you’ll say, “aha! now I know what Curtis is telling me to do.” All this text—it’s just ancillary stuff to provide more detail. But the photos/graphics are what you’ll really learn from.
- Visualized information builds trust. For better or for worse, humans are wired to trust information more when it has been visualized, especially when it looks professional. If you take a table of data and turn it into a data visualization that is professionally design, people will tend to trust it more. Something about taking the time to visualize information makes people assume you know what you’re talking about. Now, that said, you have to make sure your data visualizations are accurate. The real pitfall here is that people will tend to trust it more, even if it’s misleading. If they discover any flaws, your entire argument (and credibility) will go out the window.
- Visual information is easier to remember . Research studies have shown that visual information will be retained more than six times better if visuals are attached to it. If you actually want people to remember your presentation you must do two things: tell stories and use pictures. If you simply regurgitate information and make it very text-heavy, your audience will forget almost everything you said within three days. If you add pictures, though, they’ll have mental images to trigger memory, helping them retain your message much longer.
Find ways to visualize every chance you can, making sure that your visuals emphasize, clarify, or enhance the content you are talking about. Look at the examples above. Find ways to reduce text and enlarge graphics; turn bullets into images or icons; and use simple, easy to understand graphics that draw attention to the most important point.
Step 8: Play with Photos and Layouts

This is the one that takes the most practice, but it can be the most fun and rewarding. Recognize that your body slides can take multiple forms and that there are endless ways to organize, crop, and adjust visualizations, photos, headings, and designs. As long as you keep your color scheme, fonts, and highlighting techniques consistent, the slides will still feel uniform and professional, while giving variety to your slides.
Some things to think about as you play with the design of your slides:
- CONTRAST: Make sure you use high contrast in colors, especially for areas where you have text (black text on white backgrounds almost always work best). In addition, make sure that things that are different actually look significantly different. If two fonts are different sizes, make them obviously different sizes. If you’re using two colors, make them completely different colors. When two things look similar, there isn’t much contrast, which looks accidental and/or visually dull.
- REPETITION: Repetition is all about consistency in design. Repeat design elements throughout: fonts, colors, highlights, logos, shapes, styles, etc. Repeat the same visual feel for photos. Use the same types of icons and graphics. The more unified the design, the strong the appeal and the more professional you look.
- ALIGNMENT: Make sure everything on your slide is aligned with something else. Nothing should be “floating,” or placed arbitrarily. Align photos to titles, words to other words, rules/lines to other elements. Keep it all tightly aligned and crisp.
- PROXIMITY: Put things that are related close together and things that aren’t apart from each other. The brain will automatically assume that, if two things are next to each other (like a photo and a caption) that they are connected. Avoid confusing your audience by separating things that are different and connecting things that go together.
- Move Photos to the Bleeds . The term “bleed” is a graphic design principle that describes moving photos to the edge of page (where the ink “bleeds” off) in order to reduce visual noise. An old design principles developed by Josef Albers, 1+1=3, suggests that when you insert two objects, you automatically create a third—the space between. When you insert a photo, you end up creating a margin of white space around the edges. If that white space isn’t necessary, just make the image larger and push clear to the edge of the screen. This will remove the margin and the noise. Plus, it just makes slides look simpler and more professional and it really draws the eyes to the photo.
Step 9: Orient Your Audience

In addition to creating section slides (see Step 6 above), you can help your audience—and yourself—stay organized by giving visual cues and textual information in footers, slide counts, and headers or sidebars.
These orienting features of a slide deck can be especially valuable if you’re giving a long presentation, workshop, or training.
Start by creating a footer. These aren’t required and you don’t need them on every slide, but in most costs, presentations will benefit from some information in the footer. Some of the most common things to include in a footer:
- Company logo
- Company name
- Name of presenter
- Name of event or conference
- Title of presentation
- Copyright information
Beyond the footer, you can also include a slide count (in example above, look at the bottom right of the slide). While some argue that this can be distracting, most would say that a slide count will help audience members know how much more to expect, putting their “I’m being held hostage by this presenter!” fears away.
If your presentation is particularly long (like, say, 45 minutes or more) or you’re giving a workshop, you can really help your audience by giving them a sort of contents or guide, so that they know where they’re at in relation to everything else. You might, for example, create a small sidebar on the left that includes the section they’re in with the subsection. Or, as in the example at the top (see top left of example), you might just include which section you’re on and a summary title of that section.
There is no one or perfect way to orient your audience members. Just make sure it’s on the forefront of your mind as you work to build empathy into your slide design. The presentation is for them, after all, not you. Give them as much as you can to help them appreciate the message you’re delivering.
- ← Is a Doctor of Nursing Practice Degree Worth it?
- 6 Things You Should Do to Preserve Your Wealth →
Shop for your perfect poster print or digital download at our online store!
Loading metrics
Open Access
Ten simple rules for effective presentation slides
* E-mail: [email protected]
Affiliation Biomedical Engineering and the Center for Public Health Genomics, University of Virginia, Charlottesville, Virginia, United States of America
- Kristen M. Naegle
Published: December 2, 2021
- https://doi.org/10.1371/journal.pcbi.1009554
- Reader Comments
Citation: Naegle KM (2021) Ten simple rules for effective presentation slides. PLoS Comput Biol 17(12): e1009554. https://doi.org/10.1371/journal.pcbi.1009554
Copyright: © 2021 Kristen M. Naegle. This is an open access article distributed under the terms of the Creative Commons Attribution License , which permits unrestricted use, distribution, and reproduction in any medium, provided the original author and source are credited.
Funding: The author received no specific funding for this work.
Competing interests: The author has declared no competing interests exist.
Introduction
The “presentation slide” is the building block of all academic presentations, whether they are journal clubs, thesis committee meetings, short conference talks, or hour-long seminars. A slide is a single page projected on a screen, usually built on the premise of a title, body, and figures or tables and includes both what is shown and what is spoken about that slide. Multiple slides are strung together to tell the larger story of the presentation. While there have been excellent 10 simple rules on giving entire presentations [ 1 , 2 ], there was an absence in the fine details of how to design a slide for optimal effect—such as the design elements that allow slides to convey meaningful information, to keep the audience engaged and informed, and to deliver the information intended and in the time frame allowed. As all research presentations seek to teach, effective slide design borrows from the same principles as effective teaching, including the consideration of cognitive processing your audience is relying on to organize, process, and retain information. This is written for anyone who needs to prepare slides from any length scale and for most purposes of conveying research to broad audiences. The rules are broken into 3 primary areas. Rules 1 to 5 are about optimizing the scope of each slide. Rules 6 to 8 are about principles around designing elements of the slide. Rules 9 to 10 are about preparing for your presentation, with the slides as the central focus of that preparation.
Rule 1: Include only one idea per slide
Each slide should have one central objective to deliver—the main idea or question [ 3 – 5 ]. Often, this means breaking complex ideas down into manageable pieces (see Fig 1 , where “background” information has been split into 2 key concepts). In another example, if you are presenting a complex computational approach in a large flow diagram, introduce it in smaller units, building it up until you finish with the entire diagram. The progressive buildup of complex information means that audiences are prepared to understand the whole picture, once you have dedicated time to each of the parts. You can accomplish the buildup of components in several ways—for example, using presentation software to cover/uncover information. Personally, I choose to create separate slides for each piece of information content I introduce—where the final slide has the entire diagram, and I use cropping or a cover on duplicated slides that come before to hide what I’m not yet ready to include. I use this method in order to ensure that each slide in my deck truly presents one specific idea (the new content) and the amount of the new information on that slide can be described in 1 minute (Rule 2), but it comes with the trade-off—a change to the format of one of the slides in the series often means changes to all slides.
- PPT PowerPoint slide
- PNG larger image
- TIFF original image
Top left: A background slide that describes the background material on a project from my lab. The slide was created using a PowerPoint Design Template, which had to be modified to increase default text sizes for this figure (i.e., the default text sizes are even worse than shown here). Bottom row: The 2 new slides that break up the content into 2 explicit ideas about the background, using a central graphic. In the first slide, the graphic is an explicit example of the SH2 domain of PI3-kinase interacting with a phosphorylation site (Y754) on the PDGFR to describe the important details of what an SH2 domain and phosphotyrosine ligand are and how they interact. I use that same graphic in the second slide to generalize all binding events and include redundant text to drive home the central message (a lot of possible interactions might occur in the human proteome, more than we can currently measure). Top right highlights which rules were used to move from the original slide to the new slide. Specific changes as highlighted by Rule 7 include increasing contrast by changing the background color, increasing font size, changing to sans serif fonts, and removing all capital text and underlining (using bold to draw attention). PDGFR, platelet-derived growth factor receptor.
https://doi.org/10.1371/journal.pcbi.1009554.g001
Rule 2: Spend only 1 minute per slide
When you present your slide in the talk, it should take 1 minute or less to discuss. This rule is really helpful for planning purposes—a 20-minute presentation should have somewhere around 20 slides. Also, frequently giving your audience new information to feast on helps keep them engaged. During practice, if you find yourself spending more than a minute on a slide, there’s too much for that one slide—it’s time to break up the content into multiple slides or even remove information that is not wholly central to the story you are trying to tell. Reduce, reduce, reduce, until you get to a single message, clearly described, which takes less than 1 minute to present.
Rule 3: Make use of your heading
When each slide conveys only one message, use the heading of that slide to write exactly the message you are trying to deliver. Instead of titling the slide “Results,” try “CTNND1 is central to metastasis” or “False-positive rates are highly sample specific.” Use this landmark signpost to ensure that all the content on that slide is related exactly to the heading and only the heading. Think of the slide heading as the introductory or concluding sentence of a paragraph and the slide content the rest of the paragraph that supports the main point of the paragraph. An audience member should be able to follow along with you in the “paragraph” and come to the same conclusion sentence as your header at the end of the slide.
Rule 4: Include only essential points
While you are speaking, audience members’ eyes and minds will be wandering over your slide. If you have a comment, detail, or figure on a slide, have a plan to explicitly identify and talk about it. If you don’t think it’s important enough to spend time on, then don’t have it on your slide. This is especially important when faculty are present. I often tell students that thesis committee members are like cats: If you put a shiny bauble in front of them, they’ll go after it. Be sure to only put the shiny baubles on slides that you want them to focus on. Putting together a thesis meeting for only faculty is really an exercise in herding cats (if you have cats, you know this is no easy feat). Clear and concise slide design will go a long way in helping you corral those easily distracted faculty members.
Rule 5: Give credit, where credit is due
An exception to Rule 4 is to include proper citations or references to work on your slide. When adding citations, names of other researchers, or other types of credit, use a consistent style and method for adding this information to your slides. Your audience will then be able to easily partition this information from the other content. A common mistake people make is to think “I’ll add that reference later,” but I highly recommend you put the proper reference on the slide at the time you make it, before you forget where it came from. Finally, in certain kinds of presentations, credits can make it clear who did the work. For the faculty members heading labs, it is an effective way to connect your audience with the personnel in the lab who did the work, which is a great career booster for that person. For graduate students, it is an effective way to delineate your contribution to the work, especially in meetings where the goal is to establish your credentials for meeting the rigors of a PhD checkpoint.
Rule 6: Use graphics effectively
As a rule, you should almost never have slides that only contain text. Build your slides around good visualizations. It is a visual presentation after all, and as they say, a picture is worth a thousand words. However, on the flip side, don’t muddy the point of the slide by putting too many complex graphics on a single slide. A multipanel figure that you might include in a manuscript should often be broken into 1 panel per slide (see Rule 1 ). One way to ensure that you use the graphics effectively is to make a point to introduce the figure and its elements to the audience verbally, especially for data figures. For example, you might say the following: “This graph here shows the measured false-positive rate for an experiment and each point is a replicate of the experiment, the graph demonstrates …” If you have put too much on one slide to present in 1 minute (see Rule 2 ), then the complexity or number of the visualizations is too much for just one slide.
Rule 7: Design to avoid cognitive overload
The type of slide elements, the number of them, and how you present them all impact the ability for the audience to intake, organize, and remember the content. For example, a frequent mistake in slide design is to include full sentences, but reading and verbal processing use the same cognitive channels—therefore, an audience member can either read the slide, listen to you, or do some part of both (each poorly), as a result of cognitive overload [ 4 ]. The visual channel is separate, allowing images/videos to be processed with auditory information without cognitive overload [ 6 ] (Rule 6). As presentations are an exercise in listening, and not reading, do what you can to optimize the ability of the audience to listen. Use words sparingly as “guide posts” to you and the audience about major points of the slide. In fact, you can add short text fragments, redundant with the verbal component of the presentation, which has been shown to improve retention [ 7 ] (see Fig 1 for an example of redundant text that avoids cognitive overload). Be careful in the selection of a slide template to minimize accidentally adding elements that the audience must process, but are unimportant. David JP Phillips argues (and effectively demonstrates in his TEDx talk [ 5 ]) that the human brain can easily interpret 6 elements and more than that requires a 500% increase in human cognition load—so keep the total number of elements on the slide to 6 or less. Finally, in addition to the use of short text, white space, and the effective use of graphics/images, you can improve ease of cognitive processing further by considering color choices and font type and size. Here are a few suggestions for improving the experience for your audience, highlighting the importance of these elements for some specific groups:
- Use high contrast colors and simple backgrounds with low to no color—for persons with dyslexia or visual impairment.
- Use sans serif fonts and large font sizes (including figure legends), avoid italics, underlining (use bold font instead for emphasis), and all capital letters—for persons with dyslexia or visual impairment [ 8 ].
- Use color combinations and palettes that can be understood by those with different forms of color blindness [ 9 ]. There are excellent tools available to identify colors to use and ways to simulate your presentation or figures as they might be seen by a person with color blindness (easily found by a web search).
- In this increasing world of virtual presentation tools, consider practicing your talk with a closed captioning system capture your words. Use this to identify how to improve your speaking pace, volume, and annunciation to improve understanding by all members of your audience, but especially those with a hearing impairment.
Rule 8: Design the slide so that a distracted person gets the main takeaway
It is very difficult to stay focused on a presentation, especially if it is long or if it is part of a longer series of talks at a conference. Audience members may get distracted by an important email, or they may start dreaming of lunch. So, it’s important to look at your slide and ask “If they heard nothing I said, will they understand the key concept of this slide?” The other rules are set up to help with this, including clarity of the single point of the slide (Rule 1), titling it with a major conclusion (Rule 3), and the use of figures (Rule 6) and short text redundant to your verbal description (Rule 7). However, with each slide, step back and ask whether its main conclusion is conveyed, even if someone didn’t hear your accompanying dialog. Importantly, ask if the information on the slide is at the right level of abstraction. For example, do you have too many details about the experiment, which hides the conclusion of the experiment (i.e., breaking Rule 1)? If you are worried about not having enough details, keep a slide at the end of your slide deck (after your conclusions and acknowledgments) with the more detailed information that you can refer to during a question and answer period.
Rule 9: Iteratively improve slide design through practice
Well-designed slides that follow the first 8 rules are intended to help you deliver the message you intend and in the amount of time you intend to deliver it in. The best way to ensure that you nailed slide design for your presentation is to practice, typically a lot. The most important aspects of practicing a new presentation, with an eye toward slide design, are the following 2 key points: (1) practice to ensure that you hit, each time through, the most important points (for example, the text guide posts you left yourself and the title of the slide); and (2) practice to ensure that as you conclude the end of one slide, it leads directly to the next slide. Slide transitions, what you say as you end one slide and begin the next, are important to keeping the flow of the “story.” Practice is when I discover that the order of my presentation is poor or that I left myself too few guideposts to remember what was coming next. Additionally, during practice, the most frequent things I have to improve relate to Rule 2 (the slide takes too long to present, usually because I broke Rule 1, and I’m delivering too much information for one slide), Rule 4 (I have a nonessential detail on the slide), and Rule 5 (I forgot to give a key reference). The very best type of practice is in front of an audience (for example, your lab or peers), where, with fresh perspectives, they can help you identify places for improving slide content, design, and connections across the entirety of your talk.
Rule 10: Design to mitigate the impact of technical disasters
The real presentation almost never goes as we planned in our heads or during our practice. Maybe the speaker before you went over time and now you need to adjust. Maybe the computer the organizer is having you use won’t show your video. Maybe your internet is poor on the day you are giving a virtual presentation at a conference. Technical problems are routinely part of the practice of sharing your work through presentations. Hence, you can design your slides to limit the impact certain kinds of technical disasters create and also prepare alternate approaches. Here are just a few examples of the preparation you can do that will take you a long way toward avoiding a complete fiasco:
- Save your presentation as a PDF—if the version of Keynote or PowerPoint on a host computer cause issues, you still have a functional copy that has a higher guarantee of compatibility.
- In using videos, create a backup slide with screen shots of key results. For example, if I have a video of cell migration, I’ll be sure to have a copy of the start and end of the video, in case the video doesn’t play. Even if the video worked, you can pause on this backup slide and take the time to highlight the key results in words if someone could not see or understand the video.
- Avoid animations, such as figures or text that flash/fly-in/etc. Surveys suggest that no one likes movement in presentations [ 3 , 4 ]. There is likely a cognitive underpinning to the almost universal distaste of pointless animations that relates to the idea proposed by Kosslyn and colleagues that animations are salient perceptual units that captures direct attention [ 4 ]. Although perceptual salience can be used to draw attention to and improve retention of specific points, if you use this approach for unnecessary/unimportant things (like animation of your bullet point text, fly-ins of figures, etc.), then you will distract your audience from the important content. Finally, animations cause additional processing burdens for people with visual impairments [ 10 ] and create opportunities for technical disasters if the software on the host system is not compatible with your planned animation.
Conclusions
These rules are just a start in creating more engaging presentations that increase audience retention of your material. However, there are wonderful resources on continuing on the journey of becoming an amazing public speaker, which includes understanding the psychology and neuroscience behind human perception and learning. For example, as highlighted in Rule 7, David JP Phillips has a wonderful TEDx talk on the subject [ 5 ], and “PowerPoint presentation flaws and failures: A psychological analysis,” by Kosslyn and colleagues is deeply detailed about a number of aspects of human cognition and presentation style [ 4 ]. There are many books on the topic, including the popular “Presentation Zen” by Garr Reynolds [ 11 ]. Finally, although briefly touched on here, the visualization of data is an entire topic of its own that is worth perfecting for both written and oral presentations of work, with fantastic resources like Edward Tufte’s “The Visual Display of Quantitative Information” [ 12 ] or the article “Visualization of Biomedical Data” by O’Donoghue and colleagues [ 13 ].
Acknowledgments
I would like to thank the countless presenters, colleagues, students, and mentors from which I have learned a great deal from on effective presentations. Also, a thank you to the wonderful resources published by organizations on how to increase inclusivity. A special thanks to Dr. Jason Papin and Dr. Michael Guertin on early feedback of this editorial.
- View Article
- PubMed/NCBI
- Google Scholar
- 3. Teaching VUC for Making Better PowerPoint Presentations. n.d. Available from: https://cft.vanderbilt.edu/guides-sub-pages/making-better-powerpoint-presentations/#baddeley .
- 8. Creating a dyslexia friendly workplace. Dyslexia friendly style guide. nd. Available from: https://www.bdadyslexia.org.uk/advice/employers/creating-a-dyslexia-friendly-workplace/dyslexia-friendly-style-guide .
- 9. Cravit R. How to Use Color Blind Friendly Palettes to Make Your Charts Accessible. 2019. Available from: https://venngage.com/blog/color-blind-friendly-palette/ .
- 10. Making your conference presentation more accessible to blind and partially sighted people. n.d. Available from: https://vocaleyes.co.uk/services/resources/guidelines-for-making-your-conference-presentation-more-accessible-to-blind-and-partially-sighted-people/ .
- 11. Reynolds G. Presentation Zen: Simple Ideas on Presentation Design and Delivery. 2nd ed. New Riders Pub; 2011.
- 12. Tufte ER. The Visual Display of Quantitative Information. 2nd ed. Graphics Press; 2001.
Developing Effective Visuals
Garr Reynolds’ book Presentation Zen is a great introduction to effective use of slides in presentations. Garr also maintains a great blog on presentations . Some key points from Presentation Zen:

- Limit bullet points and text. Keep in mind that your slides probably shouldn’t function as your own personal teleprompter. Your slides are for your students’ benefit. If your slides say just about everything that you say, then your students won’t know where to pay attention–to you or to your slides.
- Use high-quality graphics. The clip art that comes with PowerPoint is certainly convenient (and more visually appealing than it used to be), but there are online sources of free, high-resolution images that can have much greater visual impact. For instance, millions of photos are available for free, educational use on the photo-sharing site Flickr under the Creative Commons license .

- Choose your fonts well. Sans-serif fonts are often easier to read on slides than serif fonts . Too many different fonts in a slide or a presentation can be distracted, so try to limit yourself to one or two. Font size matters, too. Be sure that your fonts are large enough to be read at the back of the room. And if you’re keeping your slides simple and limiting your use of text, you can usually use very large fonts.

For more thoughts on these and other suggestions by Garr Reynolds, along with example PowerPoint slides, see his Top Ten Slide Tips .
For an alternative to PowerPoint and Keynote, try Prezi , “the zooming presentation tool.”
For more information about using slides please check out our “Using Slides in the Classroom” Guide!
- SUGGESTED TOPICS
- The Magazine
- Newsletters
- Managing Yourself
- Managing Teams
- Work-life Balance
- The Big Idea
- Data & Visuals
- Case Selections
- HBR Learning
- Topic Feeds
- Account Settings
- Email Preferences
What It Takes to Give a Great Presentation
- Carmine Gallo

Five tips to set yourself apart.
Never underestimate the power of great communication. It can help you land the job of your dreams, attract investors to back your idea, or elevate your stature within your organization. But while there are plenty of good speakers in the world, you can set yourself apart out by being the person who can deliver something great over and over. Here are a few tips for business professionals who want to move from being good speakers to great ones: be concise (the fewer words, the better); never use bullet points (photos and images paired together are more memorable); don’t underestimate the power of your voice (raise and lower it for emphasis); give your audience something extra (unexpected moments will grab their attention); rehearse (the best speakers are the best because they practice — a lot).
I was sitting across the table from a Silicon Valley CEO who had pioneered a technology that touches many of our lives — the flash memory that stores data on smartphones, digital cameras, and computers. He was a frequent guest on CNBC and had been delivering business presentations for at least 20 years before we met. And yet, the CEO wanted to sharpen his public speaking skills.
- Carmine Gallo is a Harvard University instructor, keynote speaker, and author of 10 books translated into 40 languages. Gallo is the author of The Bezos Blueprint: Communication Secrets of the World’s Greatest Salesman (St. Martin’s Press).
Partner Center
Understanding SC 1.4.8: Visual Presentation (Level AAA)
The intent of this Success Criterion is to ensure that visually rendered text is presented in such a manner that it can be perceived without its layout interfering with its readability. People with some cognitive, language and learning disabilities and some low vision users cannot perceive the text and/or lose their reading place if the text is presented in a manner that is difficult for them to read.
People with some visual or cognitive disabilities need to be able to select the color of text and the color of the background. They sometimes choose combinations that seem unintuitive to someone without that disability. Sometimes these combinations have very low contrast. Sometimes only very specific color combinations work for them. Control of color or other aspects of text presentation makes a huge difference to their comprehension.
For people with some reading or vision disabilities, long lines of text can become a significant barrier. They have trouble keeping their place and following the flow of text. Having a narrow block of text makes it easier for them to continue on to the next line in a block. Lines should not exceed 80 characters or glyphs (40 if CJK), where glyphs are the element of writing in the writing system for the text. Studies have shown that Chinese, Japanese and Korean (CJK) characters are approximately twice as wide as non-CJK characters when both types of characters are displayed with characteristics that achieve the same readability, so the maximum line width for CJK characters is half that of non-CJK characters.
People with some cognitive disabilities find it difficult to track text where the lines are close together. Providing extra space between lines and paragraphs allows them to better track the next line and to recognize when they have reached the end of a paragraph. It is best if there are several different options, for instance, space-and-a-half and double spacing for line spacing. By space and a half within paragraphs we mean that top of one line is 150% further from the top of the line below it than would be true when the text is 'single spaced' (the default spacing for the font). By Paragraph spacing that is 1.5 times larger than the line spacing we mean that the spacing from the top of the last line of 1 paragraph is 250% farther from the Top of the first line of the next paragraph (i.e., that there is a blank line between the two paragraphs that is 150% of the single space blank line).
People with certain cognitive disabilities have problems reading text that is both left and right justified. The uneven spacing between words in fully justified text can cause "rivers of white" space to run down the page making reading difficult and in some cases impossible. Text justification can also cause words to be spaced closely together, so that it is difficult for them to locate word boundaries.
The resizing provision ensures that visually rendered text (text characters that have been displayed so that they can be seen [vs. text characters that are still in data form such as ASCII]) can be scaled successfully without requiring that the user scroll left and right to see all of the content. When the content has been authored so that this is possible, the content is said to reflow. This permits people with low vision and people with cognitive disabilities to increase the size of the text without becoming disoriented.
The scaling of content is primarily a user agent responsibility. User agents that satisfy UAAG 1.0 Checkpoint 4.1 allow users to configure text scale. The author's responsibility is to create Web content that does not prevent the user agent from scaling the content and that allows the reflow of the content within the current width of the viewport. See 1.4.4: Resize Text for additional discussion of resizing text.
The horizontal scrolling requirement is not intended to apply to small-screen devices where long words may be displayed on a single line and require users to scroll horizontally. For the purposes of this requirement, authors should ensure that content meets this requirement on standard desktop/laptop displays with the browser window maximized. Since people generally keep their computers for several years, it is best not to rely on the latest desktop/laptop display resolutions but to consider the common desktop/laptop display resolutions over the course of several years when making this evaluation.
Wrapping should always be possible as long as words are not so long that a single word is more than half the width of a full screen. Very long URIs may run off the side of an enlarged screen, but they would not be considered text for "reading" and, therefore, would not violate this provision.
This provision does not mean that a user would never need to use horizontal scrolling. It only means that they would not need to use horizontal scrolling back and forth to read a line of text. For example, if a page consisted of two equal sized columns of text, it would automatically meet this provision. Enlarging the page would mean that the first column was completely on screen and the user could just scroll vertically down the page to read it. To read the second column, they would horizontally scroll to the right, where the right hand column would then fit entirely within the width of the screen, and read that column without further horizontal scrolling.
This Success Criterion helps low vision users by letting them see text without distracting presentational features. It lets them configure text in ways that will be easier for them to see by letting them control the color and size of blocks of text.
This Success Criterion helps people with cognitive, language and learning disabilities perceive text and track their location within blocks of text.
- People with some cognitive disabilities can read text better when they select their own foreground and background color combinations.
- People with some cognitive disabilities can track their locations more easily when blocks of text are narrow and when they can configure the amount of space between lines and paragraphs.
- People with some cognitive disabilities can read text more easily when the spacing between words is regular.
Examples of glyphs include "A", "→" (an arrow symbol), and "さ" (a Japanese character).
Related Resources
Resources are for information purposes only, no endorsement implied.
- CSS 2 Box Model
- CSS 2 Visual formatting Model
- CSS 2 Visual formatting Model Details
- About fluid and fixed width layouts
- Accessible CSS
- Ideal line length for content
- Developing sites for users with Cognitive disabilities and learning difficulties
- RDFA Primer
- MULTIFUNK: Bringing computer-supported reading one step further , Date: April 2002, ISBN: 82-539-0491-6, Author: Gjertrud W. Kamstrup, Eva Mjøvik, Anne-Lise Rygvold og Bjørn Gunnar Saltnes
- Effective Monitor Display Design on the ERIC Web portal
- Cognitive difficulties and access to information systems - an interaction design perspective ", Peter Gregor and Anna Dickinson, Applied Computing, University of Dundee
- Legge, G.E., Pelli, D.G., Rubin, G.S., & Schleske, M.M.:Psychophysics of reading. I. Normal Vision,Vision Research, 25, 239-252, 1985.
- Legge, G.E., Rubin, G.S., Pelli, D.G., & Schleske, M.M.:Psychophysics of reading. II. Low Vision,Vision Research, 25, 253-266, 1985.
- Osaka,N. and Oda, K. (1991). Effective visual field size necessary for vertical reading during Japanese text processing. Bulletin of Psychonomic Society,29(4),345-347.
- Beckmann, P.J. & Legge, G.E. (1996). Psychophysics of reading. XIV. The page-navigation problem in using magnifiers. Vision Research, 36, 3723-3733.
- 川嶋英嗣・小田浩一(2003).読書におけるスクロール方向とウィンドウ幅の影響 日本心理学会第67回大会, 502.
- 小田浩一・今橋真理子(1995). 文字認知の閾値と読みの閾値. VISION, 7, 165-168.
- Osaka,N. (1994). Size of saccade and fixation duration of eye movements during reading: psychophysics of Japanese text processing. Journal of Optical Society of America A, 9(1), 5-13.
- 山中今日子・小田浩一 (2007). 漢字の画数と書体のウェイトが視認性に及ぼす 影響. 視覚学会2007年夏季大会ポスター 1p1 Vision, P.167.
- Line Length, Volume, and Density
- Guidance on accessible publishing
- An Accessibility Frontier: Cognitive disabilities and learning difficulties
- Cognitive/Perceptual Difference And Good Web Design
- 6 Surprising Bad Practices That Hurt Dyslexic Users
- Design for Dyslexics
- Web Design for Dyslexia
Each numbered item in this section represents a technique or combination of techniques that the WCAG Working Group deems sufficient for meeting this Success Criterion. However, it is not necessary to use these particular techniques. For information on using other techniques, see Understanding Techniques for WCAG Success Criteria , particularly the "Other Techniques" section.
Sufficient Techniques
Instructions: Since this is a multi-part success criterion, you must satisfy one of the numbered items for each of the requirements below.
- C23: Specifying text and background colors of secondary content such as banners, features and navigation in CSS while not specifying text and background colors of the main content OR
- C25: Specifying borders and layout in CSS to delineate areas of a Web page while not specifying text and text-background colors OR
- G156: Using a technology that has commonly-available user agents that can change the foreground and background of blocks of text OR
- G148: Not specifying background color, not specifying text color, and not using technology features that change those defaults OR
- G175: Providing a multi color selection tool on the page for foreground and background colors
- G204: Not interfering with the user agent's reflow of text as the viewing window is narrowed OR
- C20: Using relative measurements to set column widths so that lines can average 80 characters or less when the browser is resized
- C19: Specifying alignment either to the left OR right in CSS OR
- G172: Providing a mechanism to remove full justification of text OR
- G169: Aligning text on only one side
- G188: Providing a button on the page to increase line spaces and paragraph spaces OR
- C21: Specifying line spacing in CSS
G146: Using liquid layout AND using measurements that are relative to other measurements in the content by using one or more of the following techniques:
- C12: Using percent for font sizes OR
- C13: Using named font sizes OR
- C14: Using em units for font sizes OR
- C24: Using percentage values in CSS for container sizes OR
- SCR34: Calculating size and position in a way that scales with text size OR
- G206: Providing options within the content to switch to a layout that does not require the user to scroll horizontally to read a line of text
The following are common mistakes that are considered failures of this Success Criterion by the WCAG Working Group.
- F24: Failure of Success Criterion 1.4.3, 1.4.6 and 1.4.8 due to specifying foreground colors without specifying background colors or vice versa
- F88: Failure of Success Criterion 1.4.8 due to using text that is justified (aligned to both the left and the right margins)
hardware and/or software that acts as a user agent , or along with a mainstream user agent, to provide functionality to meet the requirements of users with disabilities that go beyond those offered by mainstream user agents
functionality provided by assistive technology includes alternative presentations (e.g., as synthesized speech or magnified content), alternative input methods (e.g., voice), additional navigation or orientation mechanisms, and content transformations (e.g., to make tables more accessible).
Assistive technologies often communicate data and messages with mainstream user agents by using and monitoring APIs.
The distinction between mainstream user agents and assistive technologies is not absolute. Many mainstream user agents provide some features to assist individuals with disabilities. The basic difference is that mainstream user agents target broad and diverse audiences that usually include people with and without disabilities. Assistive technologies target narrowly defined populations of users with specific disabilities. The assistance provided by an assistive technology is more specific and appropriate to the needs of its target users. The mainstream user agent may provide important functionality to assistive technologies like retrieving Web content from program objects or parsing markup into identifiable bundles.
- screen magnifiers, and other visual reading assistants, which are used by people with visual, perceptual and physical print disabilities to change text font, size, spacing, color, synchronization with speech, etc. in order to improve the visual readability of rendered text and images;
- screen readers, which are used by people who are blind to read textual information through synthesized speech or braille;
- text-to-speech software, which is used by some people with cognitive, language, and learning disabilities to convert text into synthetic speech;
- speech recognition software, which may be used by people who have some physical disabilities;
- alternative keyboards, which are used by people with certain physical disabilities to simulate the keyboard (including alternate keyboards that use head pointers, single switches, sip/puff and other special input devices.);
- alternative pointing devices, which are used by people with certain physical disabilities to simulate mouse pointing and button activations.
more than one sentence of text
satisfying all the requirements of a given standard, guideline or specification
process or technique for achieving a result
The mechanism may be explicitly provided in the content, or may be relied upon to be provided by either the platform or by user agents , including assistive technologies .
The mechanism needs to meet all success criteria for the conformance level claimed.
on the most common sized desktop/laptop display with the viewport maximized
Since people generally keep their computers for several years, it is best not to rely on the latest desktop/laptop display resolutions but to consider the common desktop/laptop display resolutions over the course of several years when making this evaluation.
series of user actions where each action is required in order to complete an activity
the content would not conform if that technology is turned off or is not supported
mechanism for encoding instructions to be rendered, played or executed by user agents
As used in these guidelines "Web Technology" and the word "technology" (when used alone) both refer to Web Content Technologies.
Web content technologies may include markup languages, data formats, or programming languages that authors may use alone or in combination to create end-user experiences that range from static Web pages to synchronized media presentations to dynamic Web applications.
any software that retrieves and presents Web content for users
We use essential cookies to make Venngage work. By clicking “Accept All Cookies”, you agree to the storing of cookies on your device to enhance site navigation, analyze site usage, and assist in our marketing efforts.
Manage Cookies
Cookies and similar technologies collect certain information about how you’re using our website. Some of them are essential, and without them you wouldn’t be able to use Venngage. But others are optional, and you get to choose whether we use them or not.
Strictly Necessary Cookies
These cookies are always on, as they’re essential for making Venngage work, and making it safe. Without these cookies, services you’ve asked for can’t be provided.
Show cookie providers
- Google Login
Functionality Cookies
These cookies help us provide enhanced functionality and personalisation, and remember your settings. They may be set by us or by third party providers.
Performance Cookies
These cookies help us analyze how many people are using Venngage, where they come from and how they're using it. If you opt out of these cookies, we can’t get feedback to make Venngage better for you and all our users.
- Google Analytics
Targeting Cookies
These cookies are set by our advertising partners to track your activity and show you relevant Venngage ads on other sites as you browse the internet.
- Google Tag Manager
- Infographics
- Daily Infographics
- Popular Templates
- Accessibility
- Graphic Design
- Graphs and Charts
- Data Visualization
- Human Resources
- Beginner Guides
Blog Data Visualization 18 Presentation Design Tips For Success
18 Presentation Design Tips For Success
Written by: Midori Nediger May 15, 2023

Bad presentations. We’ve all had to sit through them. Heck, we’ve probably all given one or two. I know I have.
You know the type: twice as long as they need to be, slides chock-full of text, no visuals in sight.
How can you ensure you don’t fall victim to these presentation faux-pas when designing your next presentation for your team, class, or clients?
In this blog, I’ll walk you through tips on how to design an impactful presentation along with presentation templates that can help you deliver it with style to leave a lasting impression.
Tips for designing and delivering an impactful presentation
What makes a presentation memorable?
It usually comes down to three things:
- The main idea.
- The presenter.
- The visuals.
All three elements work together to create a successful presentation. Just like how different presentation styles serve different purposes, having a good presentation idea will give the audience a purpose for listening.
Here are some top tips to consider to help you design and deliver an impactful presentation:
- Include less text and more visuals in your presentation design
- Identify one core message to center your presentation design around
- Eliminate any information that doesn’t immediately support the core message
- Create a strong presentation outline to keep you focused
- Use text to reinforce, not repeat, what you’re saying
- Design your presentation with one major takeaway per slide
- Use visuals to highlight the key message on each slide
- Use scaffolding slides to orient your audience and keep them engaged
- Use text size, weight, and color for emphasis
- Apply design choices consistently to avoid distraction
- Split a group presentation by topic
- Use a variety of page layouts to maintain your audience’s interest
- Use presentation templates to help you get started
- Include examples of inspiring people
- Dedicate slides to poignant questions
- Find quotes that will inspire your audience
- Emphasize key points with text and images
- Label your slides to prompt your memory
1. Include less text and more visuals in your presentation design
According to David Paradi’s annual presentation survey , the 3 things that annoy audiences most about presentations are:
- Speakers reading their slides
- Slides that include full sentences of text
- Text that is too small to read
The common thread that ties all of these presentation annoyances is text. Audiences are very picky about the text found in presentation slide decks .
In my experiences speaking at conferences and in webinars over the past few years, audiences respond much more positively to presentations that use visuals in place of text.
Audiences are more engaged, ask more questions, and find my talks more memorable when I include lots of visual examples in my slide decks.
I’m not the only one who has found this. We recently surveyed nearly 400 conference speakers about their presentation designs and found that 84.3% create presentations that are highly visual.
A great example of a high visual presentation is the iconic AirBnB pitch deck design , which includes no more than 40 words per slide. Instead of repeating the speaker’s script on the slides, it makes an impact with keywords, large numbers, and icons:

Learn how to customize this presentation template:
To help you take your presentations to the next level, I’d like to share my process for creating a visually-focused presentation like the one above. I’ll give you my top presentation design tips that I’ve learned over years of presenting:
- Class presentations
- Online courses
You can then apply this process to our professional presentation templates or pitch decks , creating unique presentation decks with ease! Our user-friendly editor tools make customizing these templates a breeze.
To leave a lasting impression on your audience, consider transforming your slides into an interactive presentation. Here are 15 interactive presentation ideas to enhance interactivity and engagement.
We’ll cover the most important steps for summarizing lengthy text into a presentation-friendly format. Then we’ll touch on some presentation design tips to help you get visual with your slide decks. Read on for the best creative presentation ideas .
2. Identify one core message to center your presentation design around
We know from David Paradi’s survey that audiences are easily overwhelmed with lots of text and data, especially when presentations are long.

(You when you see a presentation with lots of text and data and it’s long)
So unlike in a white paper , report , or essay , you can’t expect to tackle many complex ideas within a single presentation.
That would be a recipe for disaster.
Instead, identify a single central message that you would like to communicate to your audience. Then build your presentation around that core message.
By identifying that core message, you can ensure that everything you include in your presentation supports the goal of the presentation .
As seen below, a great presentation tells you exactly what you’re going to learn (the core message), then gets right to the facts (the supporting information).

To ensure you create an asset that’s clear, concise, impactful, and easy to follow, design your presentation around a single core message.
3. Create a strong presentation outline to keep you focused
Think of your outline as a roadmap for your presentation. The outline will shape the presentation structure and guide you through your content. Creating a strong presentation outline straight away helps make sure that you’re hitting all of the key points you need to cover to convey a persuasive presentation .
Take this presentation outline example:
- Introduction and hellos
- Vision and value proposition
- Financial profit
- Your investment
- Thanks and questions
These are all things that we know we need to talk about within the presentation.
Creating a presentation outline makes it much easier to know what to say when it comes to creating the actual presentation slides.

You could even include your presentation outline as a separate slide so that your audience knows what to expect:

The opening moments of your presentation hold immense power – check out these 15 ways to start a presentation to set the stage and captivate your audience.
4. Eliminate any information that doesn’t support the core message
Next, use that core message to identify everything that doesn’t belong in the presentation.
Aim to eliminate everything that isn’t immediately relevant to the topic at hand, and anything remotely redundant. Cut any information that isn’t absolutely essential to understanding the core message.
By cutting these extra details, you can transform forgettable text-heavy slides:

Into memorable slides with minimal text:

Here’s a quick checklist to help you cut out any extra detail:
Get rid of:
- Detailed descriptions
- Background information
- Redundant statements
- Explanations of common knowledge
- Persuasive facts and figures
- Illustrative examples
- Impactful quotes

This step may seem obvious, but when you’re presenting on a topic that you’re passionate about, it’s easy to get carried away with extraneous detail. Use the recommendations above to keep your text in check.
Clarity is key, especially if you’re presenting virtually rather than in-person. However, Lisa Schneider (Chief Growth Officer at Merriam-Webster) has had plenty of experience making that adjustment. She recently shared her tips for adapting in-person presentations into virtual presentations on Venngage that you can check out.
Watch: How to design a presentation [10 ESSENTIAL TIPS]
5. Use text to reinforce, not repeat, what you’re saying
According to presentation guru Nancy Duarte , your audience should be able to discern the meaning of your slides in 6 seconds or less.
Since your audience will tend to read every word you place on each slide, you must keep your text to an absolute minimum. The text on your slides should provide support for what you’re saying without being distracting.
Never write out, word for word, what you’re going to be saying out loud. If you’re relying on text to remember certain points, resist the urge to cram them into your slides. Instead, use a tool like Venngage’s speaker notes to highlight particular talking points. These can be imported into PowerPoint — along with the rest of your presentation — and will only be viewable to you, not your audience.

For the actual slides, text should only be used to reinforce what you’re saying. Like in the presentation design below, paraphrase long paragraphs into short bulleted lists or statements by eliminating adjectives and articles (like “the” and “a”).

Pull out quotes and important numbers, and make them a focus of each slide.

6. Design your presentation with one major takeaway per slide
As I mentioned above, audiences struggle when too much information is presented on a single slide.
To make sure you don’t overwhelm your audiences with too much information, spread out your content to cover one major takeaway per slide.
By limiting each slide to a single simple statement, you focus your audience’s attention on the topic at hand.
My favorite way to do this is to pick out the core message of whatever I’m talking about and express it in a few keywords, as seen in this presentation slide below.

This helps ensure that the visuals remain the focus of the slide.

Using the text in this way, to simply state a single fact per slide, is a sure-fire way to make an impact in your presentation.
Alternatively, pull out a significant statistic that you want to stick in your audience’s minds and make it a visual focus of the slide, as seen in this popular presentation by Officevibe .

This might mean you end up with a slide deck with a ton of slides. But that’s totally ok!
I’ve talked to many professionals who are pressured by their management teams to create presentations with a specific number of slides (usually as few as 10 or 15 slides for a 30-minute presentation).
If you ask me, this approach is completely flawed. In my mind, the longer I spend sitting on a single slide, the more likely I am to lose the interest of my audience.
How many slides should I use for a 10 minute presentation?
A good rule of thumb is to have at least as many slides as minutes in your presentation. So for a 10 minute presentation you should have at least 10 slides .
Use as many slides as you need, as long as you are presenting a single message on each slide, (as seen in the lengthy presentation template below). This is especially important if you’re presenting your business, or delivering a product presentation. You want to wow your audience, not bore them.

7. Use visuals to highlight the key message on each slide
As important as having one major takeaway per slide is having visuals that highlight the major takeaway on each slide.
Unique visuals will help make your message memorable.
Visuals are a great way to eliminate extra text, too.
You can add visuals by creating a timeline infographic to group and integrate information into visual frameworks like this:

Or create a flowchart and funnels:

Or by representing simple concepts with icons, as seen in the modern presentation design below. Using the same color for every icon helps create a polished look.
Using visuals in this way is perfect for when you have to convey messages quickly to audiences that you aren’t familiar with – such as at conferences. This would also make the ideal interview presentation template.
You can alternatively use icons in different colors, like in the presentation templates below. Just make sure the colors are complimentary, and style is consistent throughout the presentation (i.e. don’t use sleek, modern icons on one slide and whimsically illustrated icons on another). In this example, presentation clipart style icons have been used.

Any time you have important stats or trends you want your audience to remember, consider using a chart or data visualization to drive your point home. Confident public speaking combined with strong visualizations can really make an impact, encouraging your audience to act upon your message.
One of my personal favorite presentations (created by a professional designer) takes this “key message plus a visual” concept to the extreme, resulting in a slide deck that’s downright irresistible.

When applying this concept, don’t fall into the trap of using bad stock photos . Irrelevant or poorly chosen visuals can hurt you as much as they help you.
Below is an example of how to use stock photos effectively. They are more thematic than literal and are customized with fun, bright icons that set a playful tone.

The content and visual design of a presentation should be seamless.
It should never seem like your text and visuals are plopped onto a template. The format and design of the slides should contribute to and support the audience’s understanding of the content.

8. Use scaffolding slides to orient your audience and keep them engaged
It’s easy for audiences to get lost during long presentations, especially if you have lots of slides. And audiences zone out when they get lost.
To help reorient your audience every once in a while, you can use something I like to call scaffolding slides. Scaffolding slides appear throughout a presentation to denote the start and end of major sections.
The core scaffolding slide is the agenda slide, which should appear right after the introduction or title slide. It outlines the major sections of the presentation.
At the beginning of each section, you should show that agenda again but highlight the relevant section title, as seen below.

This gives audiences the sense that you’re making progress through the presentation and helps keep them anchored and engaged.
Alternatively, you can achieve a similar effect by numbering your sections and showing that number on every slide. Or use a progress bar at the bottom of each slide to indicate how far along you are in your presentation. Just make sure it doesn’t distract from the main content of the slides.

You can imagine using this “progress bar” idea for a research presentation, or any presentation where you have a lot of information to get through.
Leila Janah, founder of Sama Group, is great at this. Her Innovation and Inspire talk about Sama Group is an example of a presentation that is well organized and very easy to follow.
Her presentation follows a logical, steady stream of ideas. She seems comfortable talking in front of a crowd but doesn’t make any attempts to engage directly with them.
9. Use text size, weight and color for emphasis
Every slide should have a visual focal point. Something that immediately draws the eye at first glance.
That focal point should be whatever is most important on that slide, be it an important number, a keyword, or simply the slide title.

We can create visual focal points by varying the size, weight, and color of each element on the slide. Larger, brighter, bolder elements will command our audience’s attention, while smaller, lighter elements will tend to fade into the background.

As seen in the presentation template above, this technique can be especially useful for drawing attention to important words within a long passage of text. Consider using this technique whenever you have more than 5 words on a slide.
And if you really want your audience to pay attention, pick a high-contrast color scheme like the one below.

When picking fonts for your presentation, keep this technique in mind. Pick a font that has a noticeable difference between the “bold” font face and the “regular” font face. Source Sans Pro, Times New Roman, Montserrat, Arvo, Roboto, and Open Sans are all good options.

The last thing to remember when using size, weight, and color to create emphasis on a slide: don’t try to emphasize too many things on one slide.
If everything is highlighted, nothing is highlighted.
10. Apply design choices consistently to avoid distraction
Audiences are quick to pick out, and focus on, any inconsistencies in your presentation design. As a result, messy, inconsistent slide decks lead to distracted, disengaged audiences.
Design choices (fonts and colors, especially), must be applied consistently across a slide deck. The last thing you want is for your audience to pay attention to your design choices before your content.
To keep your design in check, it can be helpful to create a color palette and type hierarchy before you start creating your deck, and outline it in a basic style guide like this one:

I know it can sometimes be tempting to fiddle around with text sizes to fit longer bits of text on a slide, but don’t do it! If the text is too long to fit on a slide, it should be split up onto multiple slides anyway.
And remember, a consistent design isn’t necessarily a boring one. This social media marketing presentation applies a bright color scheme to a variety of 3-column and 2-column layouts, remaining consistent but still using creative presentation ideas.

11. Split a group presentation by topic
When giving a group presentation it’s always difficult to find the right balance of who should present which part.
Splitting a group presentation by topic is the most natural way to give everybody the chance to attempt without it seeming disjointed.

When presenting this slide deck to investors or potential clients, the team can easily take one topic each. One person can discuss the business model slide, and somebody else can talk about the marketing strategy.
Top tips for group presentations:
- Split your group presentation by topic
- Introduce the next speaker at the end of your slide
- Become an ‘expert’ in the slide that you are presenting
- Rehearse your presentation in advance so that everybody knows their cue to start speaking
12. Use a variety of page layouts to maintain your audience’s interest
Page after page of the same layout can become repetitive and boring. Mix up the layout of your slides to keep your audience interested.
In this example, the designer has used a variety of combinations of images, text, and icons to create an interesting and varied style.

There are hundreds of different combinations of presentation layers and presentation styles that you can use to help create an engaging presentation . This style is great for when you need to present a variety of information and statistics, like if you were presenting to financial investors, or you were giving a research presentation.
Using a variety of layouts to keep an audience engaged is something that Elon Musk is an expert in. An engaged audience is a hyped audience. Check out this Elon Musk presentation revealing a new model Tesla for a masterclass on how to vary your slides in an interesting way:
13. Use presentation templates to help you get started
It can be overwhelming to build your own presentation from scratch. Fortunately, my team at Venngage has created hundreds of professional presentation templates , which make it easy to implement these design principles and ensure your audience isn’t deterred by text-heavy slides.
Using a presentation template is a quick and easy way to create professional-looking presentation skills, without any design experience. You can edit all of the text easily, as well as change the colors, fonts, or photos. Plus you can download your work in a PowerPoint or PDF Presentation format.
After your presentation, consider summarizing your presentation in an engaging manner to r each a wider audience through a LinkedIn presentation .
14. Include examples of inspiring people
People like having role models to look up to. If you want to motivate your audience, include examples of people who demonstrate the traits or achievements, or who have found success through the topic you are presenting.
15. Dedicate slides to poignant questions
While you might be tempted to fill your slides with decorative visuals and splashes of color, consider that sometimes simplicity is more effective than complexity. The simpler your slide is, the more you can focus on one thought-provoking idea.

16. Find quotes that will inspire your audience
A really good quote can stick in a person’s mind for weeks after your presentation. Ending your presentation with a quote can be a nice way to either begin or finish your presentation.
A great example of this is Tim Ferriss’ TED talk:

Check out the full talk below.
17. Emphasize key points with text and images
When you pair concise text with an image, you’re presenting the information to your audience in two simultaneous ways. This can make the information easier to remember, and more memorable.
Use your images and text on slides to reinforce what you’re saying out loud.
Doing this achieves two things:
- When the audience hears a point and simultaneously read it on the screen, it’s easier to retain.
- Audience members can photograph/ screencap the slide and share it with their networks.
Don’t believe us? See this tip in action with a presentation our Chief Marketing Officer Nadya gave recently at Unbounce’s CTA Conference . The combination of text and images on screen leads to a memorable presentation.

18. Label your slides to prompt your memory
Often, presenters will write out an entire script for their presentation and read it off a teleprompter. The problem is, that can often make your presentation seem too rehearsed and wooden.
But even if you don’t write a complete script, you can still put key phrases on your slides to prompt jog your memory. The one thing you have to be wary of is looking back at your slides too much.
A good presentation gets things moving! Check out the top qualities of awesome presentations and learn all about how to make a good presentation to help you nail that captivating delivery.
Audiences don’t want to watch presentations with slide decks jam-packed with text. Too much text only hurts audience engagement and understanding. Your presentation design is as important as your presentation style.
By summarizing our text and creating slides with a visual focus, we can give more exciting, memorable and impactful presentations.
Give it a try with one of our popular presentation templates:

Discover popular designs

Infographic maker

Brochure maker

White paper online

Newsletter creator

Flyer maker

Timeline maker

Letterhead maker

Mind map maker

Ebook maker
IEEE.org | IEEE Xplore Digital Library | IEEE Standards | IEEE Spectrum | More Sites
Committees & Communities
IEEE PES Awards & Scholarships
Every year we are proud to recognize leading engineers with distinct awards and honors and to offer scholarships to cultivate the next generation of power and energy professionals.
View All Awards >
About Membership
Membership programs, member support tools.
Become A PES Member
You’re invited to join the leading global network of +42k power and energy students and professionals.
Get Started Today
Technical Activities
Technical reports, trending technologies.
Latest Posts:
Risk-Informed Standard for Nuclear Power Plants
Virtual Power Plants
Lifetime Extension of Electric Power Equipment
Upcoming Committee Meetings
Visit our calendar for information on upcoming technical committee meetings.
Calendar of Events >
About Conferences & Meetings
Papers, participation & proposals.
Event Sponsorship & Exhibitor Opportunities
With over 30 PES global events annually, we offer many sponsorship opportunities.
Support IEEE PES >
About Publications
Journals & transactions, education overview & resources, about pes university.
Visit the Resource Center
The largest digital library dedicated to the power and energy industry, find the resource you’ve been looking for!
New! Interactive Online Courses
A new series of interactive continuing education courses for those non-engineers and adjacent professionals working in the power industry.
View All >
Guidelines for Preparing Visuals for PES Presentations
Home / Publications / PES Author’s Kit / Guidelines for Preparing Visuals for PES Presentations
(Last revised October 2018)
All Panel session presentations must be on the PES PPT template . The presenter’s company logo may be on the first and last slides only. If the presentation is not on the PES PPT template, the presenter may not speak at the session.
Well constructed visuals can make your presentation more exciting, effective and memorable. However, in order for the visuals to accomplish this, it is critical that they be properly planned and prepared or they can become a liability rather than an asset. The guidelines on these pages are designed to help you make the most of your visual presentation.
Presentation Overview
Your visual presentation should emphasize the most important points and ideas of your oral presentation. Use the visuals to reinforce, clarify, illustrate or highlight individual points. Visuals are illustrating, not repeating, your presentation. Their purpose is to add interest and emphasis, not to compete with what you are saying.
Some key points to remember when preparing your visuals:
- Simplicity is a key to gaining your audience’s attention and retaining their interest.
- Focus on one idea at a time. To include three or four ideas in a single visual usually detracts from your presentation and is apt to confuse your audience.
- Do not repeat the text of your presentation word-for-word on the visual.
- Keep statements simple and to the point, using key words and phrases.
- Use only essential information which supports your statements; for example, do not project all the statistics you are using. Pick only the key ones.
- Experiment with a variety of layouts to determine the most effective ones. Remember that people retain information best through a picture or a chart rather than words.
- Consider audience size. Visuals must be prepared properly so that they are clear to even those at the back of a large room.
- Consider handing out copies of your visual presentation. Be sure to have sufficient quantity available for your audience.
General Guidelines
- Keep it simple . It is easier for the audience if you use three simple visuals than a single complex one.
- Keep your audience in mind when designing your visual aids. What terminology will they understand? What examples have meaning for them?
- Proofread very carefully . Try to have someone else proof in addition to yourself. It is hard to overlook errors when they are magnified in front of an audience. Remember, even a small error in such a focal part of your program can undermine the credibility of your entire presentation.
- Fonts should be clear and easy to read . Use Helvetica or similar sans serif fonts. Decorative fonts are not recommended. Use only one typeface per visual. Add variety by using different sizes and bolding title lines.
- Colored fonts should have a dark background (dark blue is best) with primary titles in either yellow or white and secondary titles in the remaining color. Details should be shown in clear bright, light contrasting colors. Use no more than three colors per visual.
- Avoid using shades of the background color for titles or details .
- Avoid commercial endorsements . A photograph of apparatus which incidentally includes a trade name is allowed, but a table comparing attributes of identified vendor’s products will not be allowed. There is much gray area in between these two examples; discuss any concerns you may have with your session chair. The display of the logo of the company with which you are associated is restricted for use to the first and last PowerPoint slides or visuals (usually the title slide). This restriction applies to logos of educational institutions as well.
- Test your presentation ahead of time . Make sure it is easy to read from an appropriate distance, and that everything is in the proper order.
Text Pointers
The text (or word) portion of presentations is used to state facts or objectives. When lines of text alone do not illustrate your point, a chart, graph or graphic might be more appropriate.
- Avoid using more than six or seven words (30–40 characters) per line, six or seven lines per visual. Make sure type is well spaced and not crowded.
- Eliminate words that do not add meaning, for example: the, an, etc.
- Avoid complete sentences. Use bulleted phrases.
- Be consistent in grammatical construction of lists; for example, use all verbs or use all noun phrases.
- Use 36 point type for all titles, and for the text of visual aids to be used in very large rooms.
- Use at least 18 point type for the main text in other than the largest rooms.
- Use bullets at beginning of lines to separate ideas.
- Use functions in PowerPoint that allow you to build information, bullet by bullet, on a slide, to keep the audience from reading ahead.
Title Pages
Use title pages to introduce new topics or add special emphasis to a very important point. The best titles are a few simple lines in large type.
Graphs, Charts and Diagrams
Tabular charts.
Tabular charts are used to show raw data and numerical relationships. Use only a few key examples on the visual to illustrate your point.
Bar graphs are used to show absolute data or relationships and comparisons. Be sure to include scales and values. Be sure the type is legible.
Pie charts are good for illustrating percentage relationships or parts of a whole. No more than eight segments are recommended.
Line Graphs
Line graphs are ideal for illustrating trends or performance over time. Your scale should include significant dates and milestones. Graphs should include no more than three lines. In black and white visuals, the lines should be distinctly different, e.g., dashed, solid, dots, etc. In color visuals, the lines should be easily differentiated colors which contrast well with the background.
Block or Process Diagrams
Block or process diagrams are good for illustrating structural relationships and designs. Graphics of this type show how each piece contributes to the whole. Avoid overcrowding. Limit your chart to no more than 10 simple geometric shapes and titles connected by lines and arrows.
One-Line Diagrams
PES papers often contain electrical one-line diagrams which are an integral part of a technical discussion. You should limit applying these to needed segments of a system to make them legible to the audience.
Photographs
Good quality photographic visuals can make a major contribution to your presentation. Be extra careful with photographs: they must be very crisp and clear, with high contrast between light and dark areas. Do not superimpose text over the image. If text is needed on the visual, it should be placed in areas that have been cleared of the image. Be sure to test your photos, projecting them to the size they will be when used to ensure that they are clear and easily recognizable.
Author’s Kit
The author’s kit is available to offer guidelines for the submission for all technical work for review.
LEARN MORE
Advertise In IEEE Magazines
Editorial and digital ad opportunities are available in our leading IEEE magazines.
Open Calls For Transactions
IEEE PES Transactions distribute the latest findings to researchers, engineers, and educators in the power and energy field.
© Copyright 2024 IEEE — All rights reserved. A not-for-profit organization, IEEE is the world’s largest technical professional organization dedicated to advancing technology for the benefit of humanity.
COMMENTS
9. Add fun with visual quizzes and polls. To break the monotony and see if your audience is still with you, throw in some quick image quizzes or polls. It's like a mini-game break in your presentation — your audience gets involved and it makes your presentation way more dynamic and memorable. 10. Use visuals wisely.
Rule 2: Spend only 1 minute per slide. When you present your slide in the talk, it should take 1 minute or less to discuss. This rule is really helpful for planning purposes—a 20-minute presentation should have somewhere around 20 slides. Also, frequently giving your audience new information to feast on helps keep them engaged.
When in doubt, adhere to the principle of simplicity, and aim for a clean and uncluttered layout with plenty of white space around text and images. Think phrases and bullets, not sentences. As an ...
The best way to make sure the attention stays on you is to limit word count to no more than 10 words per slide. As presentation expert Nancy Duarte says "any slide with more than 10 words is a document.". If you really do need a longer explanation of something, handouts or follow-up emails are the way to go.
Exercise 2. In this exercise, you will begin to develop visual aids for your presentation. Complete the steps in this exercise—and enjoy the chance to be creative. Working with visuals can be a pleasant way to take a break from the demands of writing. Revisit the ideas you developed in Note 14.24 "Exercise 1".
Apple® founder Steve Jobs was known widely for his great presentations. His unveiling of the iPhone® in 2007 is considered to have been one of his best presentations ever, and, if you were one of the millions who watched it online, you'll know why. The presentation was engaging, and passionate. Jobs was particularly well known for building his presentations around powerful visual aids.
These tips can be useful because they can be applied to all your presentations in general. Step 1 is to ask yourself who your audience is and how to convey the key message you have in mind to them. Once you settle on your message, you can start designing your slides with that direction in mind. You may wonder how to connect with an audience ...
Use the rule of thirds: split the screen into a 3x3 grid of 3 equally spaced rows and 3 equally spaced columns, then place important elements at 1 or more of the intersecting points. Group content to create meaning and connection (e.g. explanatory text near related visuals) Establish a visual hierarchy to let viewers know where to look.
PowerPoint Presentation Guidelines • Highlight key points or reinforce what the facilitator ... include only key words and phases for visual, reinforcement • In order for your presentation to fit on most screens, text and images should be placed within 95% of the PowerPoint slide. This "action safe" area is seen in the next slide ...
Get started with TED Masterclass. When preparing for your presentation, there are 5 steps to keep in mind when preparing for your presentation. These include: choosing the right software for your needs, organizing your files, preparing your presentation materials, practice, and make sure to do a final test run.
Apply the 10-20-30 rule. Apply the 10-20-30 presentation rule and keep it short, sweet and impactful! Stick to ten slides, deliver your presentation within 20 minutes and use a 30-point font to ensure clarity and focus. Less is more, and your audience will thank you for it! 9. Implement the 5-5-5 rule. Simplicity is key.
In his book providing detailed presentation design guidelines based on a similar set of cognitive psychology principles as Mayer, Stephen Kosslyn identifies seven high-level principles, one of which is the Principle of Salience: "Attention is drawn to large perceptible differences" (7). ... the visual cues within your presentation play an ...
Effective presentations require that you put a good deal of thought into how your audience will react to every component of your presentation. While an engaging personality or an intriguing subject matter will help, you can make any topic work well if you follow several key guidelines, divided into nine areas:
Visual information is easier to remember. Research studies have shown that visual information will be retained more than six times better if visuals are attached to it. If you actually want people to remember your presentation you must do two things: tell stories and use pictures. If you simply regurgitate information and make it very text ...
Rule 2: Spend only 1 minute per slide. When you present your slide in the talk, it should take 1 minute or less to discuss. This rule is really helpful for planning purposes—a 20-minute presentation should have somewhere around 20 slides. Also, frequently giving your audience new information to feast on helps keep them engaged.
Developing Effective Visuals. Garr Reynolds' book Presentation Zen is a great introduction to effective use of slides in presentations. Garr also maintains a great blog on presentations.Some key points from Presentation Zen: Keep it simple. Your slides should complement your verbal message, not detract from it by unnecessary visual clutter.
Here are a few tips for business professionals who want to move from being good speakers to great ones: be concise (the fewer words, the better); never use bullet points (photos and images paired ...
Visual Presentation (Level AAA) Success Criterion (SC) For the visual presentation of blocks of text, a mechanism is available to achieve the following: Foreground and background colors can be selected by the user. Width is no more than 80 characters or glyphs (40 if CJK). Text is not justified (aligned to both the left and the right margins).
Criteria for Professional Presentations. Appropriate font sizes for presentations Effective presentation skills. Titles - 32 point minimum. Text in bulleted lists - 20 point minimum. Appropriate colors for visibility. High contrast for rooms with ambient light. Best is dark background with light letters. Light background with dark letters OK.
Emphasize key points with text and images. Label your slides to prompt your memory. 1. Include less text and more visuals in your presentation design. According to David Paradi's annual presentation survey, the 3 things that annoy audiences most about presentations are: Speakers reading their slides.
Avoid using more than six or seven words (30-40 characters) per line, six or seven lines per visual. Make sure type is well spaced and not crowded. Eliminate words that do not add meaning, for example: the, an, etc. Avoid complete sentences. Use bulleted phrases.
presentation. Stills and video footage are mostly not in focus and poorly composed. The movement of the camera is distracting. _____/3 Creativity For the most part, The visual and audio content of the video are creatively used to effectively express the purpose, findings and conclusions of the study. the visual and audio content of the
SAMPLE ORAL PRESENTATION MARKING CRITERIA. 1. INFORMAL PEER FEEDBACK ON ORAL PRESENTATION. Give feedback on each presentation using the following table NAME OF PRESENTER 1- NOT WELL ACHIEVED 2 3 4- VERY WELL ACHIEVED COMMENTS Delivery Clearly presented Organised and easy to follow Engaged with the audience Obvious enthusiasm for topic Visual ...